BMW AG Motorcycle (K1100LT, K1100RS). Manual - part 26
 

  Index      Manuals     BMW AG Motorcycle (K1100LT, K1100RS). Repair Manual


Search            


Content   ..  24  25  26  27   ..


BMW AG Motorcycle (K1100LT, K1100RS). Manual - part 26


31.9

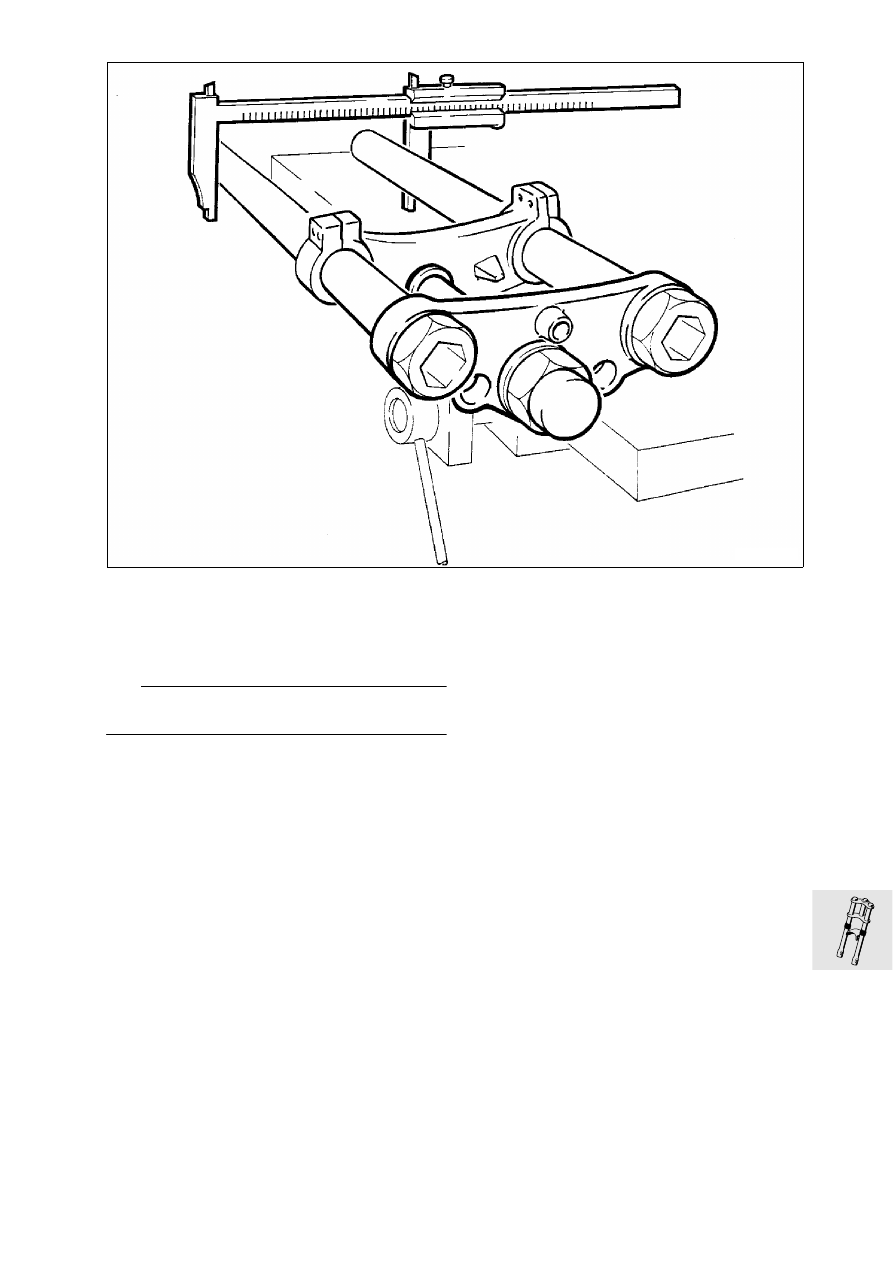
Checking parallel alignment of fixed tubes

•

Clamp fork bridge at steering tube in vice with 
jaw guards.

•

Install upper fork bridge.

L

 Note:

Fork bridge must slide smoothly on to fixed tubes.

•

Check parallel alignment of fixed tubes using 
slide gauge.

•

Check flush alignment of steering tube with re-
spect to fixed tube.

LT310090

31.10

Checking runout of fixed tube

•

Place both ends of stanchion in V-blocks.

•

Slowly turn fixed tube while checking dial gauge.

e

 Caution:

Distorted fixed tubes must not be straightened out!

Permissible runout .................. 0.15 mm (0.0059 in)

LT310100

31.11

Disassembling telescopic fork

Removing fixed tube

•

Loosen clamping screws at lower fork bridge.

•

Remove fixed tube with slider tube from fork 
bridge.

•

Drain oil.

•

Clamp slider tube at mounting for brake caliper in 
vice with jaw guards.

•

Release bottom screw fitting and pull out fixed 
tube.

Disassembling slider tube

•

Clamp slider tube at mounting for brake caliper 
vertically in vice with jaw guards.

•

Using a blunt knife, lever out dust sleeve (1) from 
the outside.

•

Using a small screwdriver, lever out retaining ring 
(2) for sealing ring.

•

Fit support ring (3), BMW No. 31 3 610, on slider 
tube.

•

Lever out shaft sealing ring (4) using a slightly 
rounded off screwdriver.

•

Remove steel ring (5).

•

Using both index fingers, remove plain bush (6) 
from slider tube.

•

Check plain bush for damage/wear; replace if 
necessary.

31 3 610

LT310110

1

4

2

5

6

4

3

LT310120

31.12

Disassembling fixed tube

•

Loosen screw plug (1) in fixed tube.

•

Screw base screw fitting (arrow) loosely into 
damper cartridge.

•

Lightly press damper cartridge into fixed tube 
using clamping fixture,  BMW  No.  31 5 550, and 
clamping insert, BMW No. 31 5 553. 

•

With the aid of a screwdriver, push apart retain-
ers (2) on the piston rod.

•

Remove perforated disc (3) and spacer (4).

•

Remove damper cartridge (5) with support spring 
(6) and guide sleeve (7).

LT310130

5

6

7

8

4

3

2

1

31 5 550

LT310140

LT310150

4

3

2

31.13

•

Press apart plain bush (8) on the fixed tube 
(arrows) and remove.

•

Slightly preform new plain bush in order to 
achieve an optimum fit on the fixed tube.

LT310160

LT310170

31.14

Assembling telescopic fork

Assembling fixed tube

•

Fit fork support spring (6) on damper cartridge 
(5), small winding spacing at top.

•

Fit guide sleeve (7).

•

Carefully clamp fixed tube (8) in vice with jaw 
guards.

•

Slide complete damper cartridge into the fixed 
tube.

•

Loosely screw base screw fitting (arrow) into 
damper cartridge.

•

With the aid of clamping fixture, 
BMW No. 31 5 550, and clamping insert, 
BMW No. 31 5 553, lightly press damper car-
tridge into fixed tube.

LT310130

5

6

7

8

4

3

2

1

31 5 550

LT310140

31.15

•

Fit spacer sleeve (4).

•

Fit perforated disc (3), smooth side facing down-
ward.

•

Fit retainers (2) and relieve clamping fixture.

•

Screw in screw plug, renew seal if necessary.

X 

Tightening torque:

Base screw fitting......................................... 20 Nm

LT310150

4

3

2

31.16

Assembling slider tube

•

Install damper cartridge with hole pattern “Z” 
(tension stage) in the right-hand slider tube.

•

Install plain bush (1) lubricated with fork oil.

•

Slide fixed tube into slider tube.

•

Screw together fixed tube and slider tube, if nec-
essary use new sealing ring.

X 

Tightening torques:

Base screw fitting......................................... 47 Nm

•

Fit steel ring (2) in slider tube.

•

Lightly oil radial sealing ring (3) with fork oil and 
slide from above over the fixed tube.

•

Fit drift, BMW No. 31 3 620, on to fixed tube and 
release.

L


Note:

Prior to assembly, lightly coat radial sealing ring with 
tyre fitting paste.
Installation location: Large groove at bottom, label-
ling facing up.

•

Fit retaining ring (4) in groove above the sealing 
ring.

•

Fit dust gaiter (5) also with drift, 
BMW No. 31 3 650, dished side.

L

 Note:

Pack grease pocket in the dust gaiter with, for ex-
ample, SHELL Retinax A or Gleitmo 805.

Oil capacity:
Oil change:

left

..................0,35 - 0,01 l (0.616 - 0.0176 Imp. pt)

right

...............0,40 - 0,01 l (0.704 - 0.0176 Imp. pt)

New filling:
left, right.........0,40 - 0,01 l (0.704 - 0.0176 Imp. pt)

X 

Tightening torque:

Oil filler plug ................................................. 10 Nm

LT310210

5

Z

4

3

2

1

TOP

7

6

31 3 620

LT310220


Content   ..  24  25  26  27   ..