Dacia SuperNova (engine E7J). Manual - part 90
UPPER SIDE STRUCTURE
43
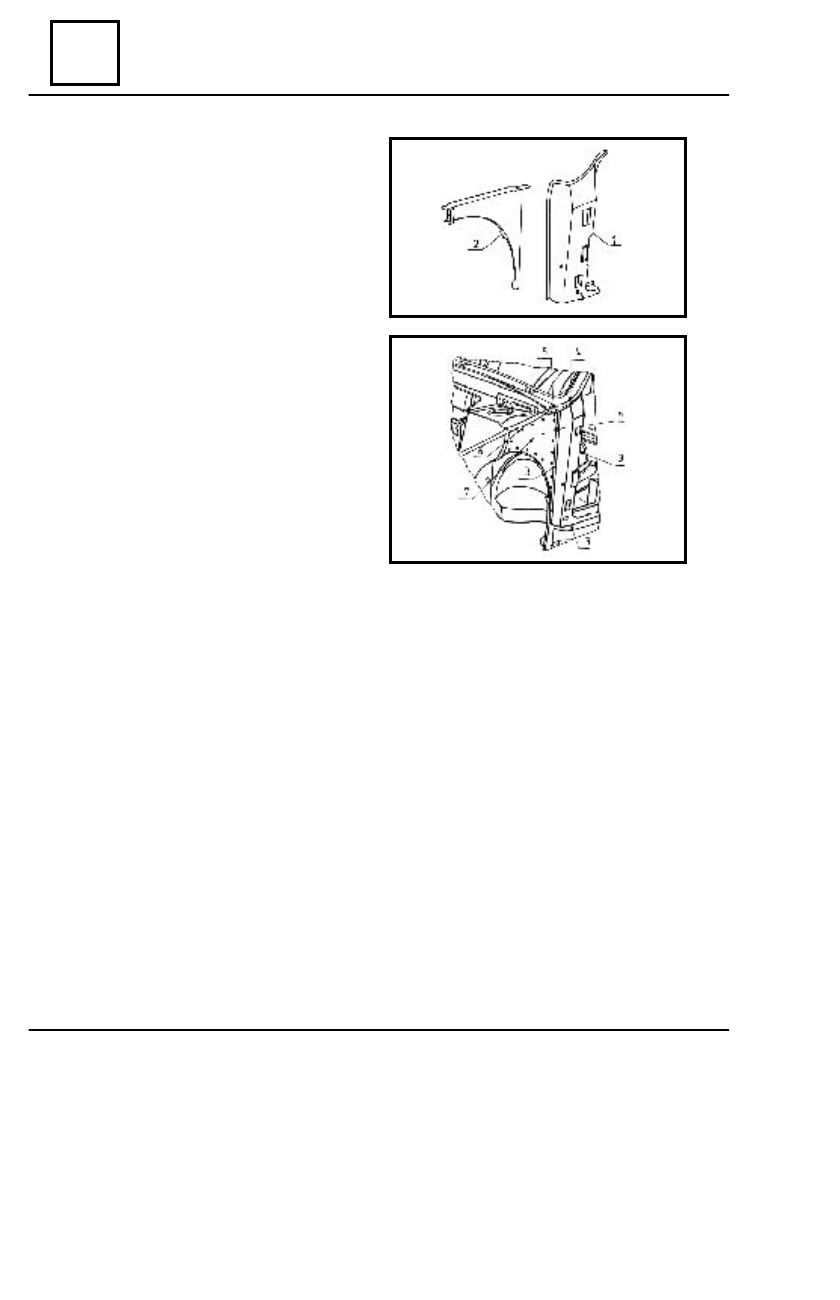
DISMOUNTING
Dismount the elements that are in contact with
the front pillar.
Detach the welding points of the front pillar
(1) which are in connection with :
- side frame lining in the area (3) ;
- roof in the area (4).
Straighten the areas resulted by dismounting.
Grind the areas resulted by dismounting.
REMOUNTING
Position and center the new element.
Check the correct positioning of the front pil-
lar.
Weld the front pillar (1) following the
assembling outlines (3) and (4) .
Protect the new element with a corrosion
preventing and noise absorbent product.
FRONT PILLAR
43 - 2