Isuzu Amigo / Axiom / Trooper / Rodeo / VehiCross. Manual - part 498


  Index      Isuzu     Isuzu Amigo / Axiom / Trooper / Rodeo / VehiCross - service repair manual 1999-2002 year


Search            


Content   ..  496  497  498  499   ..


Isuzu Amigo / Axiom / Trooper / Rodeo / VehiCross. Manual - part 498


EXTERIOR/INTERIOR TRIM

8J–11

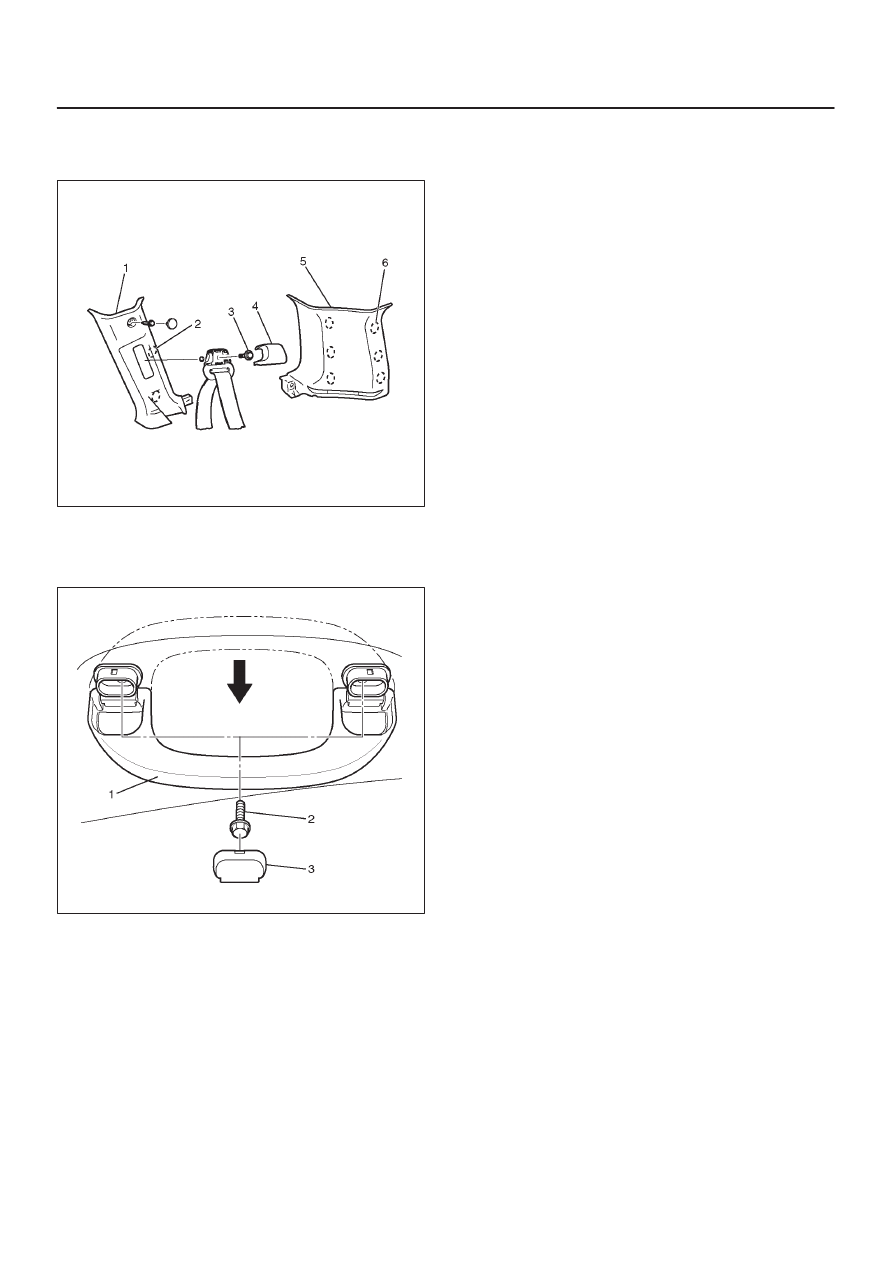
15. Remove the upper rear pillar trim cover (5).

D

Pull the trim cover at the six clip positions (6) from
the body panel.

643R200007

16. Remove the assist grip (1) (Front & Rear).

D

Pull the assist grip downword.

D

Remove the caps and fixing bolts.

743R200001

Installation

To install, follow the removal steps in the reverse order,
noting the following point:

1. Tighten the seat belt anchor bolt to the specified

torque.

Torque: 39 N·m (29 lb ft)

8J–12

EXTERIOR/INTERIOR TRIM

Headlining

Parts Location

666R200001

Legend

(1) Interior Trim Panels
(2) Headlining (Without Sunroof)
(3) Clip
(4) Luggage Room Light
(5) Assist Grip
(6) Headlinng (With Sun Roof)

(7) Sunroof Finisher (With Sunroof)
(8) Overhead Console/Sunroof Switch (With

Sunroof)

(9) Dome Light

(10) Overhead Console (Without Sunroof)

(11) Sunvisors

(12) Sunvisor Holder

Removal

1. Disconnect the battery ground cable.
2. Remove the interior trim panels.

D

Refer to 

Interior Trim Panels in this section.

3. Remove the dome light.

D

Remove the dome light lens and the fixing screws.

D

Disconnect the dome light connectors.

EXTERIOR/INTERIOR TRIM

8J–13

4. Remove the luggage room light.

D

Remove the luggage room light lens (1) and the
fixing screw.

D

Disconnect the luggage room light connector.

825R200030

5. Remove the overhead console/sunroof switch (With

sunroof).

D

Refer to 

Overhead Console in this section.

6. Remove the overhead console (without sunroof).
7. Remove the sunvisors.

D

Remove the fixing screws and pull out the sunvisor
holder (1) to remove it.

D

Disconnect the vanity mirror illumination connector.

743R200003

8. Remove the sunroof finisher (With sunroof).
9. Remove the headlining.

D

Remove the four headlining fixing clips.

Installation

To install, follow the removal steps in the reverse order,
noting the following points.

1. Install the headlining so that the fixing clips will not

come off.

2. To install the sunroof finisher (1), first fit it in at one

place with the headlining (3) close to the sunroof
frame (2), then install the entire finisher tightly by
hitting it with a plastic hammer, not allowing it to move
up.

665RW003

8J–14

EXTERIOR/INTERIOR TRIM

Overhead Console

Parts Location (W/O Sunroof)

743R200005

Legend

(1) Overhead Console Bracket
(2) Harness Connector
(3) Head Lining

(4) Room Mirror
(5) Overhead Console Assembly
(6) Front Door Finisher
(7) Front Assist Grip

Removal

1. Disconnect the battery ground cable.
2. Remove the overhead console assembly.

D

Open the lid and remove the two screws.

D

Disconnect the harness connector.

3. Remove the sunvisor and sunvisor holder. (right and

left)

4. Remove the front assist grip. (right and left)
5. Remove the front piller trim cover.

6. Remove the front door finisher.

D

Remove the upper side of door finisher.

7. Remove the interior  mirror.

D

Refer to 

Interior Mirror in this section.

8. Remove the overhead console bracket.

D

Remove the two screws.

Installation

To install, follow the removal steps in the reverse order.


Content   ..  496  497  498  499   ..