Infiniti QX56 (JA60). Manual - part 836
FRONT SEAT
SE-69
< DISASSEMBLY AND ASSEMBLY >
C
D
E
F
G
H
I
K
L
M
A
B
SE
N
O
P
Disassembly and Assembly
INFOID:0000000005256345
SEATBACK TRIM AND PAD
Disassembly
CAUTION:
• Only complete seatback assemblies can be replaced on vehicles equipped with side air bags.
• When removing or installing the seat trim, handle it carefully to keep dirt out and avoid damage.
1. Remove the seatback assembly. Refer to
SE-51, "Removal and Installation"
.
2. Remove the headrest.
3. From inside of the seatback, squeeze the headrest holder tabs
at the base of the stay pipe and pull the up to remove.
NOTE:
Before installing the headrest holder, check its orientation (front/
rear and right/left).
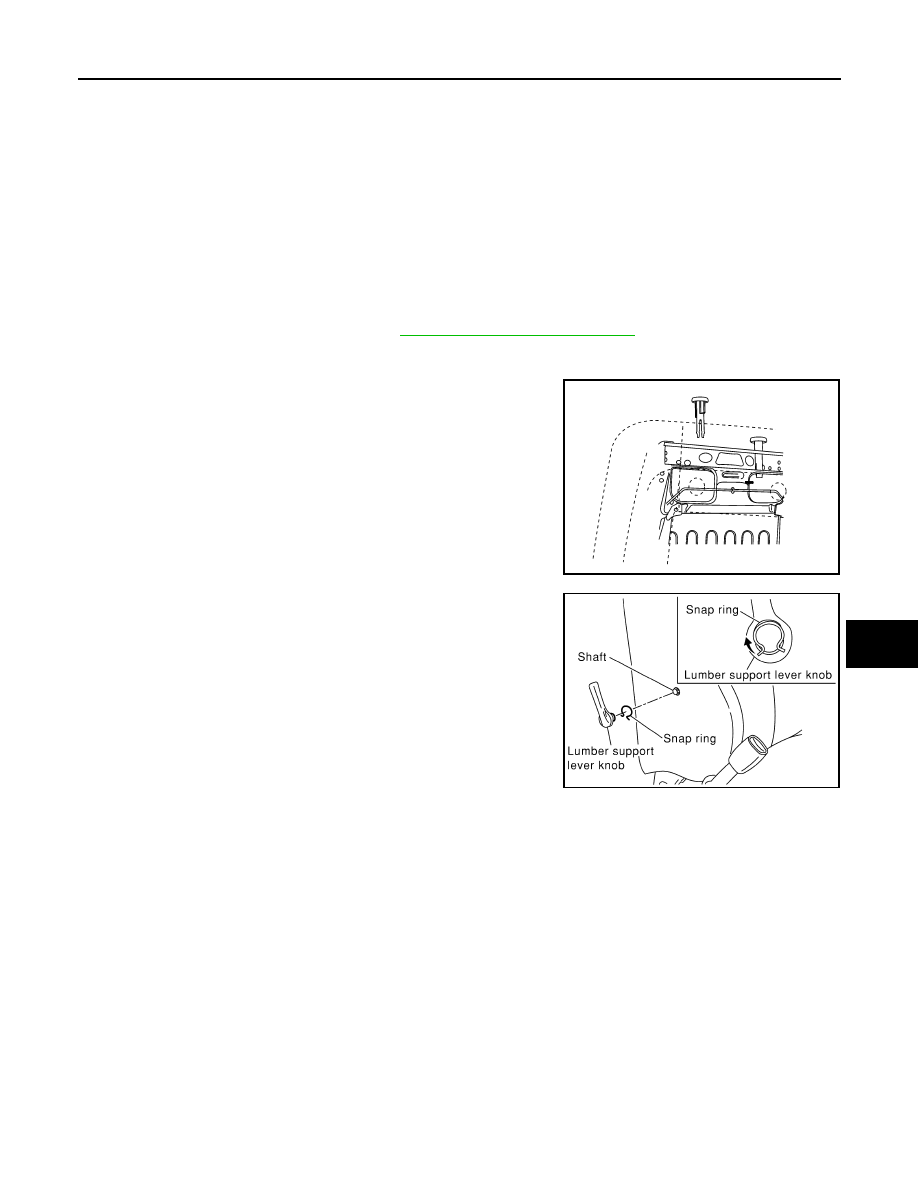
4. Remove the snap ring and the lumbar support lever knob (if
equipped).
5. Remove the seatback trim and pad assembly.
6. Remove the hog rings to separate the seatback trim from the pad.
Assembly
Assembly is in the reverse order of disassembly.
SEAT CUSHION TRIM AND PAD
Disassembly
CAUTION:
• Front passenger seat is equipped with an Occupant Classification System sensor and control mod-
ule. Do not disassemble front passenger seat cushion assembly or remove the trim as this will affect
the Occupant Classification System calibration.
• Always replace passenger seat cushion as an assembly.
• When removed, the passenger seat cushion must always be placed pan side UP to prevent damage.
• During installation, the wire harness clips must be reinstalled in the holes they were originally in. Do
not add additional clips.
• The Occupant Classification System control module can only be replaced as part of the seat cushion
assembly.
19. Outer pedestal finisher
20. Seat cushion outer finisher
21. Seat cushion assembly
22. Power seat switch escutcheon
23. Slide switch knob
24. Recliner switch knob
25. Seatback assembly
26. Headrest holder
27. Seat slide/ recline switch
28. Power lumbar switch
LRS023
PIIA1156E