Infiniti M35/M45 Y50. Manual - part 836


  Index      Infiniti     Infiniti M35/M45 Y50 - service repair manual 2007 year


Search            copyright infringement  


Content   ..  834  835  836  837   ..


Infiniti M35/M45 Y50. Manual - part 836


INSTRUMENT PANEL ASSEMBLY

IP-13

C

D

E

F

G

H

J

K

L

M

A

B

IP

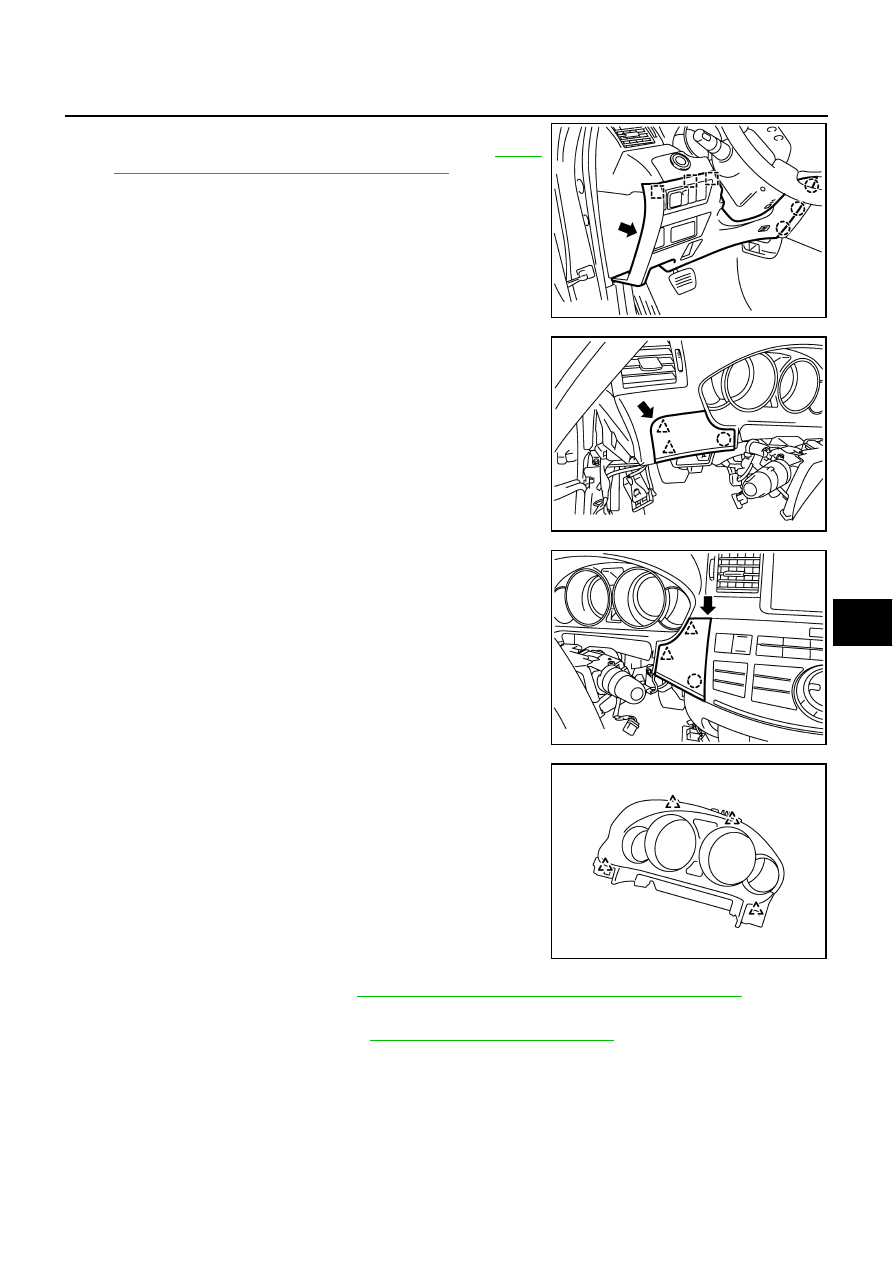
13. Remove instrument driver lower panel.

Remove hood opener mounting bolt. Refer to 

BL-18,

"Removal and Installation of Hood Lock Control"

 .

Pull back.

Disconnect harness connector.

14. Remove instrument finisher A.

Insert a remover into upper space.

15. Remove instrument finisher C.

Insert a remover into upper space

16. Remove cluster lid A

Pull back.

17. Remove combination meter. Refer to 

DI-27, "Removal and Installation of Combination Meter"

 .

18. Remove steering column cover with power tool.

19. Remove upper ventilator grille.Refer to 

ATC-143, "DUCTS AND GRILLES"

 .

PIIB4112E

PIIB4113E

PIIB4114E

PIIB6503E

IP-14

INSTRUMENT PANEL ASSEMBLY

20. Remove center ventilator grille.

Insert a remover into rear lower space.

Pull up.

21. Remove multifunction switch. Refer to 

AV-284, "Multifunction Switch"

 .

22. Remove front display unit. Refer to 

AV-283, "Front Display Unit"

 .

23. Remove audio assembly. Refer to 

AV-277, "Audio Unit"

 .

24. Remove NAVI C/U. Refer to 

AV-282, "AV (NAVI) Control Unit"

 .

25. Remove side ventilator grille (RH/LH).

Insert a remover into lower space.

Pull back.

26. Remove front defroster grille.

Insert a remover into back space.

Disconnect harness connector.

27. Remove instrument panel & pad.

Remove front passenger air bag module mounting bolt and disconnect harness connector. Refer to

SRS-46, "FRONT PASSENGER AIR BAG MODULE"

 .

Remove front pillar garnish. Refer to 

EI-38, "FRONT PILLAR GARNISH"

 .

INSTALLATION

Install in the reverse order of removal.

CAUTION:

To install, confirm locating pins on back of instrument panel are completely inserted into holes on
vehicle. 

Do not leave harness stuck when installing. 

PIIB4121E

PIIB4123E

PIIB4122E

INSTRUMENT PANEL ASSEMBLY

IP-15

C

D

E

F

G

H

J

K

L

M

A

B

IP

Removal and Installation of Cluster Lid A

NIS0025E

When removing cluster lid A assembly, take steps in the illustration shown by the number below.

 :Pawl

 :Clip

 :Metal clip

REMOVAL

1.

Remove instrument side finisher.

Insert a remover into lower space.

2.

Remove instrument driver lower panel.

Remove hood opener mounting bolt. Refer to 

BL-18,

"Removal and Installation of Hood Lock Control"

 .

Pull back.

Disconnect harness connector.

1.

Instrument side finisher (LH)

2.

Instrument driver lower panel

3.

Instrument finisher A

4.

Instrument finisher C

5.

Cluster lid A

PIIB3111E

PIIB4111E

PIIB4112E

IP-16

INSTRUMENT PANEL ASSEMBLY

3.

Remove instrument finisher A.

Insert a remover into upper space.

4.

Remove instrument finisher C.

Insert a remover into upper space.

5.

Remove cluster lid A.

Pull back.

INSTALLATION

Install in the reverse order of removal.

PIIB4113E

PIIB4114E

PIIB6503E


Content   ..  834  835  836  837   ..