Great Wall Hover. Manual - part 36


  Index      Great Wall     Great Wall Hover - service repair manual


Search            copyright infringement  


Content   ..  34  35  36  37   ..


Great Wall Hover. Manual - part 36


e. If need to install the new friction disk, please remove the clutch assembly and immerse the friction assembly into the

transmission fluid for 5 minutes at least before the installation.

f. Check whether the clutch C1 wheel axle is matched with the overspeed shaft. It should replace the wheel axle and wheel axle

assembly if loose.

g. Coat the small nylon thrust insulation plate with the Vaseline and installs it on the overspeed shaft. Refer to Figure 8.19.

h. It should be carefully when install the overspeed shaft on the C1 cylinder to avoid the damage of sealing ring.

i.

Use the Vaseline to install the small copper C1 wheel axle thrust washer, shown as Figure 8.19.

j.

Check the input shaft for problem. Install the input shaft on the cylinder and use the ring spring to install the wire safety of

input shaft and cylinder. Ensure the coil is in groove completely.

k. Use the petroleum jelly to install the gasket and place it on the input shaft.

l.

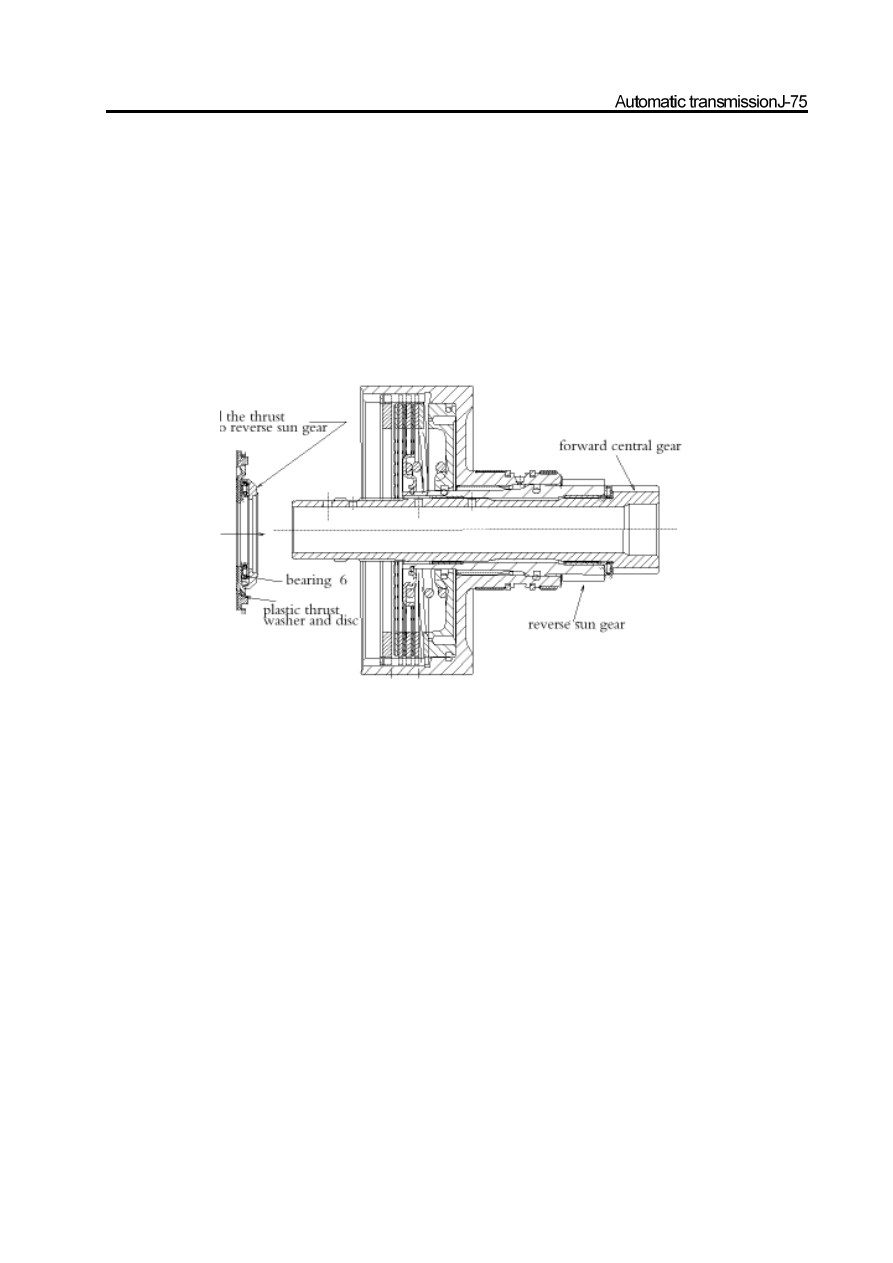
Assemble the C1/C2/C4 clutch, clutch C3 and sun gear,  shown as figure 8.24, 8.32

m.  Install the assembly in the transmission case.

Figure 8.32  and 8.33 assembly number:   6  bearing and  pressure disc to clutch C3  assembly

13. Pump housing and torque support

Caution:

a.   Do not clean the solenoid valve by solvent.

b.   Ensure the O-ring is installed in the correct position.

c.   Do not blow off the first drop and mix it with the ball spring blowed off by the torque converter. ( only for the condition of
      installing the transmission to STD pump housing)

d.   Do not damage the line bearing on the assembly; avoid any impact for bearing during the loading.

e.   Check the end floating of transmission; it is help for the lose and incorrect assembly of any assembly.

Caution:   Figure 8.35 The orientation of crossing part is shown in Figure 8.36 to 8.42.

The assembly procedure of pump housing and torque converter is as follows:

a. Check the pump for damage, chip and abnormity; check whether the sleeve of drive gear is fixed.

b. Wash the pump and pump gear carefully; remove all redundant oil and dirt.

c. Install the pump gear and pump. Use the micrometer to measure the depth from the surface of pump to gear surface. The

measured value is the side clearance of pump. The side clearance should be in the range of 0.020-0.040mm.

d. Remove the pump gear from the pump.

e.   If had been removed, please replace the pump sealing. Ensure the cleanness of pump sealing.

f. Use the transmission liquid to lubricate the pump gear, pump, washer and sealing and install the pump gear on the pump.

Figure 8.34   pump, cover and torque converter support

g. Use the automatic transmission liquid to lubricate the pump O-ring and

install it on the pump. Place the pump on the other side.

h.   Ensure the pump housing cavity and hole are not blocked.

Figure 8.35  Assembly of pump cover

i.

Use the automatic transmission liquid to lubricate all loose part before

the installation.

g. Install the primary regulating valve on the pump housing, ensure the

valve slide freely; then install the plug of regulating valve and O-ring.

Refer to Figure 8.36.

k. Install the fixed bolt, install the torque conversion clutch regulating valve,

plug and O-ring. Refer to Figure 8.37

l.

Install the fixed bolt. Refer to Figure 8.39

m. Install the torque conversion clutch control valve, spring and O-ring.

Refer to Figure 8.38

pump cover assembly

pump housing cover

oil seal

pump assembly

o-ring  (pump )

n. Install the fixed bolt, shown as Figure 8.39

o. Install the torque converter detection ball spool and spring, shown as Figure 8.41

p.   Install the washer on the pump body. Install the housing disc and solenoid wire maintaining cover on the pump housing; ensure

the edge of disc close to the pump housing.

Shown as Figure 8.34, Tighten the bolt according to the sequence of (1-5), shown as Figure 8.42.

Caution:

Check the smooth of wire and connector. To ensure whether the wire and connector have  connection and abrasion on the

input shaft or clutch C1/ C2 cylinder; check the wire and connector for over extension.

q. Tighten the screw of solenoid valve 7.Refer to Figure 8.39

 r.    Install the pump on the pump housing, tighten all bolts; ensure the pump can be washed without pump housing. Tighten

          the bolt in certain sequence; shown as figure 8.42.

Figure 8.36   Primary regulating valve

Figure 8.37  Torque converter clutch regulating valve

s. Install the pump on the washer of transfer case of housing.

t. Make the O-ring is proper for the external diameter of pump.

u.  Ensure the pump housing hole in main housing is clean and without dirt.

v. Ensure the plastic connector of solenoid valve 7 is installed on the correct position of main housing.

w. Install the pump and pump housing on the input shaft carefully and avoid the damage of gasket spring. Tighten the pump

housing spring. Refer to Figure 8.43   Figure 8.44.

x.   Check whether the transmission end float is fixed in the clearance of part 9.2. Refer to   It the end float without filling metal plate

is more than that in instruction, then the metal plate should be placed in surface of NO.4 bolt and input shaft bolt. Refer to

Figure 8.19. if the end float is less than 0.5mm or more than 0.8mm; then the transmission can not be installed correctly and

is beyond the specification partly.

Check the end floating by executing the following procedure:

Connect the disc indicator to the front end of the transmission; place the pointer on the end of input shaft.

Apply about 250N or 25kg force on the input shaft.

Zero the indicating pointer.

Install a small lever on rear of the front clutch cylinder.

The recorded measuring value is the end floating value or called as the clearance of No.4 bearing on torque converter

tube support.

After the completion of the process, adjust the front and rear brake belt according to the specification of details in part 8.4.

Figure 8.39  Valve fixing plug and pin

Figure 8.40  Torque converter release ball and spring


Content   ..  34  35  36  37   ..