Dodge Durango (HB). Manual - part 188


  Index      Dodge     Dodge Durango (HB) - service repair manual 2005 year


Search            


Content   ..  186  187  188  189   ..


Dodge Durango (HB). Manual - part 188


4. Install and tighten mounting fasteners.

5. Install instrument panel defroster grille (Refer to 23

-

BODY/INSTRUMENT

PANEL/DEFROSTER

GRILLE - INSTALLATION).

6. Install passenger airbag (Refer to 8 - ELECTRI-

CAL/RESTRAINTS/PASSENGER

AIRBAG

-

INSTALLATION).

7. Connect battery negative cable.
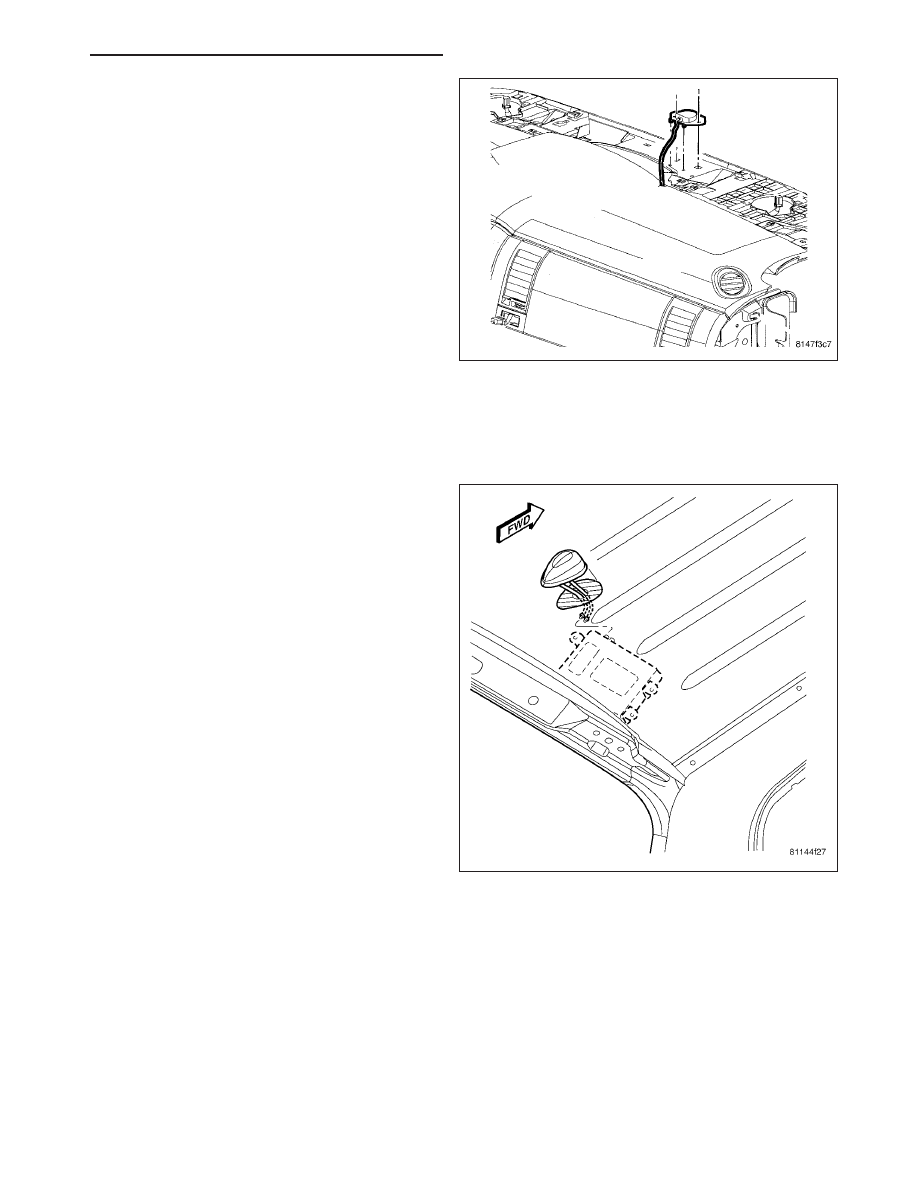
ANTENNA-SATELLITE

DESCRIPTION

The satellite radio antenna is secured by a threaded
fastener and two retainers which protrude through a
hole in the roof panel. Two wires from the antenna are
connected to the satellite receiver module located
above the headliner.

OPERATION

The satellite radio antenna receives signals from orbiting satellites and sends these signals to the satellite receiver
module. The satellite radio antenna must have open space in which to operate. Items carried on the roof, parking
inside etc. can have an effect on the antenna’s ability to receive signals.

HB

AUDIO/VIDEO - SERVICE INFORMATION

8A - 193

REMOVAL

1. Disconnect and isolate the battery negative cable.

2. Lower the rear portion of the headliner as neces-

sary to access underside of antenna (1) (Refer to
23 - BODY/INTERIOR/HEADLINER - REMOVAL).

3. Disconnect the wire harness connectors from the

antenna.

4. Remove fastener and retainer.

5. From inside the vehicle, and using a flat bladed

tool, depress one of the retaining tabs on the
antenna. Push up the one side of the antenna con-
nector through the roof panel. Depress the other
side of the connector and remove the antenna.

8A - 194

AUDIO/VIDEO - SERVICE INFORMATION

HB

INSTALLATION

1. Insert wire harness through hole in roof panel.

Press antenna into position until both retainers
snap into place.

2. Connect wire harness connectors to antenna.

3. Install and tighten retaining fastener.

4. Install headliner (Refer to 23 - BODY/INTERIOR/

HEADLINER - INSTALLATION).

5. Connect battery negative cable.

HB

AUDIO/VIDEO - SERVICE INFORMATION

8A - 195

ANTENNA CABLE-INSTRUMENT PANEL

REMOVAL

1. Disconnect and isolate the battery negative cable.

2. Remove the right side cowl trim.

3. Reach under the instrument panel outboard of the

glove box to access and disconnect the antenna
coaxial cable connector (1) and (2). Disconnect the
connector by pulling it apart while twisting the
metal connector halves. Do not pull on the cable.

4. Disengage the instrument panel antenna cable

from the retainer clips on the glove box opening
and instrument panel support.

5. Remove the radio (1) (Refer to 8 - ELECTRICAL/

AUDIO/RADIO - REMOVAL).

CAUTION: Pulling the antenna cable straight out
of the radio without pulling on the locking antenna
connector could damage the cable or radio.

6. Disconnect the antenna cable by pulling the locking

antenna connector (2) away from the radio.

7. Pull the antenna cable out through the radio open-

ing in the instrument panel.

8A - 196

AUDIO/VIDEO - SERVICE INFORMATION

HB


Content   ..  186  187  188  189   ..