Dodge Durango (HB). Manual - part 1379


  Index      Dodge     Dodge Durango (HB) - service repair manual 2005 year


Search            


Content   ..  1377  1378  1379  1380   ..


Dodge Durango (HB). Manual - part 1379


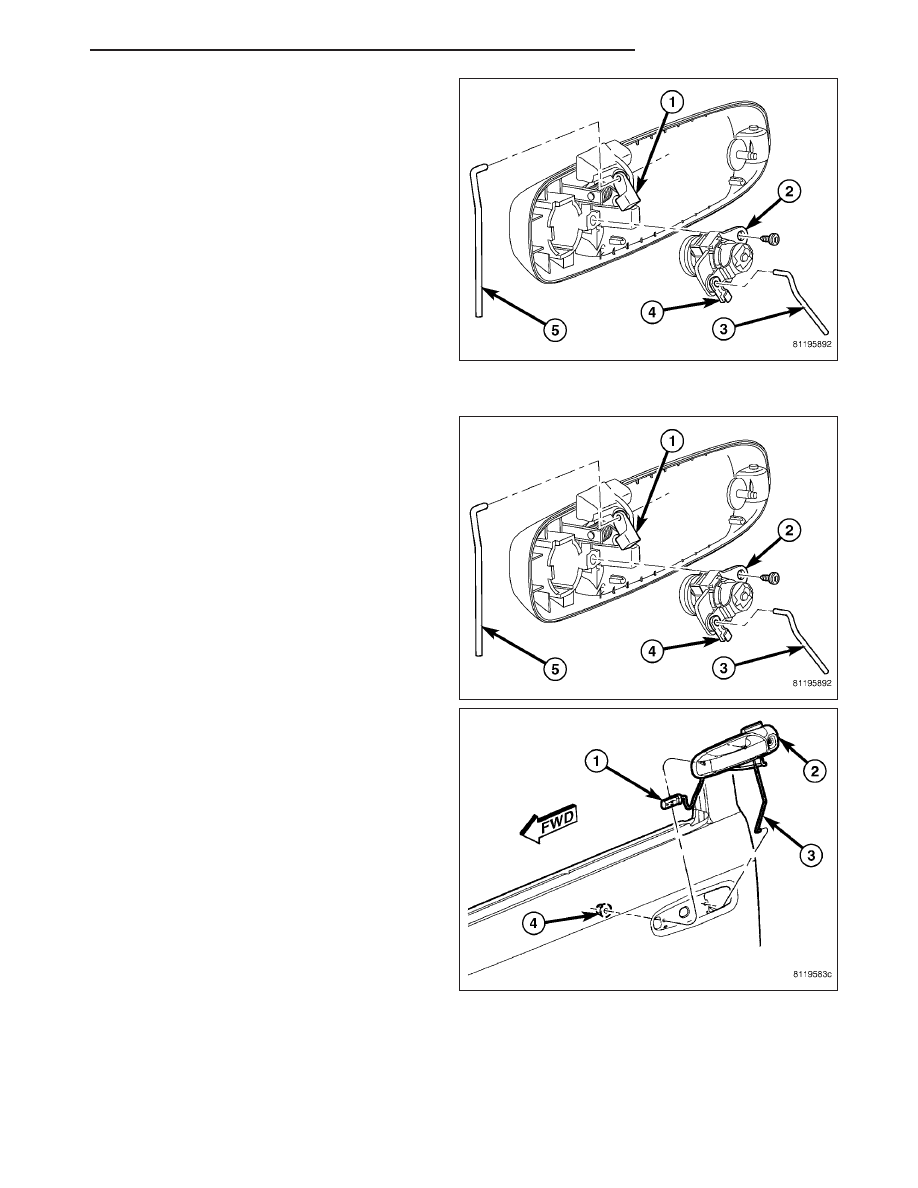
5. Separate the links (3 & 5) from the clips (1 & 4)

and remove the lock cylinder (2).

INSTALLATION

1. Install the links (3 & 5) into the clips (1 & 4) and

install the lock cylinder (2) into the exterior handle.

2. Connect the electrical connector (1), and position

the handle (2) onto the door.

3. Install the nuts (4) and tighten to 5 N·m (45 in.

lbs.).

HB

DOOR - FRONT

23 - 29

4. Connect the links (1 & 3) to the latch (4).

5. Position the rear glass run channel back and install

the nut and bolt.

6. Tighten the fasteners to 8 N·m (70 in. lbs.).

7. Install the watershield. (Refer to 23 - BODY/DOOR

- FRONT/WATERSHIELD - INSTALLATION) (Refer
to 23 - BODY/DOOR - FRONT/WATERSHIELD -
INSTALLATION)

8. Adjust the latch as needed. (Refer to 23 - BODY/

DOOR - FRONT/LATCH - ADJUSTMENTS)

CYLINDER-LOCK

REMOVAL

1. Remove the exterior handle. (Refer to 23 - BODY/

DOOR

-

FRONT/EXTERIOR

HANDLE

-

REMOVAL)

2. Remove the screw and remove the lock cylinder

(2).

23 - 30

DOOR - FRONT

HB

INSTALLATION

1. Install the lock cylinder (2) and install the screw.

2. Install the exterior handle. (Refer to 23 - BODY/

DOOR - FRONT/EXTERIOR HANDLE - INSTALLA-
TION)

CHANNEL-GLASS

REMOVAL

1. Raise the glass to the full up position.

2. Remove the watershield. (Refer to 23 - BODY/

DOOR - FRONT/WATERSHIELD - REMOVAL)

3. Remove the nuts (2) and disconnect the electrical

connector (3), if equipped.

4. Remove the side view mirror (1).

HB

DOOR - FRONT

23 - 31

5. Separate the inner belt molding from the mounting

flange from the rear to the front.

6. Insert special tool #9093 (2) between the outer belt

molding (1) and glass at the rear.

7. Push down on outer belt molding (1) and rotate

upper part of tool (2) outward from vehicle then lift
up on molding (1) to disengage from locking tabs
(3) working from back to front.

NOTE: Typical outer belt molding design shown.

8. Remove the nut (2) and bolt (3) and remove the

rear glass run channel (1).

9. Remove the bolts (6 & 5) and remove the front

glass run channel (4).

INSTALLATION

1. Install the front glass run channel (4) and install the

bolts (6 & 5). Tighten the bolts to 8 N·m (70 in.
lbs.).

2. Install the rear glass run channel and install the nut

and bolt.

3. Tighten the fasteners to 8 N·m (70 in. lbs.).

4. Position the inner and outer belt molding onto the

door and seat fully.

23 - 32

DOOR - FRONT

HB


Content   ..  1377  1378  1379  1380   ..