DAF LF45, LF55 Series. Manual - part 304


  Index      DAF     DAF LF45, LF55 Series - service repair manual


Search            


Content   ..  302  303  304  305   ..


DAF LF45, LF55 Series. Manual - part 304


©

 200416

3-7

Inspection and adjustment

BE ENGINE INLET/EXHAUST SYSTEM

ΛΦ45/55 series

4

3

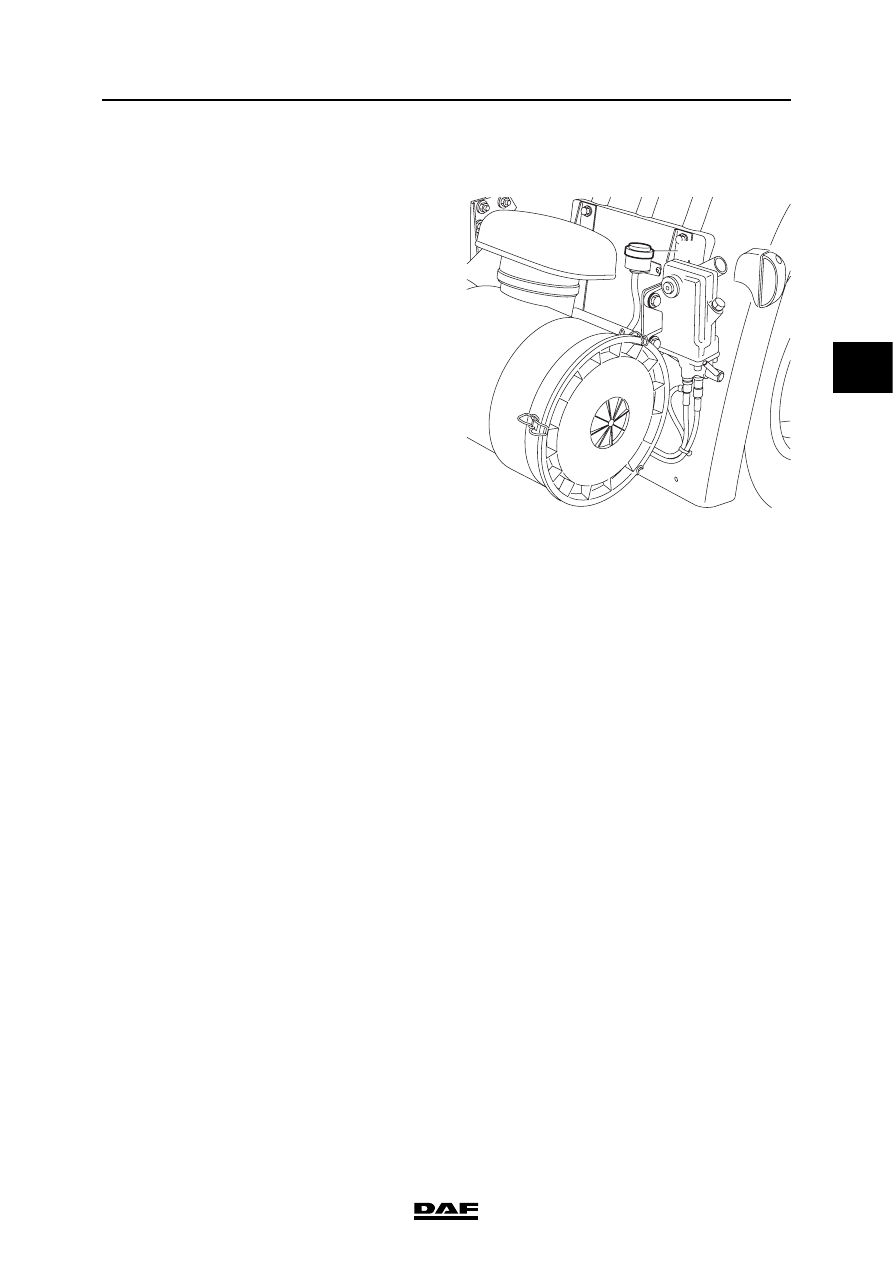
3.6 CHECKING INLET UNDERPRESSURE

1.

Remove the connection of the air intake pipe 

underpressure indicator (1) from between 

the air filter housing and turbocharger.

2.

Connect a pressure gauge with a maximum 

rating of -100 mbar (-10 kPa) to the 

connection of the underpressure indicator.

3.

Measure the inlet underpressure at full-load 

engine speed and compare the 

measurement to the specified value. See 

"Technical data".

4.

Fit the connection of the air intake pipe 

underpressure indicator (1) between the air 

filter housing and turbocharger.

i400514

1

BE ENGINE INLET/EXHAUST SYSTEM

3-8

©

 200416

Inspection and adjustment

3

ΛΦ45/55 series

4

©

 200416

4-1

Removal and installation

BE ENGINE INLET/EXHAUST SYSTEM

ΛΦ45/55 series

4

3

4. REMOVAL AND INSTALLATION

4.1 REMOVAL AND INSTALLATION, TURBOCHARGER

If the turbocharger to be replaced 

has been damaged to such an extent 

that parts of it are missing or 

lubricating oil has entered the inlet 

system, the inlet and exhaust 

systems must be checked and 

cleaned thoroughly in order to 

prevent serious damage to the 

engine.

Removing the turbocharger
1.

Remove the right-hand engine 

encapsulation (2).

2.

Remove the heat shield (1) from the oil filter.

3.

Remove each charge pipe and the 

turbocharger exhaust pipe.

4.

Remove the oil discharge pipe from the 

turbocharger.

5.

Detach the entire oil supply pipe from the oil 

filter housing to the turbocharger.

6.

Remove the attachment bolts from the 

turbocharger.

7.

Remove the turbocharger.

8.

Immediately plug the openings.

Installing the turbocharger
1.

Clean the turbocharger and the oil supply 

and discharge pipes.

2.

Before installing the turbocharger, check the 

following:

-

the turbocharger housing and connector 

flange for cracks. See "Technical data" 

for rejection standards;

-

the turbocharger shaft must be able to 

rotate freely;

-

the turbocharger shaft must not run out 

of true;

-

the turbocharger pump and turbine 

wheels must not be damaged;

-

there must not be an excessive amount 

of oil in the compressor side of the 

turbocharger. A small amount of oil on 

the inside walls of the compressor side 

is allowed.

}

1

i400857

2

BE ENGINE INLET/EXHAUST SYSTEM

4-2

©

 200416

Removal and installation

3

ΛΦ45/55 series

4

3.

Check the adjustment of the turbocharger 

wastegate. See "Inspection and adjustment".

4.

Check the axial bearing play of the 

turbocharger; see "Inspection and 

adjustment".

5.

Check the radial bearing play of the 

turbocharger; see "Inspection and 

adjustment".

6.

Clean the sealing surfaces.

Note:

Always use new gaskets when installing the 

turbocharger.

7.

Apply a layer of Copaslip to the exhaust 

manifold studs.

8.

Fit the turbocharger to the exhaust manifold.

9.

Fit the attachment nuts and tighten them to 

the specified torque. See "Technical data".

10. Check that the oil supply and discharge 

pipes are clean and not blocked, kinked or 

cracked. Replace the pipes if necessary.

Note:

If the turbocharger oil supply and/or 

discharge does not function properly, this 

may result in serious damage to the 

turbocharger and/or engine.

11. Fit new O-rings to the oil discharge pipe and 

apply a thin layer of engine oil to them. Fit the 

oil discharge pipe. For the specified 

tightening torque, see "Technical data".

12. Pour clean engine oil into the oil supply of the 

turbocharger and fit the oil supply pipe, after 

fitting a new copper ring, on the oil filter 

housing and the turbocharger. Tighten the 

pipe to the specified tightening torque; see 

"Technical data".


Content   ..  302  303  304  305   ..