Chery Tiggo 5 (T21). Manual - part 532


  Index      Chery     Chery Tiggo 5 (T21) - service repair manual 2014 year


Search            


Content   ..  530  531  532  533   ..


Chery Tiggo 5 (T21). Manual - part 532


49–

39

49

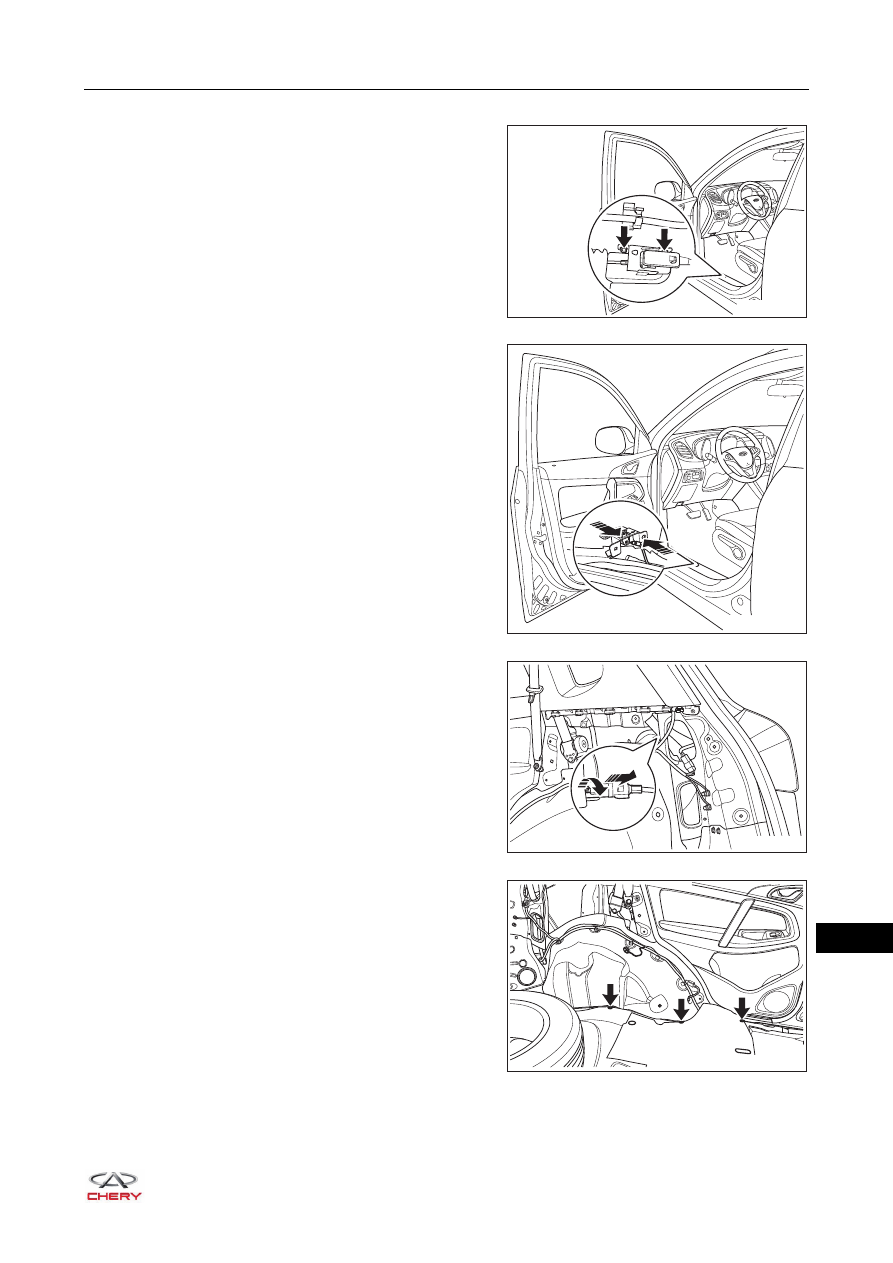
11.Remove the fuel filler cap cable assembly.

a. Remove 2 fixing bolts (arrow) from the fuel tank 

opening bracket assembly.

(Tightening torque: 10 ± 1 N·m)

b. Remove the fuel filler cap cable from the fuel tank 

opening bracket assembly in the direction of arrow as 
shown in the illustration. 

c. Remove the fuel filler cap cable on the other side in 

the direction of arrow as shown in the illustration.

d. Remove the clips (arrow) on the side of fuel filler cap 

cable.

RT21490401

RT21490410

RT21490440

RT21490420

49–

40

49

e. Remove the clips (arrow) on the rear part of fuel filler 

cap cable and remove the fuel filler cap cable.

Installation

Installation is in the reverse order of removal.

RT21490430

CAUTION

 Prevent interior and body paint from being scratched when installing fuel filler cap cable. 
 Make sure damaged clips are replaced and fuel filler cap cable is installed in place when installing fuel 

filler cap cable. 

 Check that fuel filler cap cable can operate properly after installing fuel filler cap cable. 

49–

41

49

Rear Wheel House Sound Insulation Pad

Removal

HINT:

 Use the same procedures for the rear left/rear right side and front right side.

 Procedures listed below are for the front right side.

1. Turn off all the electrical equipment and ignition switch.
2. Disconnect the negative battery cable.
3. Remove the left C-pillar lower protector assembly (

See page 49-23

).

4. Remove the rear wheel house sound insulation pad.

a. Remove the fixing nut (1) from the ground wire 

harness. 

(Tightening torque: 15 ± 2 N·m)

b. Remove the clips (arrow) from the rear wheel house 

sound insulation pad. 

c. Remove the clamping washer (2) from the rear wheel 

house sound insulation pad, and remove the rear 
wheel house sound insulation pad.

Installation

Installation is in the reverse order of removal.

CAUTION

 Make sure to wear safety equipment to prevent accidents when removing the rear wheel house sound 

insulation pad assembly.

 Appropriate force should be applied when removing the rear wheel house sound insulation pad 

assembly. Be careful not to operate roughly.

RT21490450

2

1


Content   ..  530  531  532  533   ..