Chery Fora (Elara A520). Manual - part 139


  Index      Chery     Chery Fora (Elara A520) - service repair manual


Search            


Content   ..  137  138  139  140   ..


Chery Fora (Elara A520). Manual - part 139


48 

 
3) 

Use slot-head screwdriver to pry out the 
old oil seal 

Note:  Be  careful  when  dismantling  the  oil 
seal, and avoid scuffing the oil seal seat ring. 
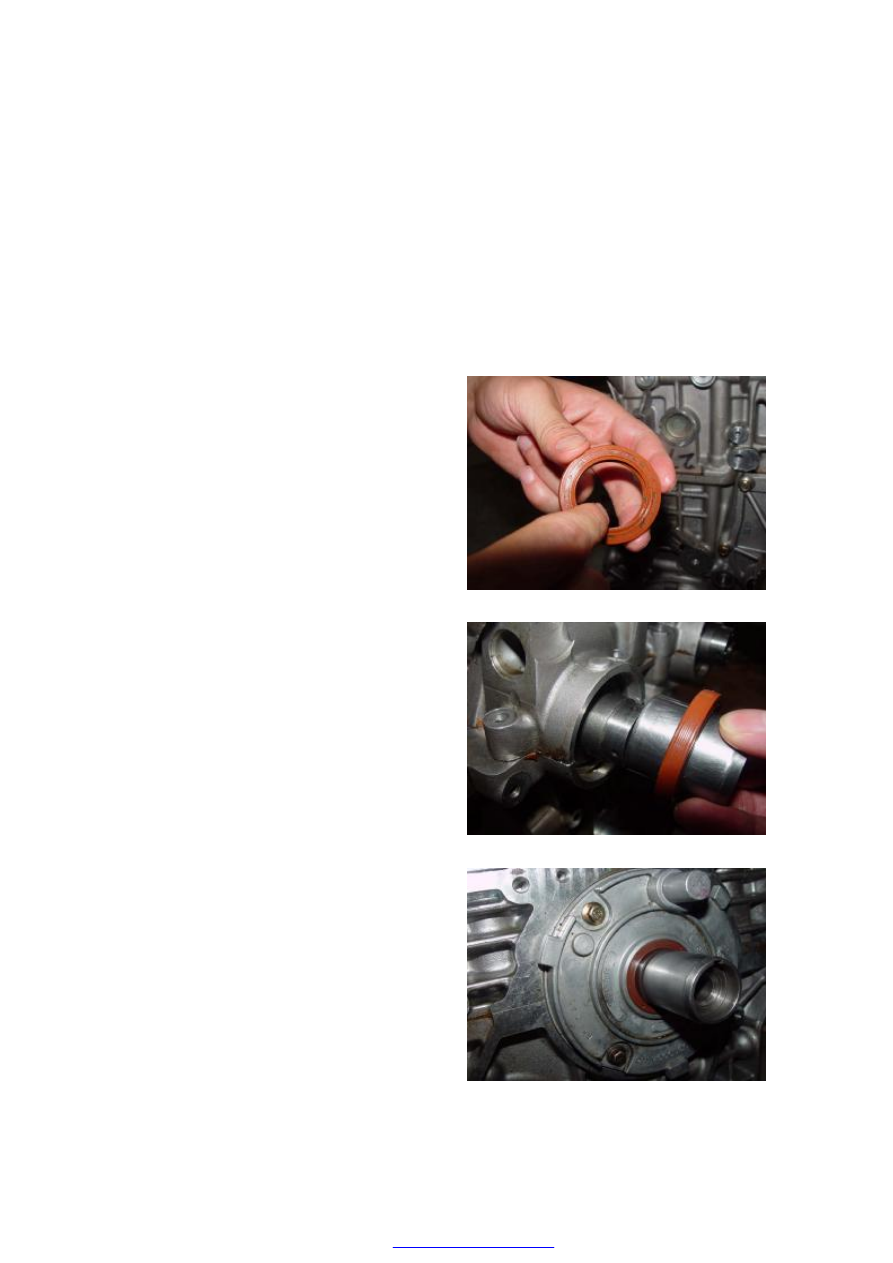
4.2.2  Installation 

1) 

Clean  up  the  dirt  and  stain  on  the  oil 
seal  seat  ring,  and  apply  a  layer  of 
lubricant onto the seat ring.   

2) 

Apply  a  layer  of  engine  lubricant  onto 
the oil seal lip. 


3) 

Fit  the  lubricant-applied  new  oil  seal 
into special tool. 


4) 

Press  the  oil  seal  into  the  oil  seal  seat 
ring carefully, and use hammer to knock 
it to the specified position. 


49 

 
5 Replacement of Oil Pump 

5.1  Needed tools and auxiliary materials   

A set of big sleeve tools, a set of small sleeve 
tools, and a set of open end wrenches 

5.2  Process of replacement 

5.2.1  Process of removal 

1) 

Dismantle  the  timing  belt(  detailed 
methods  are  shown  in  the  “removal  of 
engine timing belt”). 

2) 

Shift  the  car  into  5th  gear  and  step  on 
the  brake,  and  dismantle  the  timing  belt 
pulley. 

3) 

Use  10#  sleeve  to  dismantle  the  fixed 
bolt  of  oil  pump,  and  remove  the  oil 
pump.   

Torque: 8+3NM 

4) 

Pry out the oil seal. 

5) 

Clean the seat ring of oil pump. 

5.2.2  Installation 

1) 

Apply oil onto the oil pump gasket. 

2) 

Mount the oil pump into the seat ring of 
oil pump. 

Note: The bulging portion of oil pump should 
point downward.   

When  the  position  is  not  correct,  the  bolt 
cannot be screwed in.   

3) 

Mount oil seal. 

4) 

Mount other components. 

6  Replacement  of  Crankshaft  Rear  Oil 

Seal 

6.1  Needed tools and auxiliary materials   

A set of sleeve tools, a slot head screwdriver, 
a small crane, engine oil. 

6.2  Process of removal 


50 


1) 

Lift down the engine assembly  from the 
car(  detailed  methods  are  shown  in  the 
“lifting  and  installation  of  engine 
assembly”. 

2) 

Dismantle he clutch pressure plate. 


3) 

Dismantle  the  flywheel.  Firstly  use 
special  tool  to  clamp  the  flywheel,  and 
then use  sleeve  wrench  to  dismantle  the 
fixed bolts. 

4) 

Use slot head screwdriver to pry out the 
old oil seal. 

Note: Avoid scuffing the oil seal seat ring. 


6.2  Installation 

1) 

Clean  the  oil  seal  seat  ring.  Use  clean 
gauze  to  suck  some  engine  oil  to  clean 
up  the  foreign  substances  in  the  oil seal 
seat ring. 


2) 

Apply  a  layer  of  oil  onto  the  front  oil 
seal  lip of crankshaft equally.  Fit the oil 
seal onto the special tool, and then press 
it into the oil seal seat ring.   


3) 

Install  flywheel  and  clutch  pressure 
plate,  and  assemble  the  engine  into  the 
car. 

Torque:  25±5N.M,  and  then  screw  for 
30°±5°. 


51 

 
7  Replacement of Crankshaft and Thrust 

Washer 

7.1  Needed tools and auxiliary materials   

A  set  of  open  end  wrenches,  a  set  of  sleeve 
tools,  one  small  crane,  Le  Tai  glue,  engine 
oil, feeler gauge and micrometer guage. 

7.2  Process of removal 

1) 

Lift  down  the  engine  (detailed  methods 
are shown in the “lifting and installation 
of engine”). 

2) 

Discharge the engine oil. 

3) 

Dismantle  the  engine  timing  belt 
(detailed  methods  are  shown  in  the 
“ replacement of timing belt”). 

4) 

Dismantle  the  engine  accessories  such 
as  engine  A/C  compressor,  power 
steering  pump  and  bracket.(  detailed 
methods  are  shown  in  the  “replacement 
of engine accessories”). 

5) 

Dismantle  the  engine  cylinder  head 
assembly  (detailed  methods  are  shown 
in the “replacement of cylinder head”).   

6) 

Dismantle  the  clutch  pressure  plate, 
flywheel and timing belt pulley. 

7) 

Dismantle 

the 

oil 

pan 

and 

oil 

strainer.(detailed  methods  are  shown  in 
the  “  replacement  of  oil  span  and 
strainer”. 

8) 

Dismantle  the  piston  connecting  rod 
assemblies of four cylinders, place them 
well in order.   

9) 

Dismantle the oil pump assembly 

10)  Dismantle  the  lower  frame  of  cylinder 

block,  and  then  you  can  take  out  the 
crankshaft and thrust washer. 


Content   ..  137  138  139  140   ..