Chery A15 / 480 LHD model. Manual - part 78


  Index      Chery     Chery A15 / 480 LHD model - service repair manual


Search            


Content   ..  76  77  78  79   ..


Chery A15 / 480 LHD model. Manual - part 78


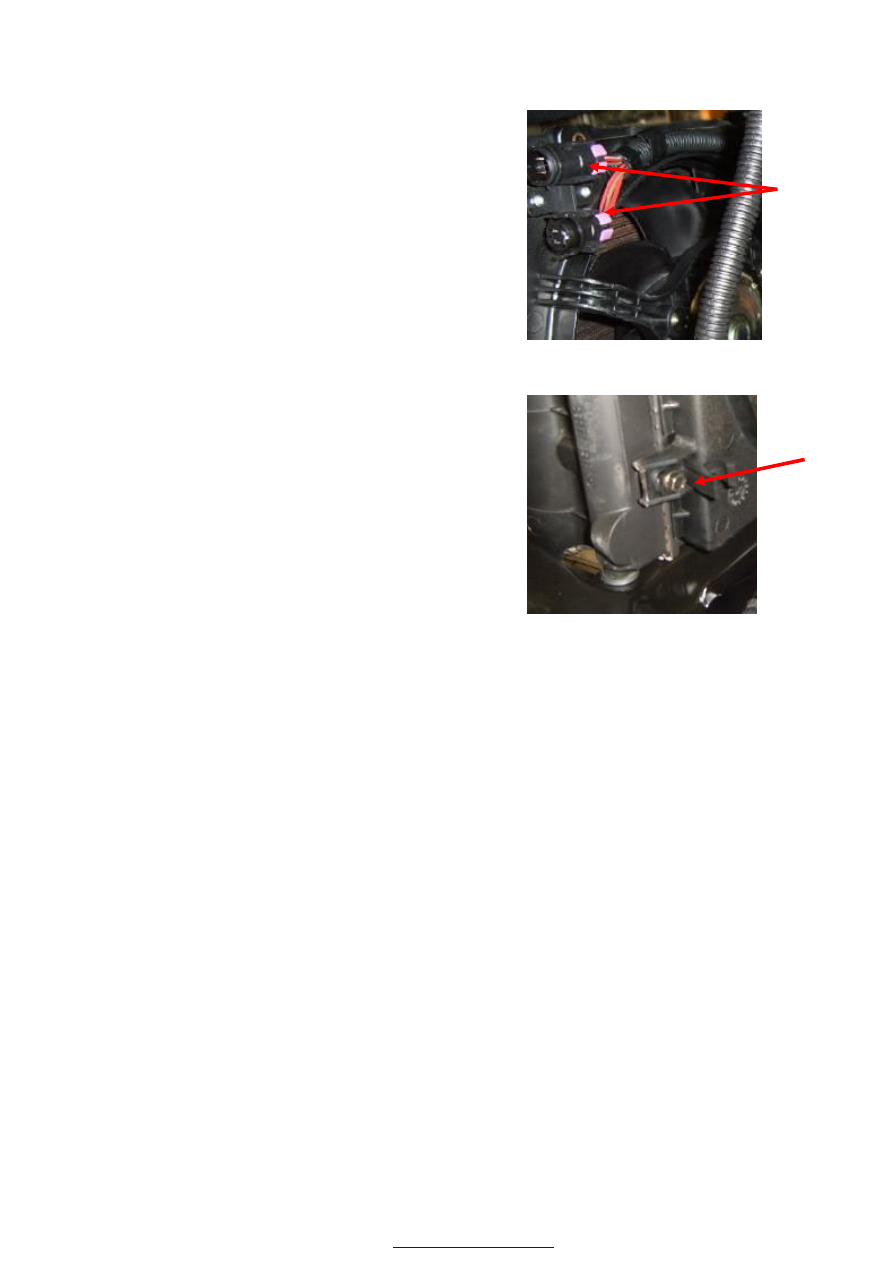
——To demount the matching plug of the cooling fan.


——To  remove  the  fastening  self-tapping  screw  from 

the cooling fan. 


——To take the cooling fan out.   


Assembly: 

——To  assemble  the  cooling  fan  according  to  the 

disassembly  order  (the  tightening  torque  of 
self-tapping screw is 1.8~2.2Nm) 


——To start up the engine and check if the cooling fan 

is under normal operation.


Guideline For Disassembly: 

——During  the  disassembly  process,  you  should  pay 

more attention not to pull A/C pipe to a large extent, 
otherwise the A/C pipe shall crack and deform. 


EXPANSION RESERVOIR 


——To  pry  out  the  protecting  hood  of  expansion 

reservoir by using a screw drive.   


——To  demount  the  fastening  bolts  of  the  expansion 

reservoir by using M10 sleeve.   


——To pull out the plug of liquid level sensor. 

——To take the expansion reservoir out. 


Disassembly: 

——To  demount  the  water  pipe  connecting  with  the 

expansion reservoir.   


——To demount the left and right wind boards by  M10 

sleeve. 


——To take out the radiator. 


Assembly: 

——To  assemble  the  expansion  reservoir  according  to 

the  order  opposite  to  the  disassembly  order(the 
tightening  torque  of  self-tapping  screw  is 
4.0~5.0Nm). 

——To refill coolant. 


ASSEMBLY OF RADIATOR   

Disassembly: 

——To discharge coolant (refer to the coolant discharge 

process) 

——To  demount  the  cooling  fan  (refer  to  the 

disassembly process of the cooling fan). 


——To take out the radiator 


——To  install  the  radiator  onto  the  front  transom  and 

put it straightly towards the positioning hole. 
 

——To install the  left and right tensioned plates of the 

radiator,  and  tighten  the  bolts  of  the  plates  with 
tightening torque of 5±1Nm.   

Assembly: 

——To  assemble  the  radiator  according  to  the  order 

opposite of the disassembly order.   

——To  install  the  2  wind  boards  onto  the  radiator  by 

using  self-tapping  screws  with  their  tightening 
torque of 6~7Nm. 


Content   ..  76  77  78  79   ..