Snowmobile Arctic Cat (2008 year). Manual - part 30


  Index      Snowmobiles / ATV     Snowmobile Arctic Cat - service manual 2008 year


Search            


Content   ..  28  29  30  31   ..


Snowmobile Arctic Cat (2008 year). Manual - part 30


2-57

2

MS384

MS384

0738-291

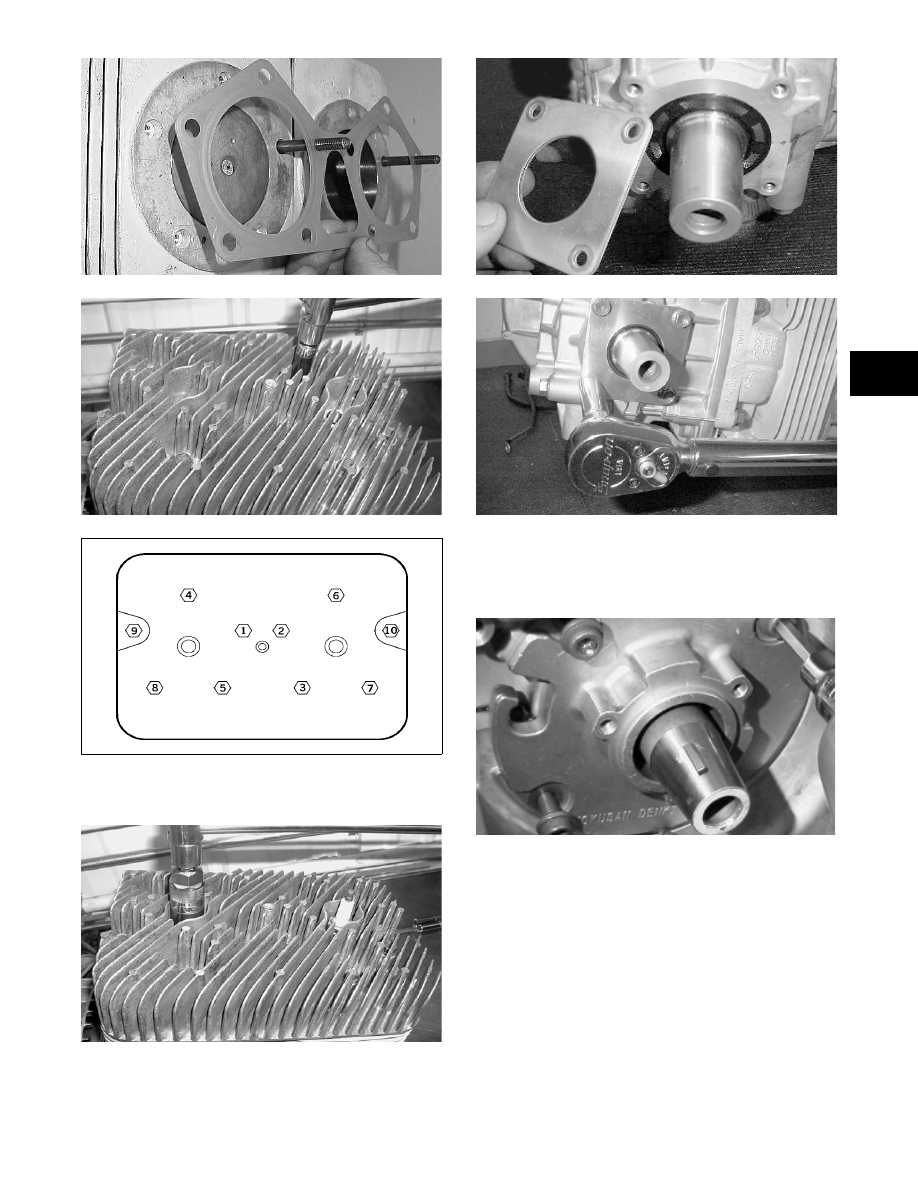
15. Install the spark plugs; then tighten to 19 ft-lb.

Pressure test the engine (see Section 3).

MS385

16. Position the seal retainer plate on the PTO-side;

then install the four cap screws. Tighten the cap

screws to 8 ft-lb.

MD0253

MD0292

17. Install the stator plate so the ignition wire cut-out

is in the upper left position. Lightly coat the four

Allen-head cap screws with red Loctite #271; then

install and tighten them to 8 ft-lb.

MD0255

18. Place the stator wiring through the hole in the

crankcase; then install the stator. Lightly coat the

three Allen-head cap screws with red Loctite

#271; then tighten them to 8 ft-lb.

2-58

MD0076

MD0274

19. Place the ignition timing sensor wiring through the

hole in the crankcase; then position the ignition

timing sensor and install two Phillips-head cap

screws (coated with red Loctite #271). Tighten the

cap screws securely.

MD0074

MD0073

20. Install the rubber insulator grommet into the

crankcase.

MD0262

21. Install the key; then install the flywheel and cap

screw (threads coated with red Loctite #271).

Tighten the cap screw only until snug.

„NOTE: Do not tighten the flywheel cap screw at
this point. 

MD0264

22. Place the fan and starter pulley into position on the

flywheel. Using Flywheel Spanner Wrench to hold

the starter cup, tighten the three cap screws

(coated with green Loctite #609 and Loctite

Primer #7471) to 17 ft-lb.

! CAUTION

Do not use green Loctite #609 without also using
Loctite Primer #7471.

! CAUTION

When installing the fan, make sure that the locating
pins on the flywheel align with the indentations in
the fan.

2-59

2

MD0280

23. Using Flywheel Spanner Wrench to hold the

starter cup, tighten the flywheel cap screw (from

step 21) to 50 ft-lb.

MD0278

24. Using the six cap screws and the special washers,

install the rear (intake-side) shroud. Tighten the

cap screws to 60 in.-lb.

MD0277

25. Using the five 6 mm cap screws and the special

washers, install the front (exhaust-side) cooling

shroud and tighten to 60 in.-lb. Install the rubber

spark plug grommets; then tighten the cap screws

securely.

MD0269

MD0268

26. Lubricate the oil-injection pump driveshaft; then

while rotating the driveshaft, install it and the

thrust washer into the lower crankcase half.

„NOTE: Make sure the thrust washer is installed
on the oil injection pump driveshaft when it is
installed.

MD0252

27. With a new O-ring in place, install the oil injection

pump driveshaft retainer.

2-60

MD0273

28. With a new O-ring in place, install the oil injection

pump aligning the slot on the oil pump with the

flat on the end of the oil injection pump driveshaft.

Tighten the Allen-head cap screws to 8 ft-lb.

MD0294

„NOTE: For assembling purposed, always use
new O-rings lubricated with oil on the oil injection
pump and retainer.

MD0090

29. Install the first set of intake gaskets, heat deflector,

remaining gaskets, insulators, and flanges. Secure

with nuts and washers and tighten the nuts (threads

coated with red Loctite #271) to 15 ft-lb.

Installing Engine

1. Install the engine plate to the engine with four cap

screws. Tighten to 30 ft-lb.

FZ025

2. Install the PTO-side crankcase snubber bracket

with two cap screws; then tighten to 20 ft-lb.

FZ022A

3. With the steering turned all the way to the right,

install the engine into the chassis and position the

engine forward of the mounting locations to access

the oil pump and electrical connectors.

FZ013

4. Route the wiring harness as noted during disas-

sembly and connect the plug-ins to the CDI and

ignition coil; then connect the main harness plug-

in.

„NOTE: Prior to connecting the harness, it is
advisable to clean all plug-ins with contact cleaner.

5. Connect the oil line to the oil pump and secure

with the clamp; then with the oil pump cable prop-

erly routed, install the cable to the oil pump and

secure with the washer and E-clip.


Content   ..  28  29  30  31   ..