Snowmobile Polaris (2006 year). Manual - part 34
6.22
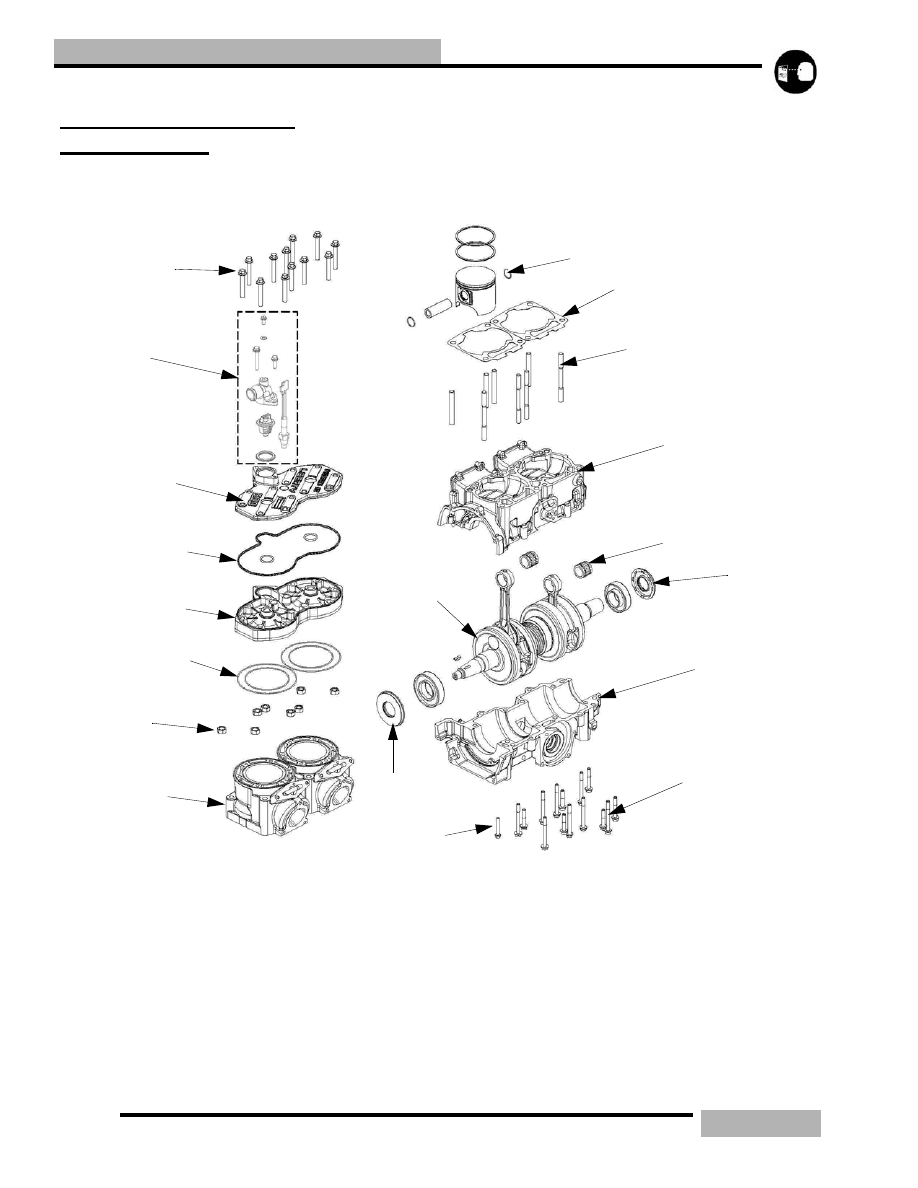
ENGINE
500/600 HO ENGINE
REBUILDING
500/600 LIBERTY ENGINE DISASSEMBLY
1.
Remove reed valve assembly
2.
Remove the head bolts (1).
3.
Remove the head cover (3) and the rubber head seals (4).
4.
Remove the head (5) and cylinder o-rings (6).
5.
Remove the VES assembly. ‘EXHAUST VALVE
REMOVAL” on page 6.2.
6.
Remove the cylinder nuts (7) and carefully remove the
cylinders (8) with a slight rocking motion.
7.
Remove the c-clips that hold the wrist pin into the piston
(9).
8.
Using the piston pin puller PN 2870386 remove the piston
pins, and the piston from the crankshaft (15).
9.
Remove the water pump cover.
10. Remove the water/oil pump assembly. ‘500/600
LIBERTY WATER/OIL PUMP CROSS SHAFT
DISASSEMBLY” on page 6.24.
11. If removing the engine mounting straps (these straps are
mounted to the engine and bulkhead) label the direction
and placement of each engine strap.
12. Remove the cylinder base gaskets (10) and replace if
damaged.
13. Turn over the crankcase and remove the bottom crankcase
1
2
3
4
5
6
7
8
9
10
11
12
13
15
16
18
14
14
22(29.8)
32(43.4)
22(29.8)
17
5(6.8)