Volkswagen Golf / Golf GTI / Golf Variant. Manual - part 966
2.16
Left/Right Seat Heating Button -E653- /
-E654- , Removing and Installing
The seat heating buttons are integrated in the Heater Control
Module - J65- / A/C Control Module - J301- / Climatronic Control
Module - J255- display control head. Components cannot be re‐
placed separately if faulty.
– Heater Control Module - J65- / A/C Control Module - J301- /
Climatronic Control Module - J255- removing and installing.
Refer to ⇒ Heating, Ventilation, and Air Conditioning; Rep.
Gr. 87 ; Component Location Overview - Display And Control
Unit .
2.17
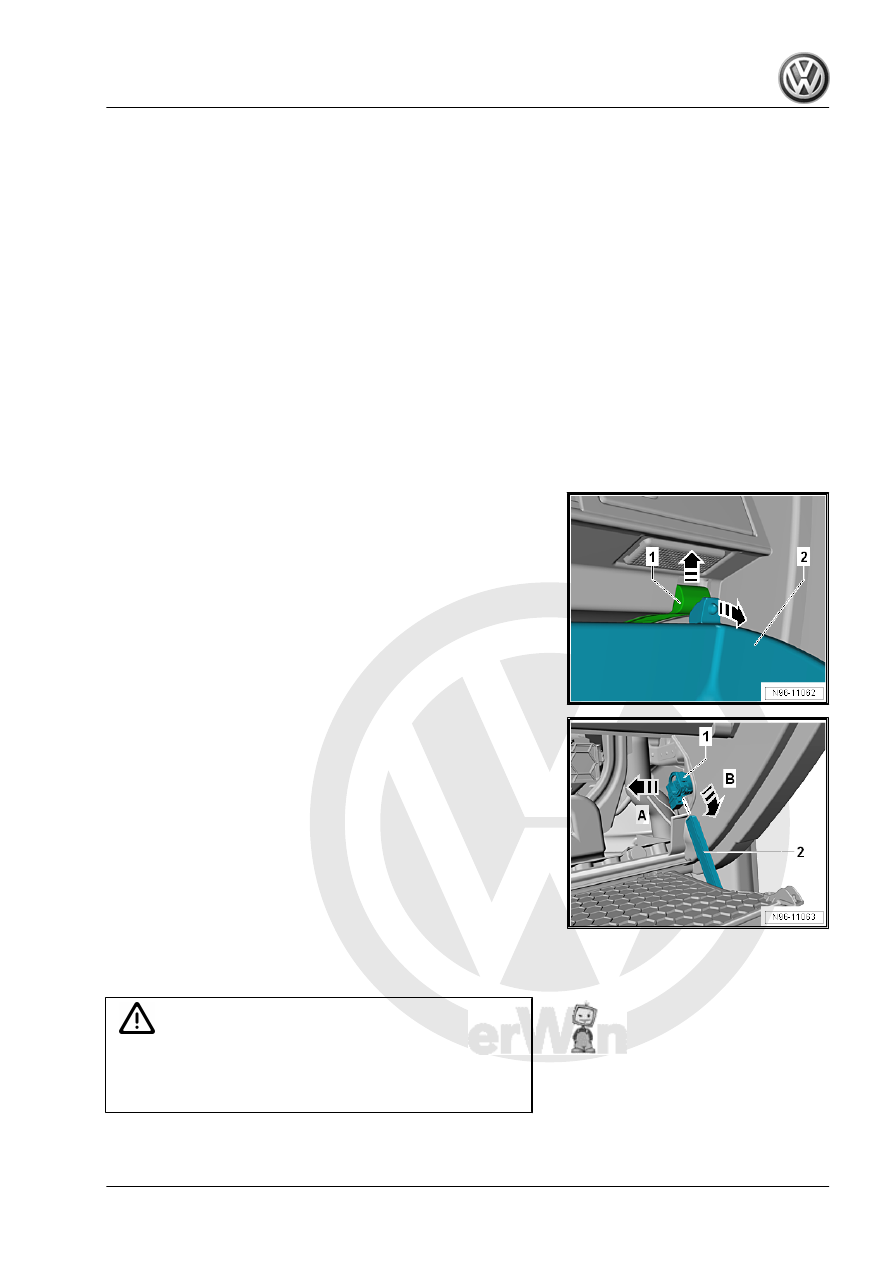
Glove Compartment Lamp Switch -
E26- , Removing and Installing
Removing
– Turn off the ignition and all electrical equipment.
– Remove the ignition key, if equipped.
– Open the glove compartment.
– Push the left and right glove compartment stop -1- in the up‐
ward direction of the -arrow-.
– Open the glove compartment lid -2-.
– Open the glove compartment lid completely in the direction of
the -arrow B- so that the steering rack -2- is removed from the
damper -1-.
– Remove the Glove Compartment Lamp Switch - E26- in the
damper -1- from the mount in the direction of the -arrow A-.
Installing
Install in reverse order of removal.
– Perform a function test.
2.18
Exterior Rearview Mirror Adjuster -
EX11- , Removing and Installing
Caution
Risk of damaging the component surfaces.
♦ When positioning a prying tool, put commercially available
adhesive tape over the component in the visible area.