Volkswagen Golf / Golf GTI / Golf Variant. Manual - part 729
3
Secondary Air Injection System
⇒ “3.1 Overview - Secondary Air Injection System”, page 352
⇒ “3.2 Secondary Air Injection Pump Motor V101 , Removing and
⇒ “3.3 Secondary Air Injection Solenoid Valve N112 , Removing
.
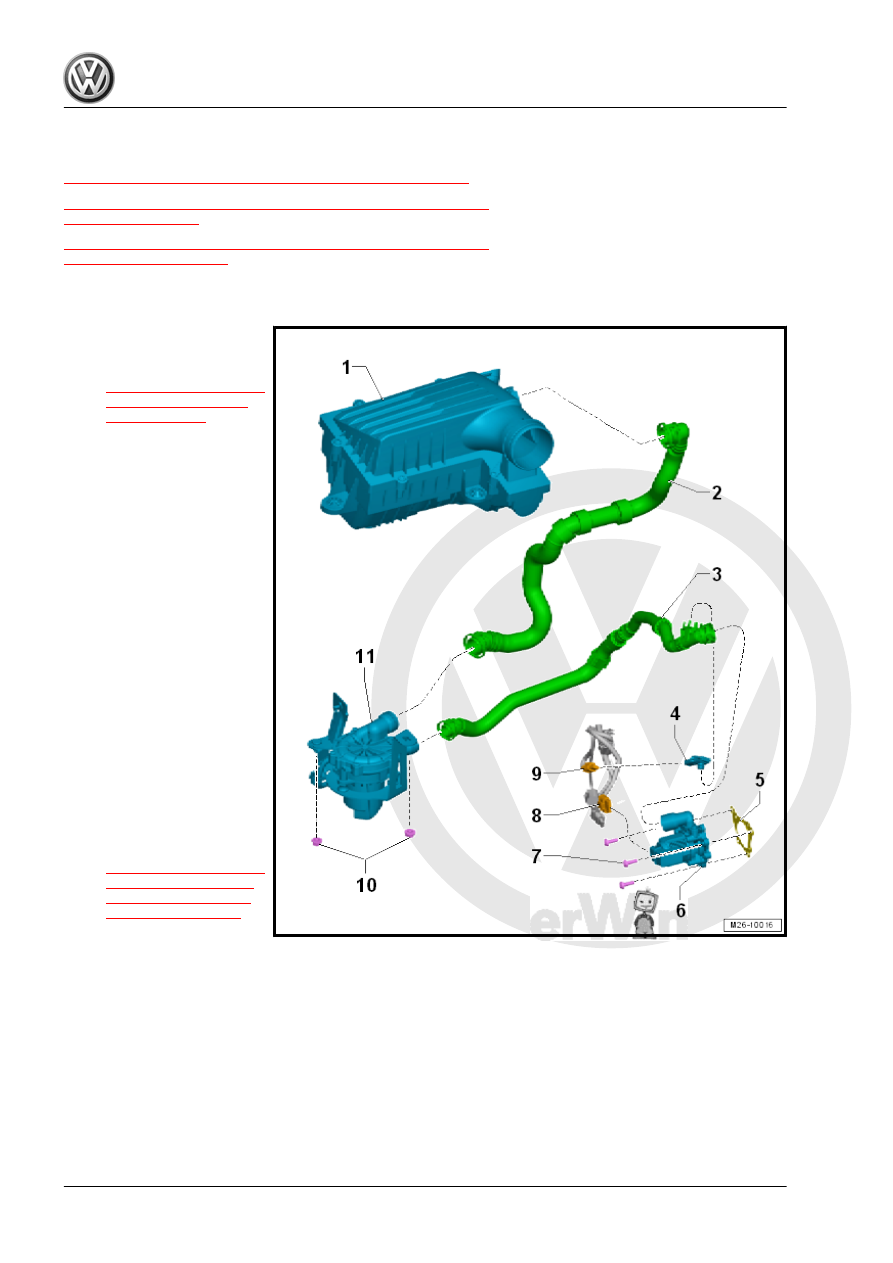
3.1
Overview - Secondary Air Injection System
1 - Air Filter Housing
❑ Removing and instal‐
ling. Refer to
2 - Connecting Line
❑ From the Secondary Air
Injection Pump Motor -
V101- on the air filter
housing
3 - Connecting Line
❑ From the Secondary Air
Injection Solenoid Valve
- N112- on the Secon‐
dary Air Injection Pump
Motor - V101-
4 - Secondary Air Injection
Sensor 1 - G609-
5 - Seal
❑ Replace after removing
the Secondary Air Injec‐
tion Solenoid Valve -
N112- .
6 - Secondary Air Injection Sol‐
enoid Valve - N112-
❑ Secondary Air Injection
Solenoid Valve - N112- ,
Removing and instal‐
ling. Refer to
.
7 - Bolt
❑ 9 Nm
8 - Electric Connection
❑ For the Secondary Air Injection Solenoid Valve - N112-
9 - Electric Connection
❑ For the Secondary Air Injection Sensor 1 - G609-
10 - Nut
❑ 8 Nm