Volkswagen Golf / Golf GTI / Golf Variant. Manual - part 702
4
Radiator/Coolant Fan
⇒ “4.1 Overview - Radiator/Coolant Fan”, page 244
⇒ “4.3 Overview - Fan Shroud and Radiator Fan”, page 247
⇒ “4.4 Radiator, Removing and Installing”, page 247
⇒ “4.5 Fan Shroud, Removing and Installing”, page 249
.
⇒ “4.6 Coolant Fan, Removing and Installing”, page 250
⇒ “4.7 Auxiliary Cooler, Removing and Installing”, page 251
.
4.1
Overview - Radiator/Coolant Fan
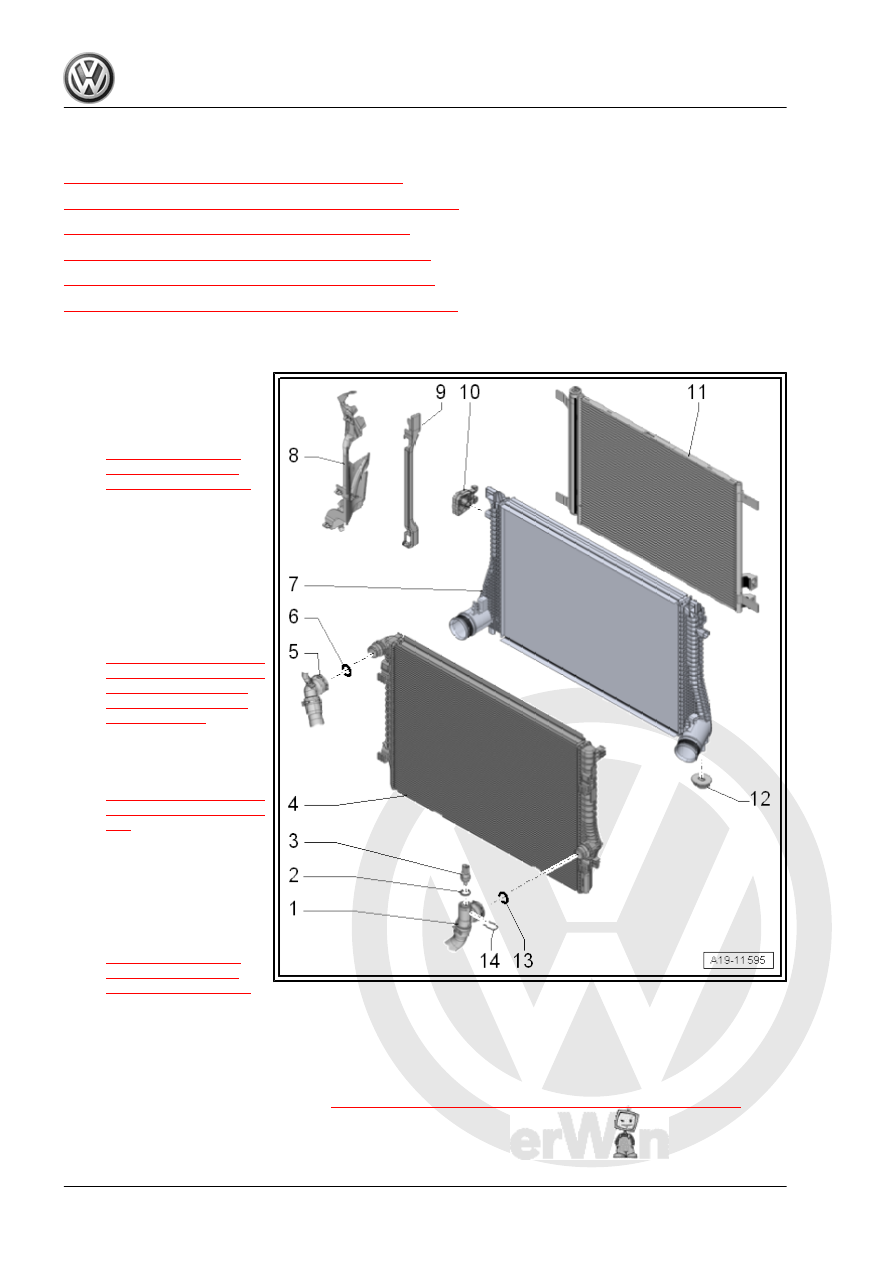
1 - Coolant Hose
❑ Lift the retaining clamp
to remove
❑ Connecting. Refer to
2 - O-Ring
❑ Replace after removing
❑ Coat with coolant
3 - Engine Coolant Tempera‐
ture Sensor on Radiator Outlet
- G83-
❑ Removing and instal‐
ling. Refer to
4 - Radiator
❑ Removing and instal‐
ling. Refer to
.
❑ Change the coolant af‐
ter replacing
5 - Coolant Hose
❑ Lift the retaining clamp
to remove
❑ Connecting. Refer to
6 - O-Ring
❑ Replace after removing
❑ Coat with coolant
7 - Charge Air Cooler
❑ Removing and installing. Refer to
⇒ “2.3 Charge Air Cooler, Removing and Installing”, page 265