Volkswagen Golf / Golf GTI / Golf Variant. Manual - part 589


  Index      Volkswagen     Volkswagen Golf / Golf GTI / Golf Variant - service repair manual 2013 year


Search            copyright infringement  


Content   ..  587  588  589  590   ..


Volkswagen Golf / Golf GTI / Golf Variant. Manual - part 589


7

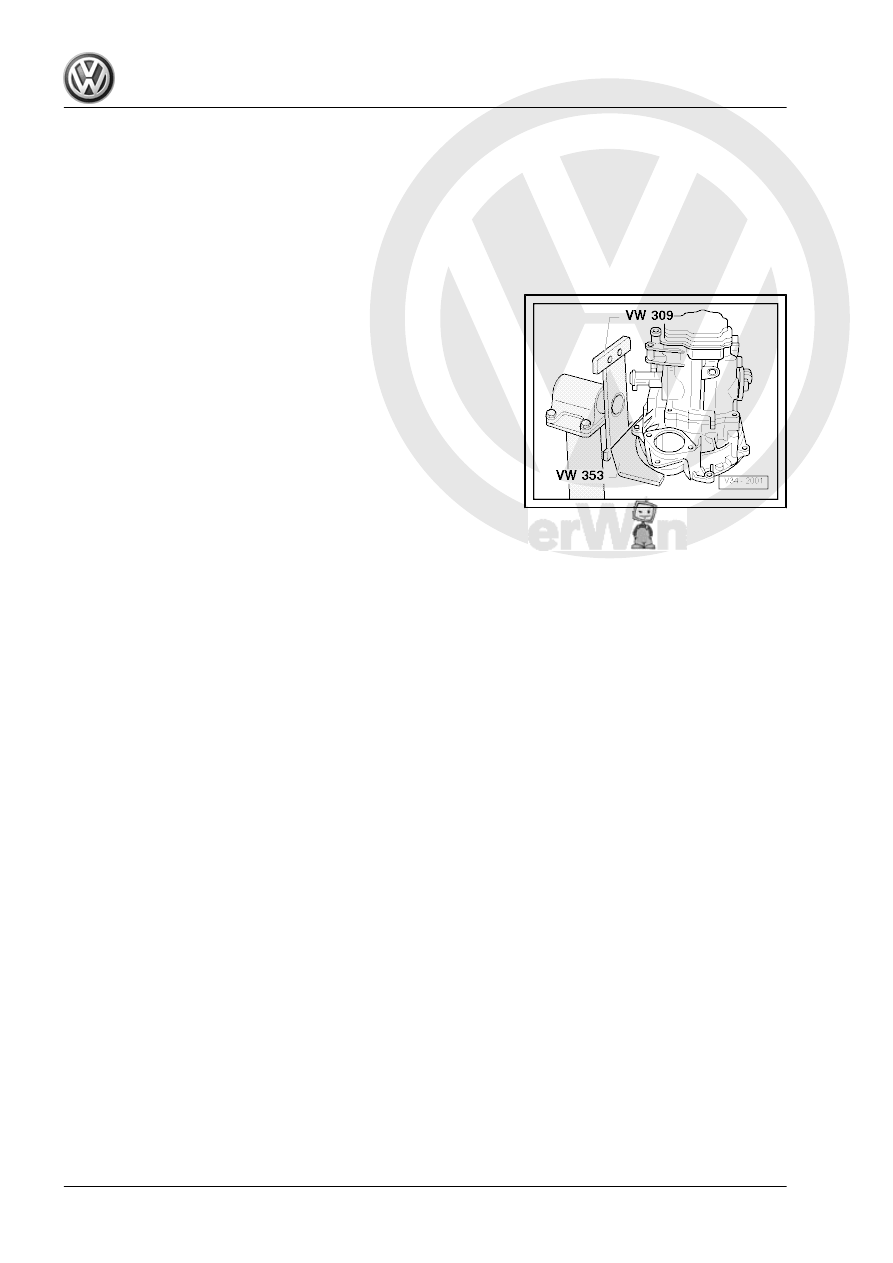
Securing on Engine and Transmis‐

sion Holder

Special tools and workshop equipment required
♦ Holding Plate - VW309-
♦ or Holding Plate - VW309A-
♦ Transmission Support - VW353-
– Secure the transmission on the Transmission Support -

VW353- .

– Place a Shop Crane - Drip Tray - VAS6208- for example un‐

derneath.

8

Transmission Fluid

⇒ “8.1 Transmission Fluid Level, Checking”, page 125
⇒ “8.2 Transmission Fluid, Draining and Filling”, page 125

8.1

Transmission Fluid Level, Checking

It is not possible to check the transmission fluid level by removing

oil filler plug.

Due to the angle of the engine/transmission assembly, the lower

edge of the filler hole -arrow 1- is located below the oil level

-arrow 2-.
The Transmission Fluid Level In Transmission Can Only be

Checked When the Transmission Fluid Has Been Drained Com‐

pletely and then Filled Again. Refer to

⇒ “8.2 Transmission Fluid, Draining and Filling”, page 125

 .

8.2

Transmission Fluid, Draining and Filling

Special tools and workshop equipment required
♦ Torque Wrench 1331 5-50Nm - VAG1331-
♦ Hose (approximately 600 mm long, outside diameter 10 mm)

with commercially available funnel.

Transmission Fluid, Draining
Transmission fluid. Refer to the Parts Catalog.
– Remove the entire air filter housing if it is located above the

gearshift lever. Refer to ⇒  Engine Mechanical, Fuel Injection

and Ignition; Rep. Gr.  24 ; Air Filter; Air Filter Housing, Re‐

moving and Installing .

– Remove the noise insulation. Refer to ⇒  Body Exterior; Rep.

Gr.  66 ; Noise Insulation; Overview - Noise Insulation .

Clean the transmission.

Caution

To drain gear oil, journal for shift forks in transmission must be

removed.
To avoid that the position of the shift forks is changed, for ex‐

ample  by  involuntarily  operating  shift  mechanism,  shift  rod

must be secured.

Secure the Gearshift Shaft as Follows:
– Push the gearshift shaft down in the direction of -arrow 1-.
– While press the gearshift shaft down, rotate the bracket -A- in

direction of -arrow 2- upward and simultaneously press it in

until it engages in the gearshift shaft.

• The gearshift shaft is secured.

Use a Clean Container that Holds three Liters (3.17 quarts) With

a Scale Printed On It To Catch the Transmission Fluid.
– Remove the drain plug -arrow 1- and then the pivot pins for

the shift forks -arrow 2- and drain the transmission fluid.

– Install the pivot pins for the shift forks -arrow 2- with a new O-

ring. Refer to

⇒ “5.4 Overview - Transmission Housing and Selector Mech‐

anism”, page 95

 .

– Install the oil drain plug -arrow 1- -item 15-

⇒ Item 15 (page 120)

 .

– Rotate the bracket -A- back into its starting position direction

of -arrow- so that the gearshift shaft moves freely.

Transmission Fluid, Filling
• The oil drain plug is tightened to the tightening specification.
• Install the shift fork journal with a new O-ring. Refer to

⇒ “5.4 Overview - Transmission Housing and Selector Mech‐

anism”, page 95

 .

Transmission fluid. Refer to the Parts Catalog.
Fill the Transmission Fluid Capacity into the Container to 1.8 Lit‐

ers (1.9 quarts).

– Remove the Back-Up Lamp Switch - F4- -arrow-.
– Hose (approximately 600 mm (23.6 in.) long, outside diameter

10 mm) with commercially available funnel.

– Insert the hose into the hole in the Back-Up Lamp Switch - F4-

(seconded technician) and fill the transmission fluid.

– Reinstall the Back-Up Lamp Switch - F4- -arrow-. Refer to

⇒ “5.5 Overview - Shift Unit”, page 96

 .

– Check the selector mechanism function. Refer to

⇒ “1.7 Selector Mechanism, Checking”, page 65

 .

– Install the air filter housing if it was removed earlier. Refer to

⇒  Engine Mechanical, Fuel Injection and Ignition; Rep. Gr. 

24 ; Air Filter; Air Filter Housing, Removing and Installing .

– Install the noise insulation. Refer to ⇒  Body Exterior; Rep. Gr. 

66 ; Noise Insulation; Overview - Noise Insulation .


Content   ..  587  588  589  590   ..