Volkswagen Golf / Golf GTI / Golf Variant. Manual - part 544
2
Actuators
⇒ “2.1 Component Location Overview - Front Actuators”,
page 12
⇒ “2.2 Temperature Regulator Door Motor V68 with Temperature
Regulator Door Motor Position Sensor G92 , Removing and In‐
stalling”, page 13
⇒ “2.3 Recirculation Door Motor V113 , Removing and Installing”,
page 13
⇒ “2.4 Air Distribution Door Motor V428 with Position Sensor Air
Distribution Door Motor Position Sensor G645 , Removing and
2.1
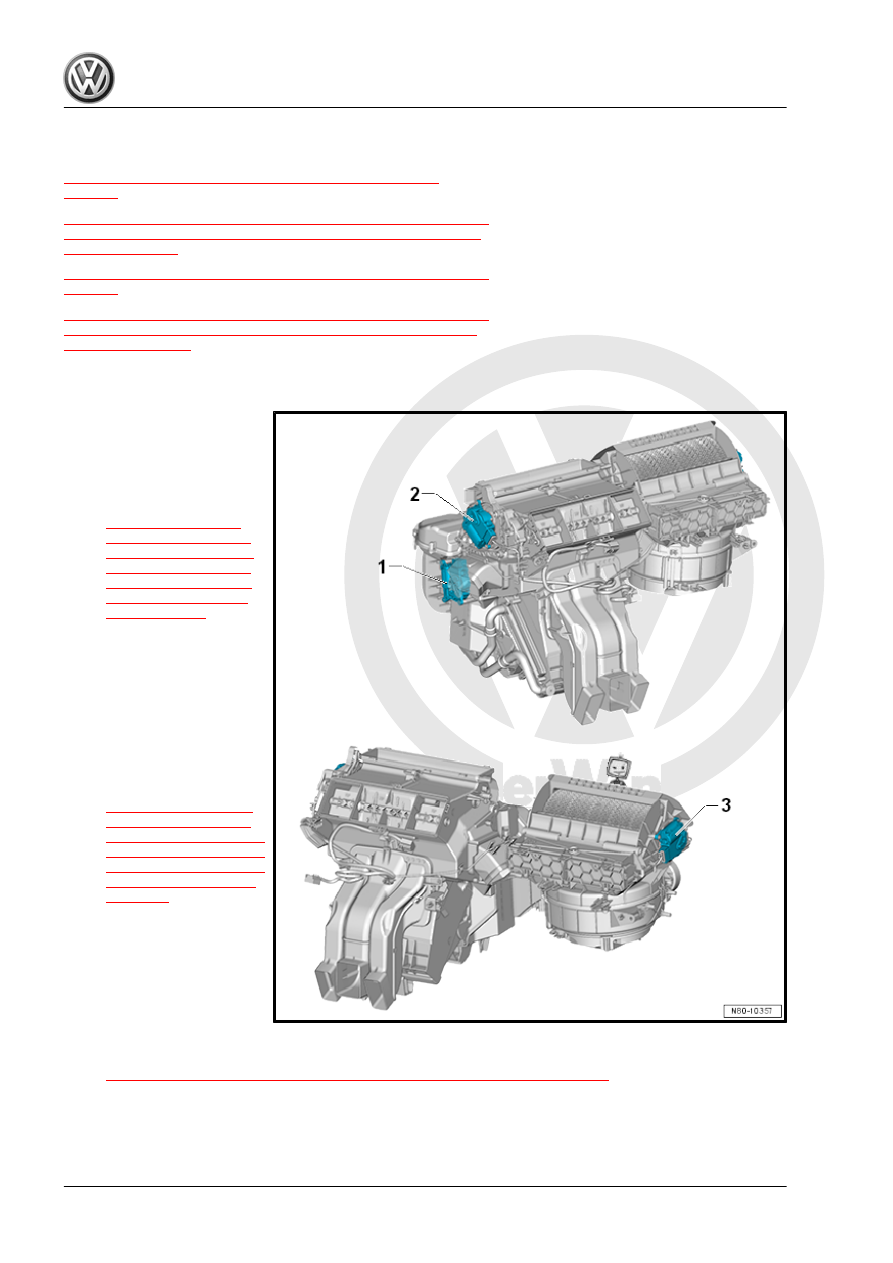
Component Location Overview - Front Actuators
1 - Temperature Regulator
Door Motor - V68-
❑ Check using the Vehicle
Diagnostic Tester .
❑ Removing and instal‐
ling. Refer to
❑ Replacing: initiate the
basic setting using the
Vehicle Diagnostic
Tester
2 - Air Distribution Door Motor
- V428-
❑ Check using the Vehicle
Diagnostic Tester .
❑ Removing and instal‐
ling. Refer to
❑ Replacing: initiate the
basic setting using the
Vehicle Diagnostic
Tester
3 - Recirculation Door Motor -
V113-
❑ Check using the Vehicle
Diagnostic Tester .
❑ Removing and installing. Refer to
⇒ “7.4 Recirculation Door Motor V113 , Removing and Installing”, page 134
❑ Replacing: initiate the basic setting using the Vehicle Diagnostic Tester