Volkswagen Golf / Golf GTI / Golf Variant. Manual - part 472
 

  Index      Volkswagen     Volkswagen Golf / Golf GTI / Golf Variant - service repair manual 2013 year


Search            copyright infringement  


Content   ..  470  471  472  473   ..


Volkswagen Golf / Golf GTI / Golf Variant. Manual - part 472


7

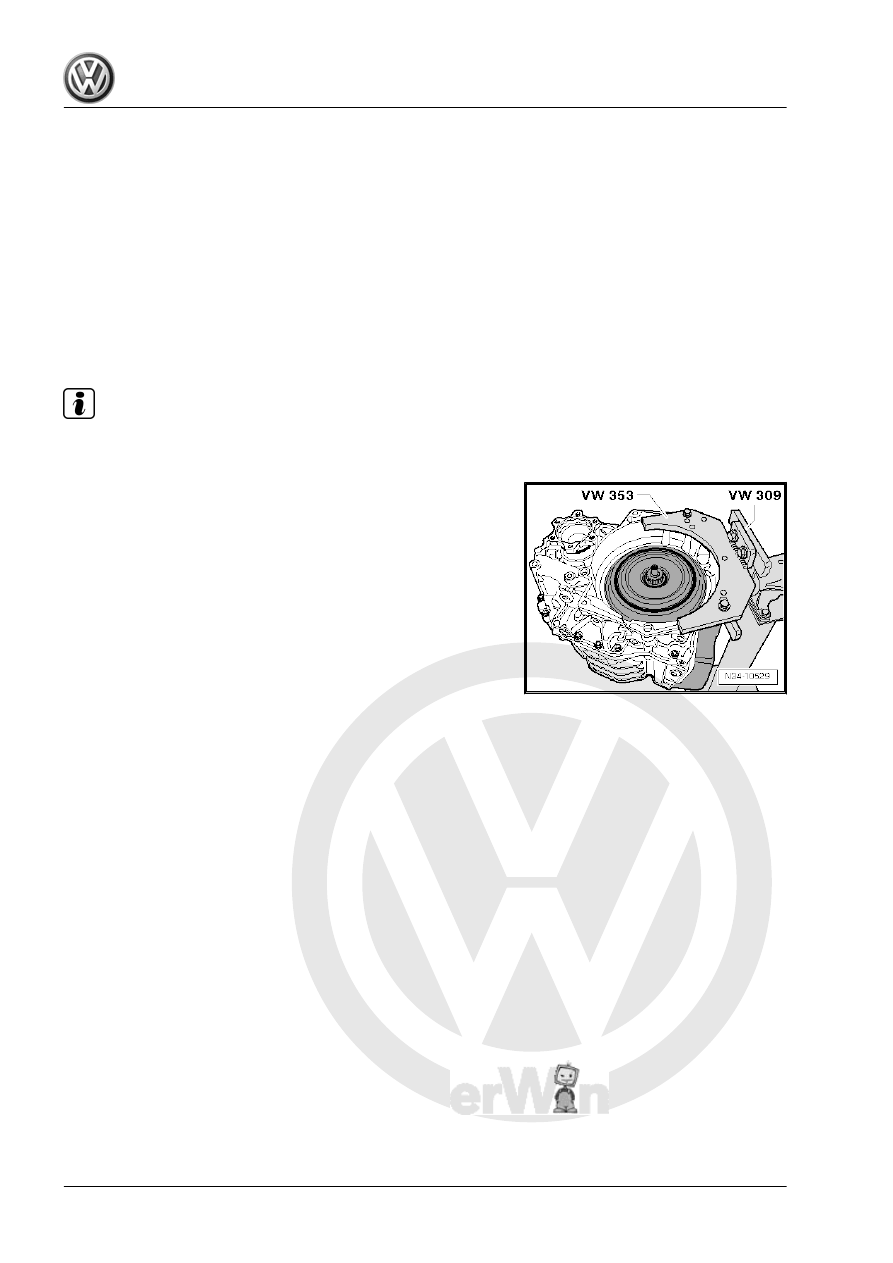
Securing on Engine and Transmis‐

sion Holder

Special tools and workshop equipment required
♦ Holding Plate - VW309-
♦ or Holding Plate - VW309A-
♦ Transmission Support - VW353-
♦ Engine and Gearbox Bracket - VAS6095A-
Remember there is oil in the transmission. Do not turn the trans‐

mission with the vents facing downward when transporting or

when it is on the assembly stand. The fluid will leak out.

Note

Remove the bleed cap if necessary and seal using suitable oil-

tight plugs.

Secure the transmission on the Transmission Support - VW353- .

8

Transmission Fluid Circuit

⇒ “8.1 Transmission Fluid Cooler, Removing and Installing”, page

105
⇒ “8.2 Transmission Fluid Pump, Removing and Installing”, page

107
⇒ “8.3 Transmission Fluid Filter, Removing and Installing”,

page 110

8.1

Transmission Fluid Cooler, Removing

and Installing

Special tools and workshop equipment required
♦ Hose Clamps - Up To 25mm - 3094-
♦ Torque Wrench 5-50Nm - VAG1331-
♦ Engine Bung Set - VAS6122-

Caution

This procedure contains mandatory replaceable parts. Refer

to component overview prior to starting procedure.

Mandatory Replacement Parts
♦ Bolts - Transmission Fluid Cooler
♦ O-rings - Transmission Fluid Cooler
Removing
– Move the selector lever into “P”.
– Remove the air filter housing:
♦ Gasoline engine. Refer to ⇒  Engine Mechanical, Fuel Injec‐

tion and Ignition; Rep. Gr.  24 ; Air Filter; Air Filter Housing,

Removing and Installing .

♦ Diesel engine. Refer to ⇒  Rep. Gr.  23 ; Air Filter; Air Filter

Housing, Removing and Installing .

– Remove the battery and the battery tray if necessary. Refer to

⇒  Electrical Equipment; Rep. Gr.  27 ; Battery; Battery, Dis‐

connecting and Connecting .

– Place lint-free cloth on to transmission fluid cooler and trans‐

mission to absorb exiting coolant.

WARNING

Risk of burning due to hot steam and hot coolant.

♦ When engine is warm, the cooling system is under pres‐

sure.

♦ Reduce pressure by cover coolant expansion tank cap

with cloths and carefully opening.

– Disconnect the coolant hoses with Hose Clamps - Up To

25mm - 3094- and remove from the transmission fluid cooler.

– Remove the bolts -A- and the transmission fluid cooler -B-.

Caution

Coolant must not drip into transmission!

Installing
– Replace the O-rings -C- on the transmission fluid cooler -B-.
– Mount the transmission fluid cooler -B-, while doing this, pay

attention to the O-rings -C-.

– Install and tighten the new bolts -arrows-.

– Attach the coolant hoses to the transmission fluid cooler and

remove the Hose Clamps - Up To 25mm - 3094- .

– Install the battery and the battery tray if they were removed

earlier. Refer to ⇒  Electrical Equipment; Rep. Gr.  27 ; Battery;

Battery, Disconnecting and Connecting .

– Install the air filter housing:
♦ Gasoline engine. Refer to ⇒  Engine Mechanical, Fuel Injec‐

tion and Ignition; Rep. Gr.  24 ; Air Filter; Air Filter Housing,

Removing and Installing .

♦ Diesel engine. Refer to ⇒  Rep. Gr.  23 ; Air Filter; Air Filter

Housing, Removing and Installing .

– Check the coolant level and add if necessary. Refer to ⇒  En‐

gine Mechanical, Fuel Injection and Ignition; Rep. Gr.  19 ;

Cooling System/Coolant; Coolant, Draining and Filling .

– After repairing, check the transmission fluid level and fill. Refer

to 

⇒ “9.1 Transmission Fluid Level, Checking”, page 113

 .

Caution

Do not start engine during coolant level test if the transmission

fluid has not been filled yet.

Tightening Specifications
♦ Transmission fluid cooler at transmission. Refer to

⇒ “6.1 Overview - Transmission”, page 101

 .

8.2

Transmission Fluid Pump, Removing

and Installing

Special tools and workshop equipment required
♦ Wrench - Pump/Injector Long Reach - T10054-
♦ Torque Wrench 1331 5-50Nm - VAG1331-
♦ Used Oil Collection and Extraction Unit - SMN372500-
Brief Description
Transmission fluid pump can be replaced without removing trans‐

mission. The vehicle must be raised and any covers installed on

bottom of front end must be removed. The control arm to sus‐

pension strut connection does not need to be separated. The

driveshaft also does not have to be removed. It is not necessary

to perform a “basic setting”. Only the dual-clutch transmission flu‐

id and transmission fluid pump cover have to be replaced.
Removing
– Loosen the left front wheel bolts.
– Raise the vehicle and remove the left front wheel.
– Remove the noise insulation. Refer to ⇒  Body Exterior; Rep.

Gr.  66 ; Noise Insulation; Overview - Noise Insulation .

– Remove the left front wheel housing liner. Refer to ⇒  Body

Exterior; Rep. Gr.  66 ; Wheel Housing Liner; Front Wheel

Housing Liner, Removing and Installing .


Content   ..  470  471  472  473   ..