Volkswagen Golf / Golf GTI / Golf Variant. Manual - part 406
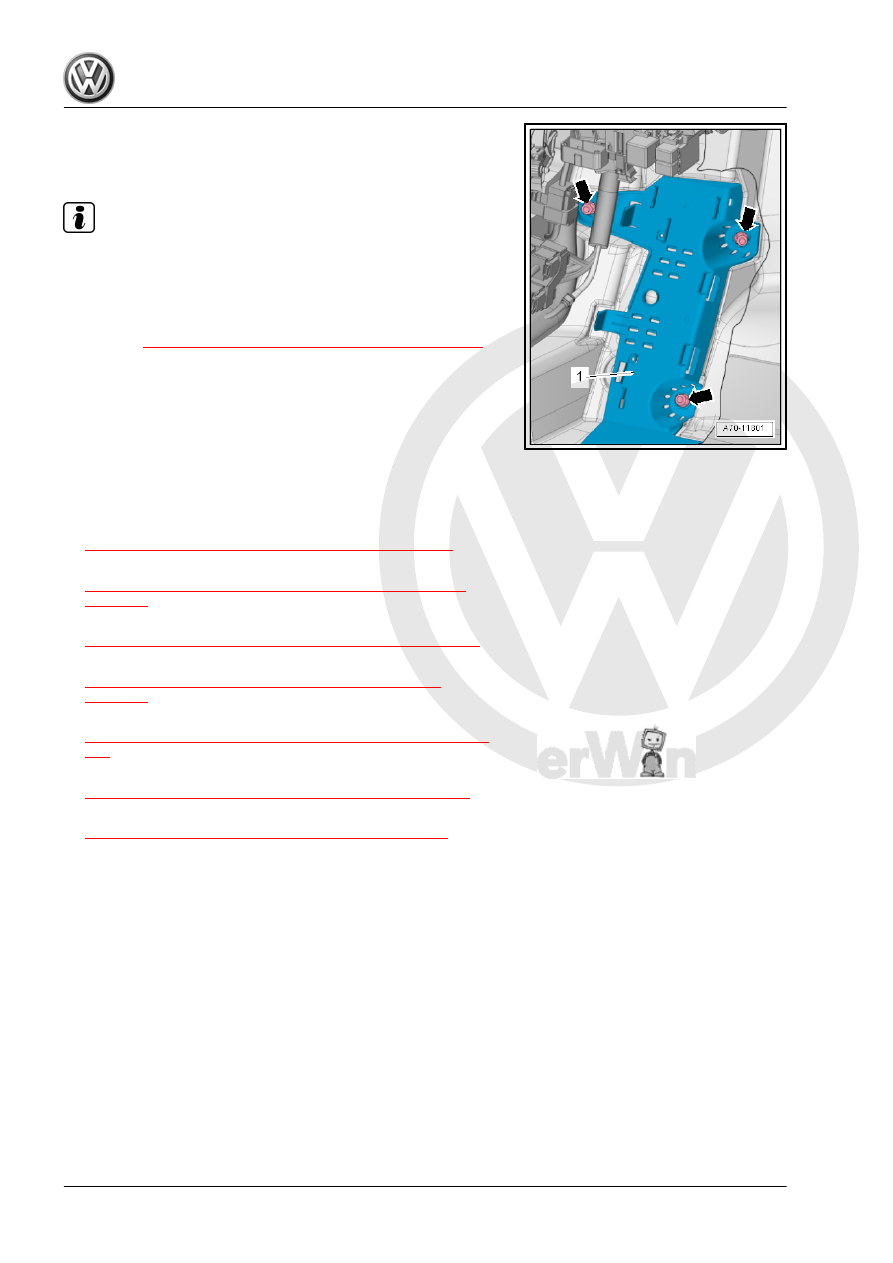
– Remove the bracket -1- from the threaded bins and remove
under the carpet.
Installing
Note
Check all the fasteners for damage and replace if necessary.
Install in reverse order of removal.
Tightening Specifications
♦ Refer to
⇒ “5.9 Overview - Foot Rest and Carpet”, page 249
5.19
Carpet, Removing and Installing
Removing
– Remove the front seats. Refer to
⇒ “2.10 Front Seat, Removing and Installing”, page 335
– Remove the rear bench seat. Refer to
⇒ “3.7 Bench Seat/Single Seat, Removing and Installing”,
– Remove the sill panels. Refer to
⇒ “5.10 Sill Panel Strip, Removing and Installing”, page 249
.
– Remove the A-pillar lower trim panel. Refer to
⇒ “5.12 A-Pillar Trim Panel, Removing and Installing”,
– Remove the front belt end fittings. Refer to
⇒ “1.11 Front Belt End Fitting, Removing and Installing”, page
.
– Remove the center console. Refer to
⇒ “3.8 Center Console, Removing and Installing”, page 59
.
– Remove the foot rest. Refer to
⇒ “5.18 Foot Rest, Removing and Installing”, page 271
– If equipped, remove the rear air guide duct. Refer to ⇒ Heat‐
ing, Ventilation and Air Conditioning; Rep. Gr. 87 ; Air Routing;
Overview - Air Routing and Air Distribution in Passenger Com‐
partment .