Volkswagen Golf / Golf GTI / Golf Variant. Manual - part 367
1.11
Front Belt End Fitting, Removing and In‐
stalling
⇒ “1.11.1 Front Belt End Fitting, Removing and Installing, without
Belt End Fitting Tensioner, 4-Door Sedan and Wagon”,
page 116
⇒ “1.11.3 Front Belt End Fitting, Removing and Installing, with Belt
End Fitting Tensioner”, page 117
1.11.1
Front Belt End Fitting, Removing and In‐
stalling, without Belt End Fitting Ten‐
sioner, 2-Door Sedan
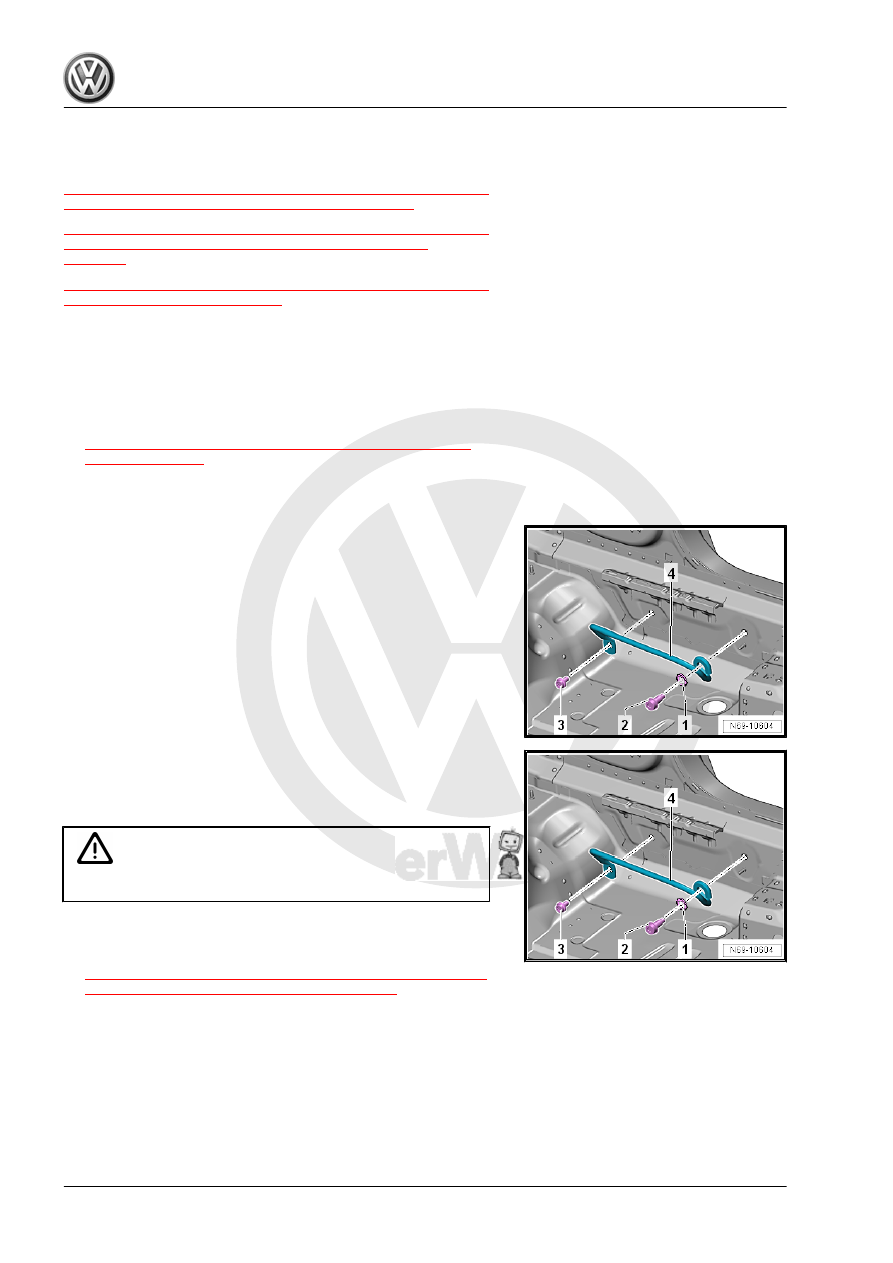
Removing
– Remove the sill panel. Refer to
⇒ “5.10.1 Sill Panel Strip, Removing and Installing, 2-Door
.
– Remove the bolt -3-.
– Remove the bolt -2- and remove with the washer -1-.
– Remove the seat belt loop from the belt end fitting -4-.
Installing
– Guide the belt end fitting -4- through the seat belt loop.
– Attach the belt end fitting with the washer -1- and the bolt -2-.
– Install the belt end fitting with the bolt -3-.
WARNING
Follow the bolt sequence exactly.
Tightening Specifications
♦ Refer to
⇒ “1.2.1 Overview - Front Three-Point Seat Belt, without Belt
End Fitting Tensioner, 2-Door Sedan”, page 83
1.11.2
Front Belt End Fitting, Removing and In‐
stalling, without Belt End Fitting Ten‐
sioner, 4-Door Sedan and Wagon
Removing
• Front seat positioned all the forward and raised all the way up.