Volkswagen Golf / Golf GTI / Golf Variant. Manual - part 333


  Index      Volkswagen     Volkswagen Golf / Golf GTI / Golf Variant - service repair manual 2013 year


Search            copyright infringement  


Content   ..  331  332  333  334   ..


Volkswagen Golf / Golf GTI / Golf Variant. Manual - part 333


Install in reverse order of removal. Note the following:

DANGER!

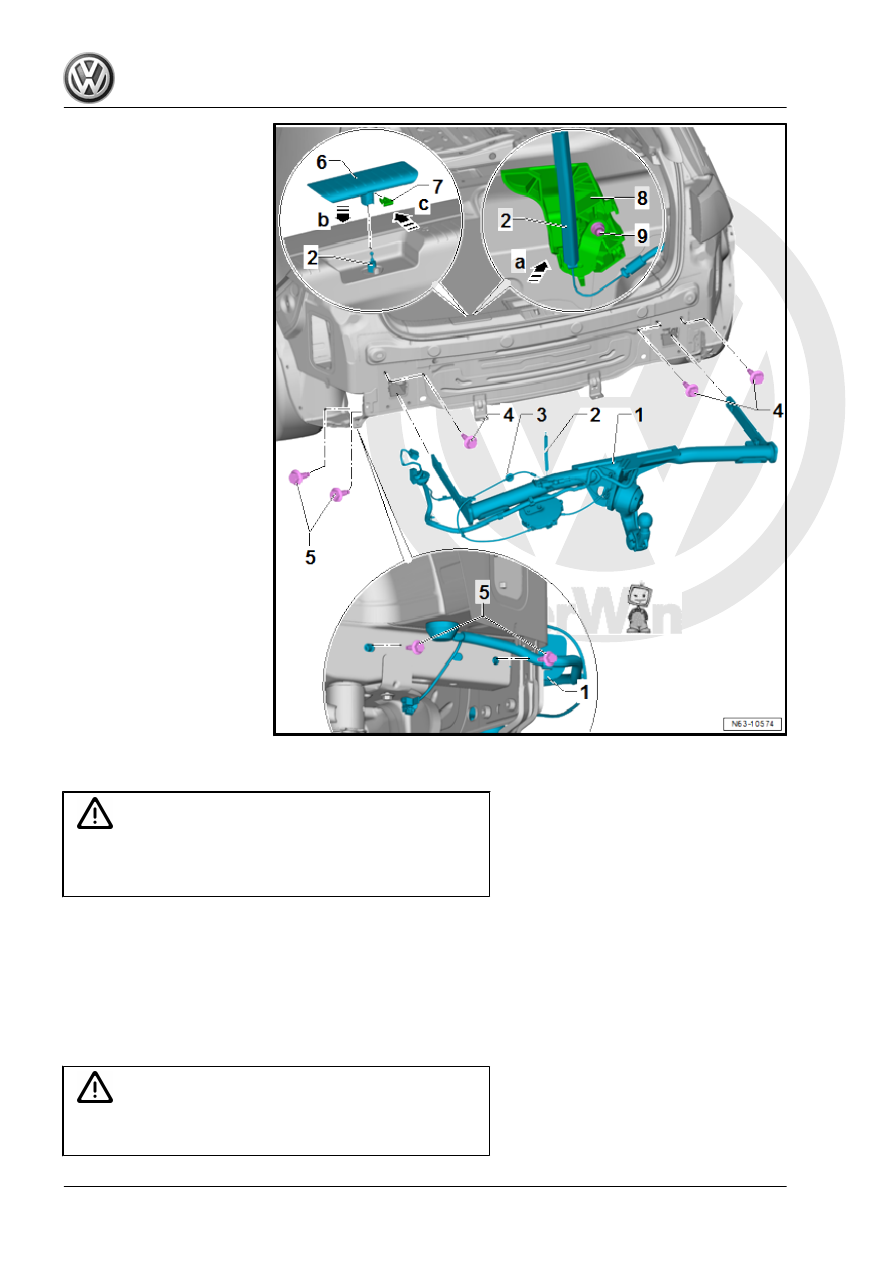
The bolts -4- are actually sealing threaded connections and

seal off the vehicle interior from exhaust gas. They must always

be installed.

The grommet -3- on the release cable must be attached correctly

in the cross panel.
– Perform a function test after installing the trailer hitch.
Tightening Specifications

10.3.2

Trailer Hitch, Removing and Installing,

Wagon

Caution

This procedure contains mandatory replaceable parts. Refer

to component overview prior to starting procedure.

Mandatory Replacement Parts
♦ Bolt - Trailer Hitch to Body (Always replace after loosening)

Note

Depending on the version, slight deviations must be considered.

Removing

– Loosen the locking mechanism with a screwdriver -3- in di‐

rection of -arrow a-.

– Remove the screwdriver in direction of -arrow b-.
– Slide the locking mechanism upward in direction of -arrow c-.
– Remove the mechanism -1- from the release cable -4- in di‐

rection of -arrow d-.

– Remove the bumper cover. Refer to

⇒ “2.5.2 Bumper Cover, Removing and Installing, Wagon”,

page 341

 .

– The locking mechanism -7- is loosened.

– Remove the release lever -6- from the release cable -2- in di‐

rection of -arrow A-.

Remove the lock carrier trim panel. Refer to ⇒  Body Interior; Rep.

Gr.  70 ; Luggage Compartment Trim Panels; Lock Carrier Trim

Panel, Removing and Installing .
– Remove the release cable -2- with the guide -3- between the

lock carrier plates in direction of -arrow C-.

– Remove the release cable with the grommet -3- from the ve‐

hicle.

– Disconnect the wire behind the forced air extraction and pull

out of the vehicle.

– Remove the screws -5-.
– Remove the trailer hitch -1- parallel from the longitudinal mem‐

bers.

Installing

Install in reverse order of removal while paying attention to the

following:

DANGER!

The bolts -2- are actually sealing threaded connections and

seal off the passenger compartment from exhaust gas. They

must always be installed.

Note

The grommet on the release cable -3- must be attached correctly in the cross panel.

The locking mechanism -6- must noticeably engage.

– Perform a function test after installing the trailer hitch.
Tightening Specifications
♦ Refer to

⇒ “10.1.2 Overview - Trailer Hitch, Wagon”, page 460


Content   ..  331  332  333  334   ..