Volkswagen Golf / Golf GTI / Golf Variant. Manual - part 280
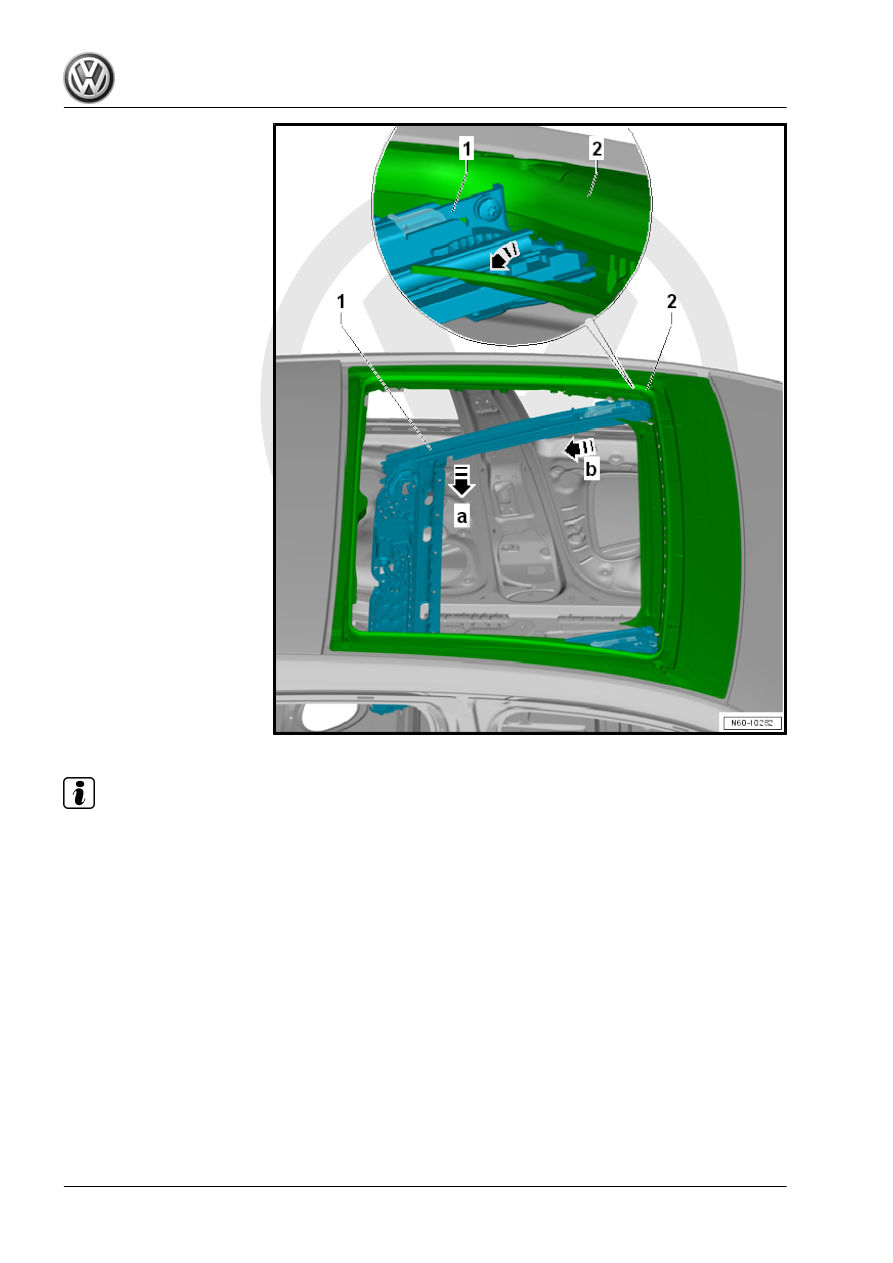
Note
Do not twist or bend the guide rails with the slotted guide rail guide, because there is no brace installed in the
front area.
– Lower the slotted guide rail guide with guide rails -1- at the rear
-arrow a-.
– Remove the slotted guide rail guide with guide rails -1- from
the sunroof frame -2- -arrow b-.
Installing