Volkswagen Golf / Golf GTI / Golf Variant. Manual - part 257
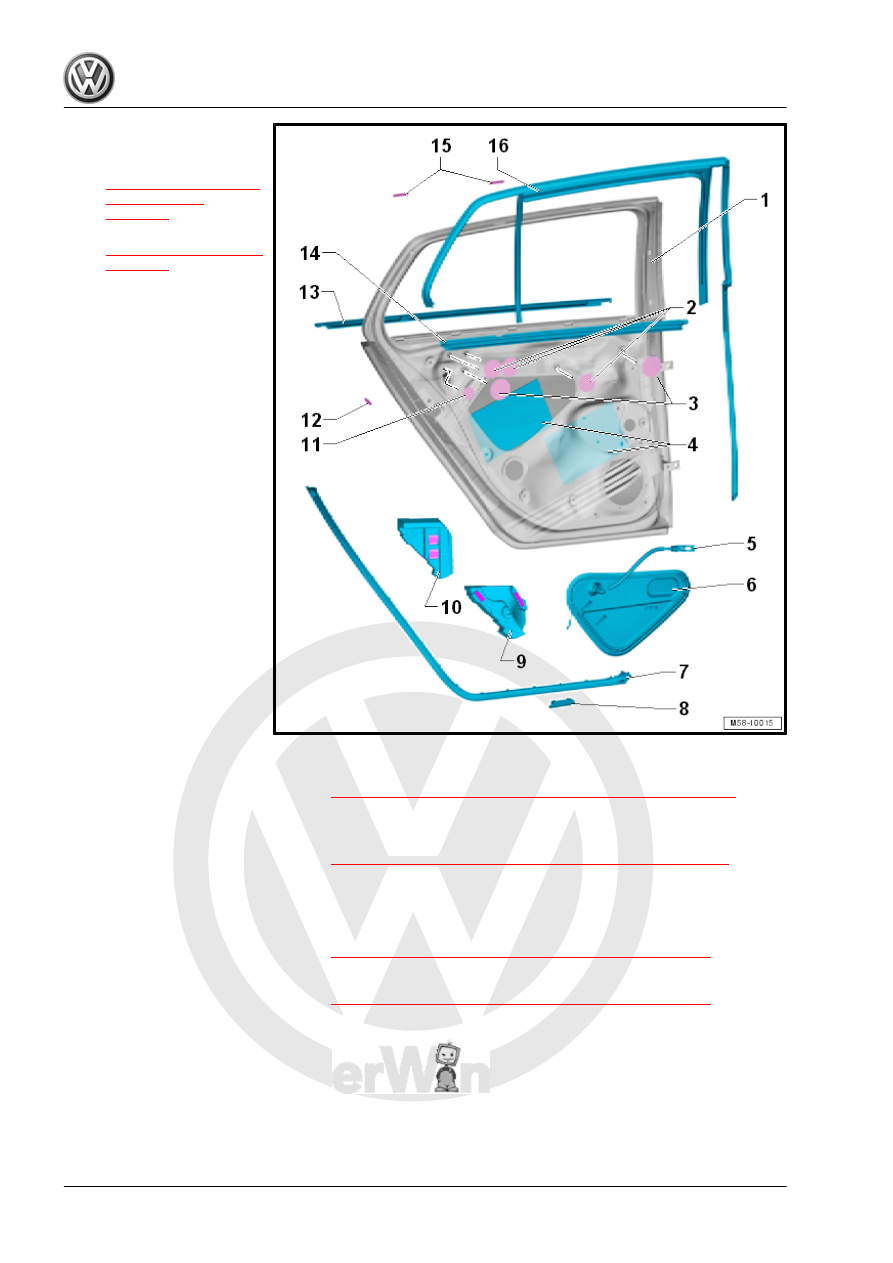
1 - Rear Door
❑ Removing and instal‐
ling. Refer to
❑ Adjusting. Refer to
2 - Sticker
❑ Quantity: 3
❑ 28 mm diameter
❑ Use commercially avail‐
able duct tape if needed
3 - Sticker
❑ Quantity: 2
❑ 32 mm diameter
❑ Use commercially avail‐
able duct tape if needed
4 - Insulation
❑ Self-adhesive
❑ Installing:
– Cut to size if necessary,
200 mm x 100 mm. Po‐
sition as shown in the il‐
lustration.
– Warm using the Wiring
Harness Repair Set -
Hot Air Blower -
VAS1978/14A- and
then press firmly onto
the outer door panel.
5 - Release Cable
6 - Door Inner Cover
❑ Removing and installing. Refer to
⇒ “2.8 Door Inner Cover, Removing and Installing”, page 170
7 - Outer Door Seal
❑ Secured with clips on the door
❑ Removing and installing. Refer to
⇒ “1.7 Outer Door Seal, Removing and Installing”, page 157
8 - Bracket
❑ Component of the outer door seal
9 - Inner Outer Cover
❑ Removing and installing. Refer to
⇒ “2.17 Outer Cover, Removing and Installing”, page 188
10 - Outer External Cushion
❑ Removing and installing. Refer to
⇒ “2.17 Outer Cover, Removing and Installing”, page 188
11 - Sticker
❑ Quantity: 1
❑ 19 mm diameter
❑ Use commercially available duct tape if needed
12 - Sticker
❑ Quantity: 1
❑ 15 mm diameter