Volkswagen Golf / Golf GTI / Golf Variant. Manual - part 234
Note
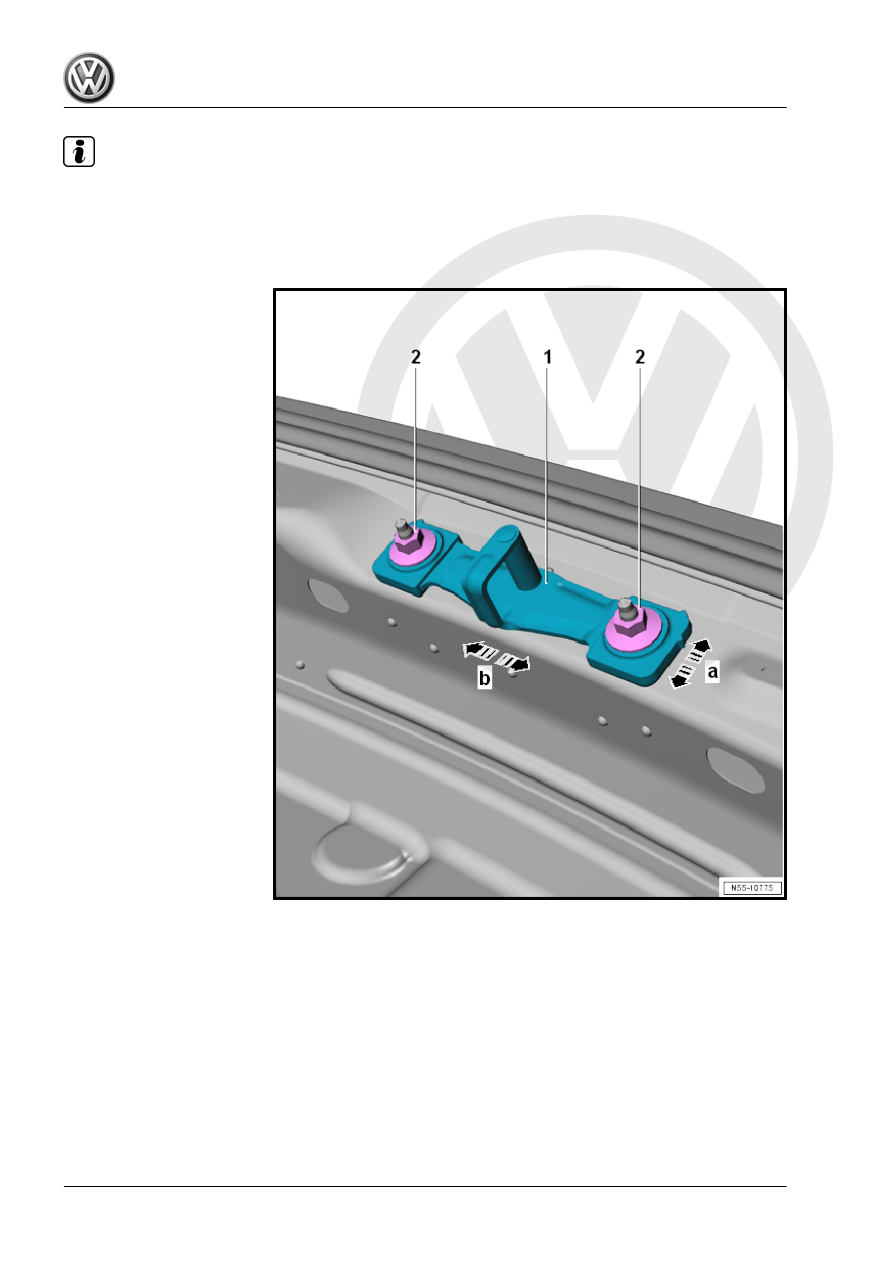
♦
By loosening the hex nuts -2-, the catch -1- can be moved inside the oversized holes in direction of
-arrows a and b-.
♦
Adjust the catch -1- so that the rear lid latch opening with the rotary latch engages with the center of the
catch -1-.
– Remove the lock carrier trim panel. Refer to ⇒ Body Interior;
Rep. Gr. 70 ; Luggage Compartment Trim Panels; Lock Car‐
rier Trim Panel, Removing and Installing .
– Loosen the hex nuts -2-.
– Move the catch -1- into the upper position and tighten the hex
nuts -2-.
– Close the rear lid and check the adjustment.
Tightening Specifications
2.11
Rear Lid Seal, Removing and Installing
The seal on the rear lid is equipped at the factory with a sealant,
applied to body flange and then rolled on.