Volkswagen Golf / Golf GTI / Jetta. Manual - part 462


  Index      Volkswagen     Volkswagen Golf / Golf GTI / Jetta - service repair manual 1999-2005 year


Search            copyright infringement  


Content   ..  460  461  462  463   ..


Volkswagen Golf / Golf GTI / Jetta. Manual - part 462


46-88


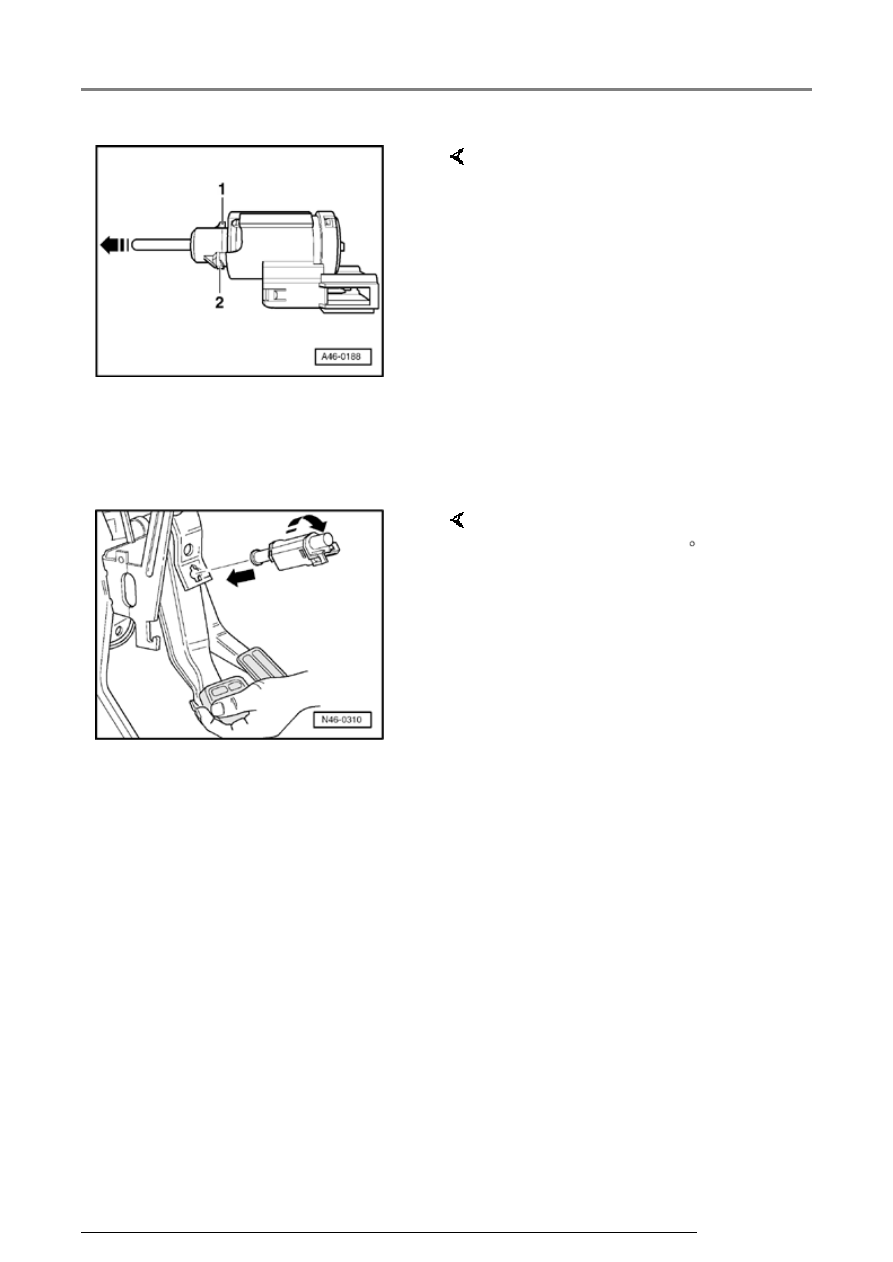
-  Before installing, pull out plunger 

(arrow) completely. 

-  Apply a light coat of lubricant Part 

No. G 052 142 A2 to end of 
plunger. 

-  Hold brake pedal in up position 

(against stop). 

-  Note orientation of retainer tabs -

1- and -2- on switch and carefully 
insert switch into retainer 
mounting hole. 

-  Push switch in and seat fully into 

opening (pressing plunger against 
brake pedal to adjust). 


Note:  

The above action turns the plunger 
shoe into the correct orientation to 
make electrical contacts in switch 
operate, as well as locks in the 
plunger adjustment against the 
brake pedal.
 

CAUTION!


When installing, switch must be 
rotated until it is fully locked and 
the electrical connector is in the 
horizontal position. Inspect to 
ensure internal stop pin on 
retaining collar is fully seated 
against outer shell.


-  Once seated, secure switch by 

turning clockwise 45 . 

-  Reconnect electrical connector to 

switch. 

-  Check function of brake light 

switch. 

Brake pedal - assembly overview

47-1


Front 
brake 
calipers, 
servicing  

FS III front 
brake 
calipers, 
servicing 


Note: 

 When 

carrying 
out repairs 
install all 
parts 
supplied in 
repair kit.
 

 New brake 

calipers 
are filled 
with brake 
fluid and 
are pre-
bled.
 

 Apply thin 

coat of 
lubricant G 
052 150 
A2 to 
brake 
cylinders, 
pistons 
and seals.
 

- 

Protective 
seal
 

2 - Bleed 

valve 

 Apply 

thin coat 
of 
assembly 
lubricant 
G 052 
150 A2 

Front brake calipers, servicing

to 
threads 
before 
screwing 
in 

3 - Cap 

 Insert in 

mounting 
bushing 

4 - Guide 

pins, 30 
Nm 
(22.1 ft. 
lb)
 

Front brake calipers, servicing

47-2


5 - Mounting 

bushing 

 Insert 

into 
brake 
caliper 
housing 

6 - Brake 

caliper 
housing
 

- 

Protective 
seal
 

 Do not 

damage 
when 
inserting 
piston 

8 - Piston 

 Removing 

and 
installing 


Page 

47-3


 Apply 

thin coat 
of 
assembly 
lubricant 
G 052 
150 A2 
to piston 
before 
inserting 

9 - Seal 

 Removing 

and 
installing 


Page 

47-3


Front brake calipers, servicing


Content   ..  460  461  462  463   ..