Toyota RAV4 Hybrid (2021 year). Manual in english - part 1
16
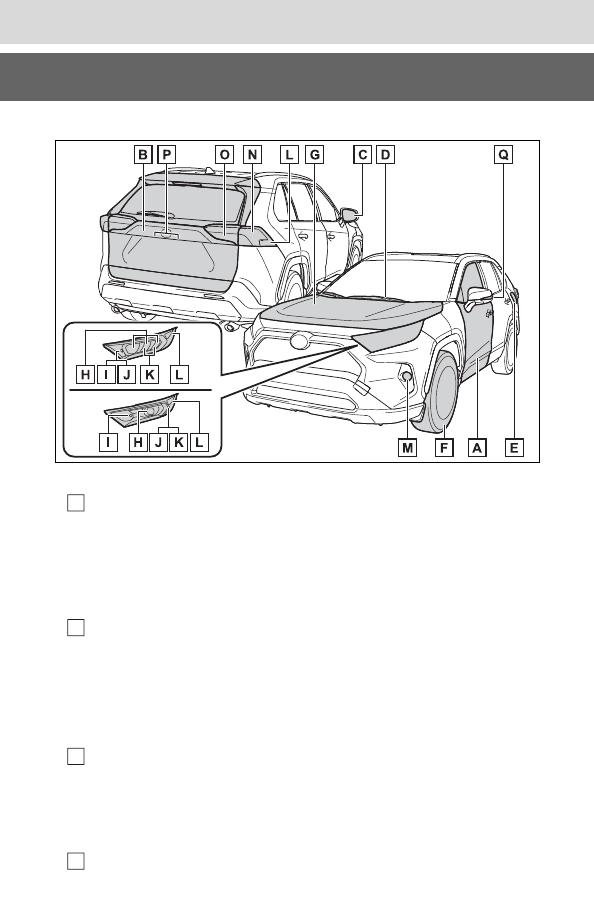
Pictorial index
Pictorial index
■
Exterior
The shape of the headlights may differ depending on the grade, etc.
Side doors ..........................................................................P.127
Locking/unlocking ................................................................P.127
Opening/closing the side windows.......................................P.176
Locking/unlocking by using the mechanical key ..........P.128, 670
Warning messages ..............................................................P.654
Back door ...........................................................................P.133
Locking/unlocking ................................................................P.134
Opening from inside the cabin
*
............................................P.137
Opening from outside...................................................P.135, 137
Warning messages ..............................................................P.654
Outside rear view mirrors .................................................P.174
Adjusting the mirror angle ....................................................P.174
Folding the mirrors ...............................................................P.174
Defogging the mirrors
*
.........................................................P.526
Windshield wipers .............................................................P.236
A
B
C
D