Toyota Land Cruiser (2021 year). Manual in english - part 1
16
LC200_OM_OM60T03U_(U)
Pictorial index
■
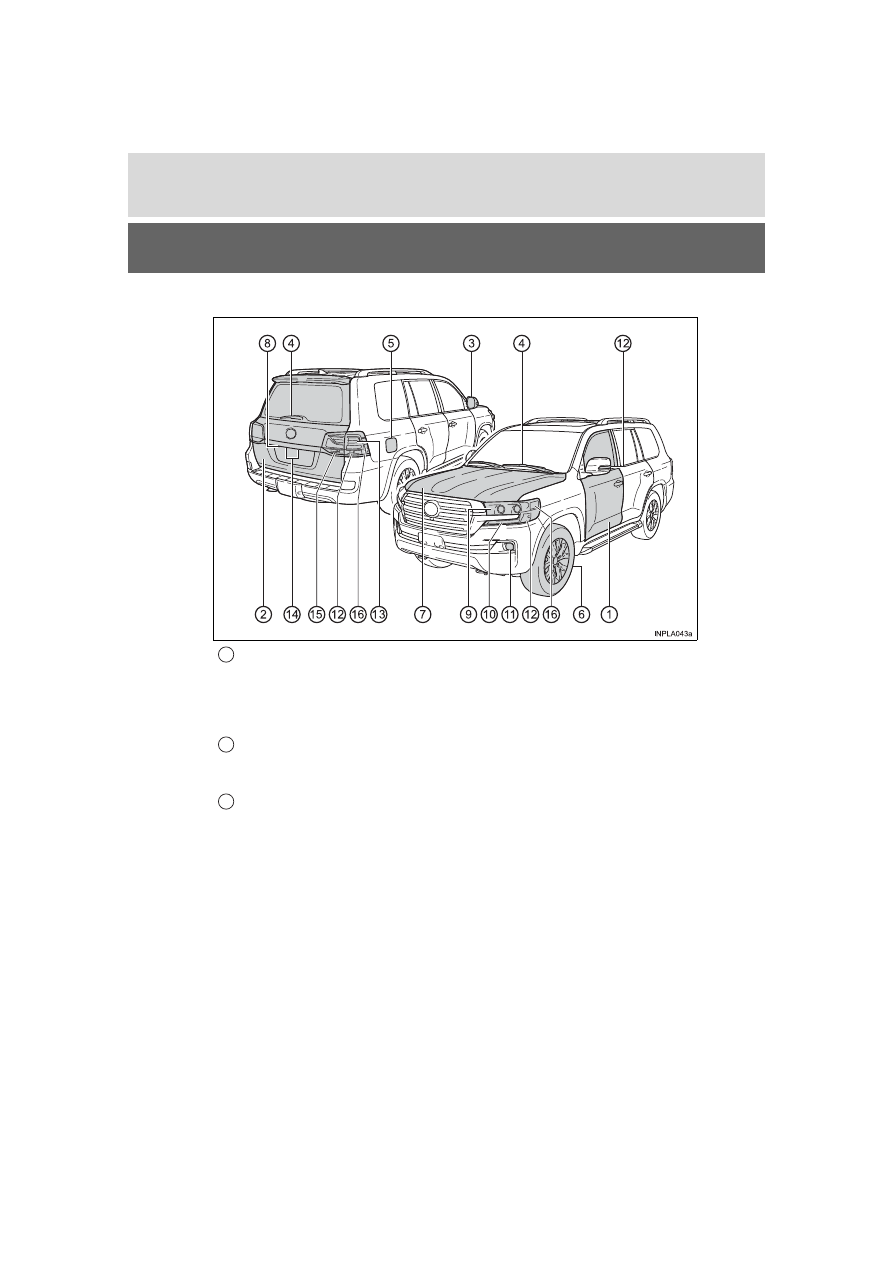
Exterior
Side doors . . . . . . . . . . . . . . . . . . . . . . . . . . . . . . . . . . . . . . . P. 118
Locking/unlocking . . . . . . . . . . . . . . . . . . . . . . . . . . . . . . . . . . P. 118
Opening/closing the door glasses . . . . . . . . . . . . . . . . . . . . . . P. 169
Locking/unlocking by using the mechanical key . . . . . . . . . . . P. 560
Warning lights/warning messages . . . . . . . . . . . . . . . . . . P. 532, 539
Back door . . . . . . . . . . . . . . . . . . . . . . . . . . . . . . . . . . . . . . . . P. 126
Opening from outside . . . . . . . . . . . . . . . . . . . . . . . . . . . . . . . P. 127
Warning lights/warning messages . . . . . . . . . . . . . . . . . . P. 532, 539
Outside rear view mirrors . . . . . . . . . . . . . . . . . . . . . . . . . . . P. 165
Adjusting the mirror angle . . . . . . . . . . . . . . . . . . . . . . . . . . . . P. 165
Folding the mirrors. . . . . . . . . . . . . . . . . . . . . . . . . . . . . . . . . . P. 165
Driving position memory . . . . . . . . . . . . . . . . . . . . . . . . . . . . . P. 154
Defogging the mirrors . . . . . . . . . . . . . . . . . . . . . . . . . . . . . . . P. 400
1
2
3