Toyota Tundra (2015 year). Manual - part 2394


  Index      Toyota     Toyota Tundra (2015 year) - Service and Repair Manual


Search            copyright infringement  


Content   ..  2392  2393  2394  2395   ..


Toyota Tundra (2015 year). Manual - part 2394


NOTICE:

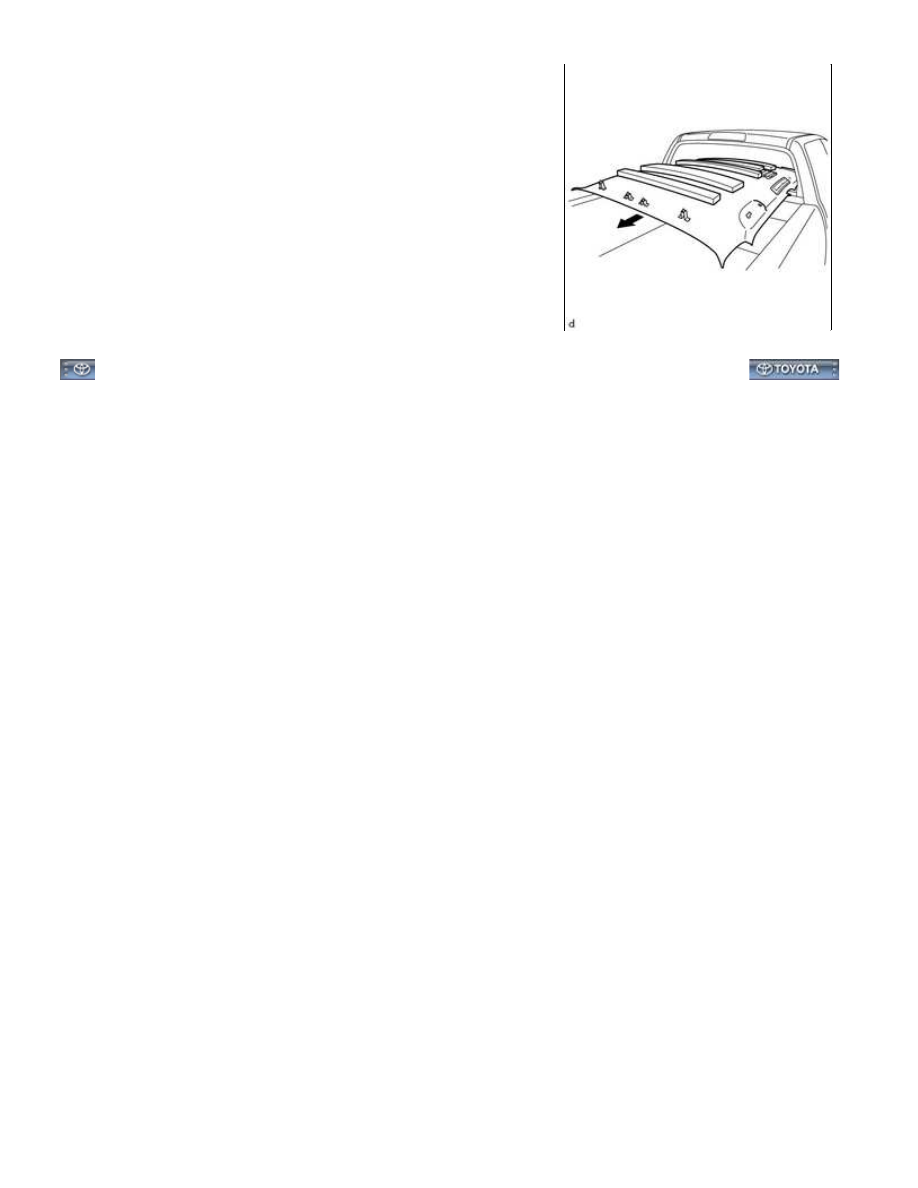
INTERIOR: ROOF HEADLINING (for CrewMax): REMOVAL; 2015 M...

Last Modified: 9-16-2014

6.6 A

Doc ID: RM000002W7W00YX

Model Year: 2015

Model: Tundra

Prod Date Range: [08/2014 -           ]

Title: INTERIOR: ROOF HEADLINING (for CrewMax): INSTALLATION; 2015 MY Tundra [08/2014 -        ]

INSTALLATION

HINT:

A bolt without a torque specification is shown in the standard bolt chart 


.

1. INSTALL ROOF HEADLINING ASSEMBLY

NOTICE:

(b) w/o Sliding Roof:

(d) Attach the 4 wire harness clamps and connect the connector to

the front pillar LH.

(e) w/ EC Mirror:

Connect the connector.

2. INSTALL ASSIST GRIP SUB-ASSEMBLY 

3. INSTALL VISOR HOLDER 

4. INSTALL VISOR ASSEMBLY LH 

5. INSTALL VISOR ASSEMBLY RH

HINT:

Use the same procedure described for the LH side.

6. INSTALL ROOM LIGHT ASSEMBLY 

7. INSTALL INNER REAR VIEW MIRROR STAY HOLDER COVER (w/ EC Mirror) 

8. INSTALL ROOF CONSOLE BOX ASSEMBLY 

INTERIOR: ROOF HEADLINING (for CrewMax): INSTALLATION; 20...

9. INSTALL REAR SHOULDER BELT ANCHOR PLATE

SUB-ASSEMBLY LH

(a) Slide the rear shoulder belt anchor plate sub-assembly LH in the

direction shown in the illustration and attach the 4 claws to install

it.

10. INSTALL REAR SHOULDER BELT ANCHOR PLATE SUB-ASSEMBLY RH

HINT:

Use the same procedure described for the LH side.

11. INSTALL FRONT QUARTER TRIM PANEL ASSEMBLY LH

(c) Install the 2 bolts.

(d) Attach the claw to close the cover.

12. INSTALL FRONT QUARTER TRIM PANEL ASSEMBLY RH

HINT:

Use the same procedure described for the LH side.

13. INSTALL LOWER QUARTER TRIM PANEL ASSEMBLY LH

(a) Attach the 5 clips to install the lower quarter trim panel assembly LH.

(b) Connect the rear seat outer belt assembly with the bolt.

Torque:

42 N·m {428 kgf·cm, 31ft·lbf}

(c) Attach the 2 claws to install the cover.

14. INSTALL LOWER QUARTER TRIM PANEL ASSEMBLY RH

HINT:

Use the same procedure described for the LH side.

INTERIOR: ROOF HEADLINING (for CrewMax): INSTALLATION; 20...

15. INSTALL NO. 1 BOX SPEAKER ASSEMBLY (w/ Woofer) 

16. INSTALL FRONT SHOULDER BELT ANCHOR PLATE SUB-ASSEMBLY LH 

17. INSTALL FRONT SHOULDER BELT ANCHOR PLATE SUB-ASSEMBLY RH

HINT:

Use the same procedure described for the LH side.

18. INSTALL CENTER PILLAR GARNISH LH 

19. INSTALL CENTER PILLAR GARNISH RH

HINT:

Use the same procedure described for the LH side.

20. INSTALL LOWER CENTER PILLAR GARNISH LH 

21. INSTALL LOWER CENTER PILLAR GARNISH RH

HINT:

Use the same procedure described for the LH side.

22. INSTALL FRONT PILLAR GARNISH LH 

23. INSTALL FRONT PILLAR GARNISH RH 

24. INSTALL REAR DOOR OPENING TRIM WEATHERSTRIP LH

(a) Install the rear door opening trim weatherstrip LH.

25. INSTALL REAR DOOR OPENING TRIM WEATHERSTRIP RH

HINT:

Use the same procedure described for the LH side.

26. INSTALL FRONT DOOR OPENING TRIM WEATHERSTRIP LH

(a) Install the front door opening trim weatherstrip LH.

27. INSTALL FRONT DOOR OPENING TRIM WEATHERSTRIP RH

HINT:

Use the same procedure described for the LH side.

28. INSTALL COWL SIDE TRIM BOARD LH 

29. INSTALL COWL SIDE TRIM BOARD RH

HINT:

Use the same procedure described for the LH side.

30. INSTALL REAR DOOR SCUFF PLATE LH

(a) Attach the 8 claws and 2 clips to install the rear door scuff plate LH.

31. INSTALL REAR DOOR SCUFF PLATE RH

HINT:

Use the same procedure described for the LH side.

INTERIOR: ROOF HEADLINING (for CrewMax): INSTALLATION; 20...


Content   ..  2392  2393  2394  2395   ..