Toyota Tundra (2015 year). Manual - part 2393


  Index      Toyota     Toyota Tundra (2015 year) - Service and Repair Manual


Search            copyright infringement  


Content   ..  2391  2392  2393  2394   ..


Toyota Tundra (2015 year). Manual - part 2393


17. REMOVE REAR DOOR OPENING TRIM WEATHERSTRIP LH

(a) Remove the rear door opening trim weatherstrip LH.

18. REMOVE REAR DOOR OPENING TRIM WEATHERSTRIP RH

HINT:

Use the same procedure described for the LH side.

19. REMOVE FRONT PILLAR GARNISH LH 

20. REMOVE FRONT PILLAR GARNISH RH 

21. REMOVE LOWER CENTER PILLAR GARNISH LH 

22. REMOVE LOWER CENTER PILLAR GARNISH RH

HINT:

Use the same procedure described for the LH side.

23. REMOVE CENTER PILLAR GARNISH LH 

24. REMOVE CENTER PILLAR GARNISH RH

HINT:

Use the same procedure described for the LH side.

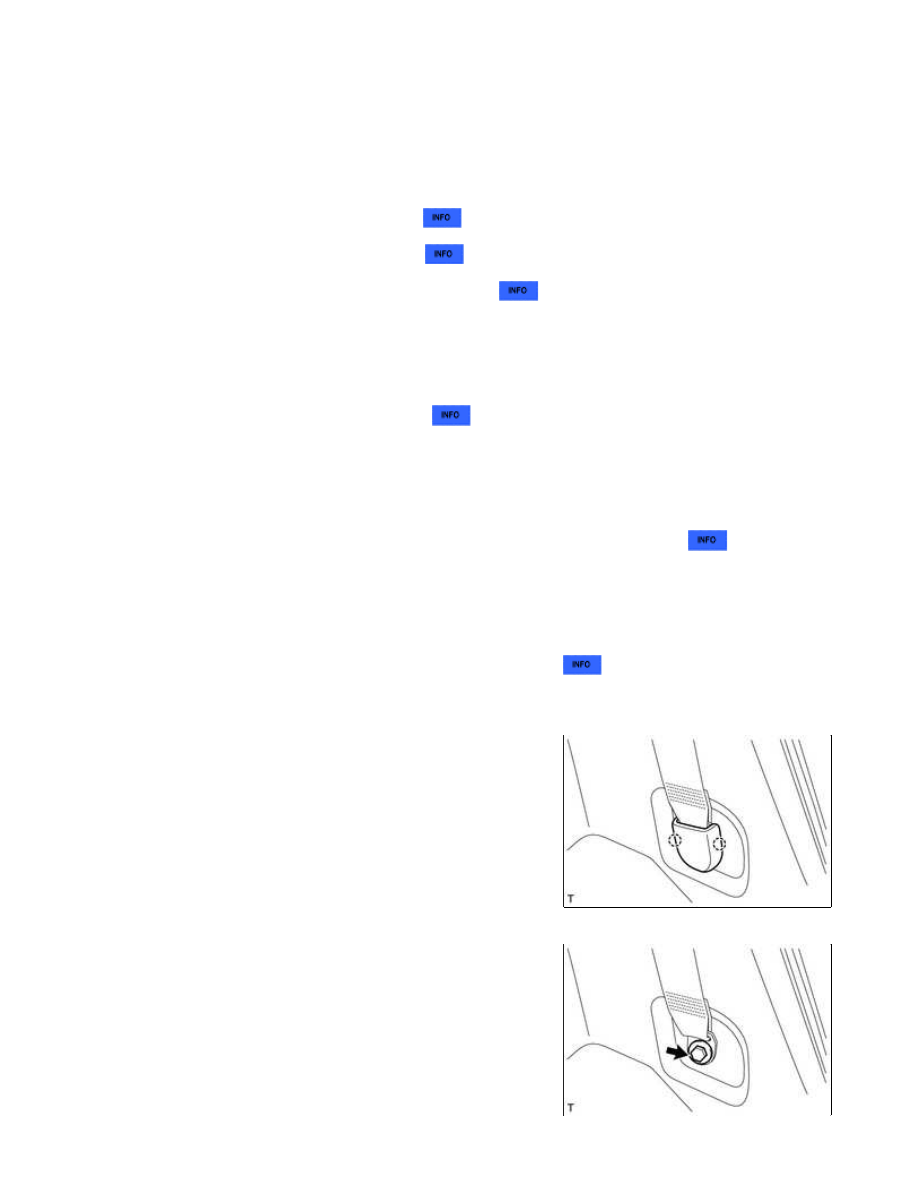
25. REMOVE FRONT SHOULDER BELT ANCHOR PLATE SUB-ASSEMBLY LH 

26. REMOVE FRONT SHOULDER BELT ANCHOR PLATE SUB-ASSEMBLY RH

HINT:

Use the same procedure described for the LH side.

27. REMOVE NO. 1 BOX SPEAKER ASSEMBLY (w/ Woofer) 

28. REMOVE LOWER QUARTER TRIM PANEL ASSEMBLY LH

(a) Detach the 2 claws and remove the cover.

(b) Loosen the bolt and disconnect the rear seat outer belt

assembly.

INTERIOR: ROOF HEADLINING (for CrewMax): REMOVAL; 2015 M...

(c) Detach the 5 clips and remove the lower quarter trim panel

assembly LH.

29. REMOVE LOWER QUARTER TRIM PANEL ASSEMBLY RH

HINT:

Use the same procedure described for the LH side.

30. REMOVE FRONT QUARTER TRIM PANEL ASSEMBLY LH

(a) Apply protective tape as shown in the illustration.

Text in Illustration

*1

Protective Tape

(b) Using a screwdriver, detach the claw and open the cover.

HINT:

Tape the screwdriver tip before use.

(c) Remove the 2 bolts.

(d) Detach the 4 clips and remove the front quarter trim panel assembly LH.

INTERIOR: ROOF HEADLINING (for CrewMax): REMOVAL; 2015 M...

HINT:

Use the same procedure described for the LH side.

32. REMOVE REAR SHOULDER BELT ANCHOR PLATE

SUB-ASSEMBLY LH

HINT:

Use the same procedure described for the LH side.

34. REMOVE ROOF CONSOLE BOX ASSEMBLY 

35. REMOVE INNER REAR VIEW MIRROR STAY HOLDER COVER (w/ EC Mirror) 

36. REMOVE ROOM LIGHT ASSEMBLY 

37. REMOVE VISOR ASSEMBLY LH 

38. REMOVE VISOR ASSEMBLY RH

HINT:

Use the same procedure described for the LH side.

39. REMOVE VISOR HOLDER 

40. REMOVE ASSIST GRIP SUB-ASSEMBLY 

41. REMOVE ROOF HEADLINING ASSEMBLY

(a) w/ EC Mirror:

Disconnect the connector.

INTERIOR: ROOF HEADLINING (for CrewMax): REMOVAL; 2015 M...

(b) w/ Sliding Roof:

Disconnect the connector.

(c) Disconnect the connector and detach the 4 wire harness clamps

from the front pillar LH.

(d) w/o Sliding Roof:

*A

w/o Sliding Roof

*2

w/ Sliding Roof

INTERIOR: ROOF HEADLINING (for CrewMax): REMOVAL; 2015 M...


Content   ..  2391  2392  2393  2394   ..