Toyota Tundra (2015 year). Manual - part 1726


  Index      Toyota     Toyota Tundra (2015 year) - Service and Repair Manual


Search            copyright infringement  


Content   ..  1724  1725  1726  1727   ..


Toyota Tundra (2015 year). Manual - part 1726


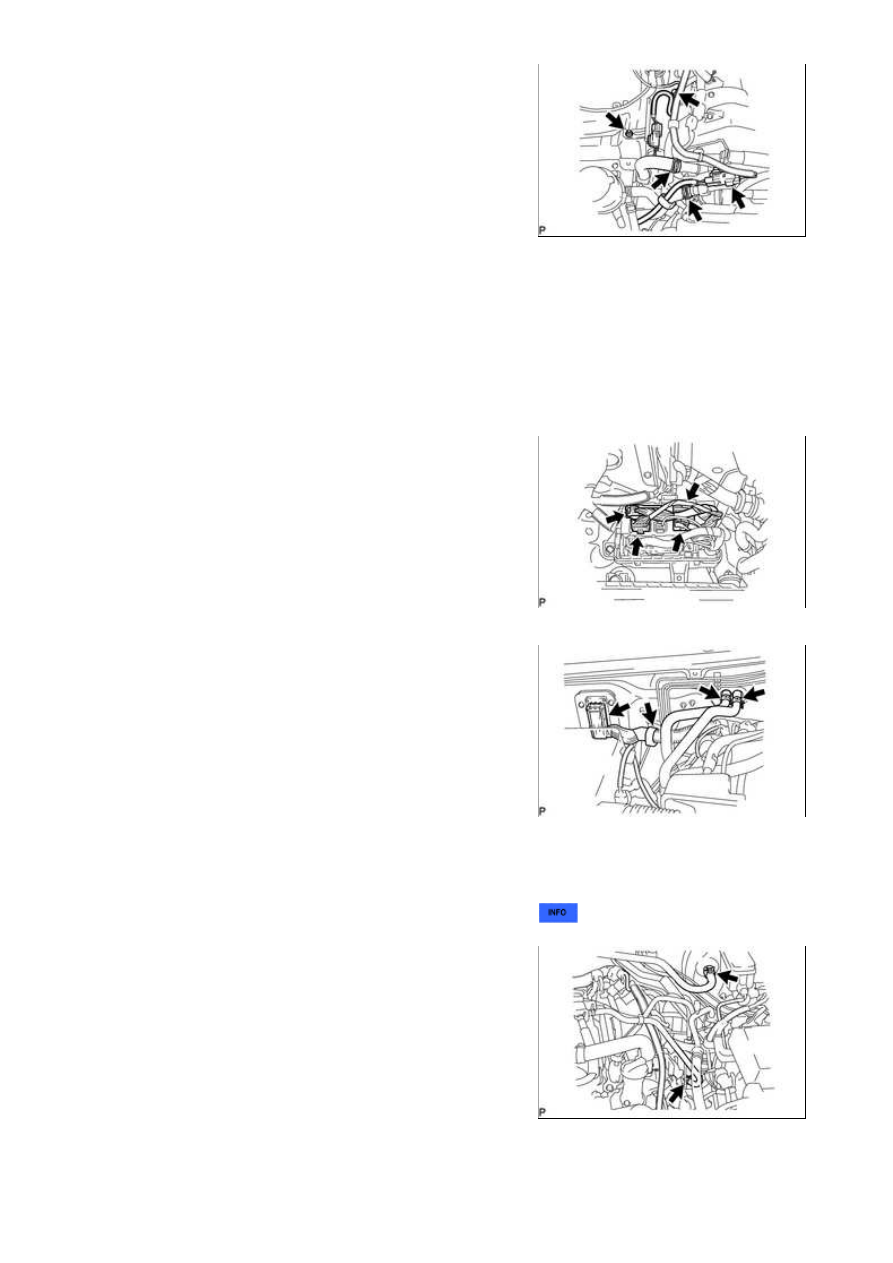
(g) Connect the 2 air injection system hoses.

(h) Install the ground wire with the bolt.

Torque:

8.0 N·m {82 kgf·cm, 71in·lbf}

(i) Connect the 2 air pump connectors and install the connector bracket with the nut.

Torque:

6.0 N·m {61 kgf·cm, 53in·lbf}

(j) Connect the 4 connectors to the connector holder block.

(k) Connect the heater hoses.

(l) Connect the ECM connector and clamp.

HINT:

Refer to the following procedures to connect the ECM connector 


.

(m) Connect the union to check valve hose.

(n) Connect the purge line hose.

22. CONNECT FUEL MAIN AND RETURN HOSE

3UR-FBE ENGINE MECHANICAL: ENGINE ASSEMBLY: INSTALL...

(a) Connect the fuel main and return hoses 


.

(b) Install the fuel pipe clamp.

23. INSTALL RADIATOR ASSEMBLY 

24. INSTALL FAN SHROUD 

25. INSTALL FAN & GENERATOR V BELT 

26. INSTALL RADIATOR SIDE DEFLECTOR LH 

27. INSTALL RADIATOR SIDE DEFLECTOR RH 

28. INSTALL RADIATOR GRILLE SUB-ASSEMBLY 

29. INSTALL OUTLET RADIATOR HOSE

30. INSTALL INLET RADIATOR HOSE

31. INSTALL AIR CLEANER ASSEMBLY

(a) Install the air cleaner case with the 2 bolts.

Torque:

5.0 N·m {51 kgf·cm, 44in·lbf}

(b) Install the air cleaner element onto the air cleaner case.

3UR-FBE ENGINE MECHANICAL: ENGINE ASSEMBLY: INSTALL...

(c) Install the air cleaner cap.

(1) for Type A:

Install the air cleaner cap and fasten the 4 hook clamps.

(2) for Type B:

Install the air cleaner cap and fasten the 2 hook clamps.

(3) Connect the MAF meter connector.

(4) Attach the wire harness clamp.

32. INSTALL AIR CLEANER HOSE ASSEMBLY

(a) Install the air cleaner hose with the 2 clamps.

Torque:

4.0 N·m {41 kgf·cm, 35in·lbf}

(b) Connect the vacuum hose.

(c) Connect the ventilation hose.

33. ADD ENGINE OIL 

34. ADD ENGINE COOLANT 

35. CONNECT CABLE TO NEGATIVE BATTERY TERMINAL

36. INSPECT FOR OIL LEAK

(a) Inspect for engine oil leak 


.

37. INSPECT FOR COOLANT LEAK 

38. INSPECT FOR EXHAUST GAS LEAK 

39. INSPECT FOR FUEL LEAK 

40. INSPECT SHIFT LEVER POSITION

(a) for Column Shift:

Refer to the following procedures 


.

(b) for Floor Shift:

Refer to the following procedures 


.

3UR-FBE ENGINE MECHANICAL: ENGINE ASSEMBLY: INSTALL...

41. INSTALL V-BANK COVER SUB-ASSEMBLY

(a) Attach the 2 V-bank cover hooks to the bracket. Then align

the 2 V-bank cover grommets with the 2 pins, and press

down on the V-bank cover to attach the pins.

42. INSTALL COWL TOP OUTER PANEL SUB-ASSEMBLY 

43. INSTALL WINDSHIELD WIPER MOTOR ASSEMBLY

(a) Install the windshield wiper motor 


.

44. INSTALL HOOD SUB-ASSEMBLY

(a) Install the hood with the 4 bolts.

Torque:

13 N·m {133 kgf·cm, 10ft·lbf}

Install the hood support while supporting the hood by hand.

(c) Attach the hood support clips.

NOTICE:

Check that the hood support is engaged in the ball joint and that it cannot be pulled out.

45. ADJUST HOOD SUB-ASSEMBLY 

46. INSTALL NO. 1 ENGINE UNDER COVER 

47. INSPECT IGNITION TIMING 

48. INSPECT ENGINE IDLE SPEED 

49. INSPECT CO/HC 

3UR-FBE ENGINE MECHANICAL: ENGINE ASSEMBLY: INSTALL...


Content   ..  1724  1725  1726  1727   ..