Subaru XV Crosstrek Hybrid (2016 year). Instruction - part 8
Keys and doors/Door locks
Door locks
& Locking and unlocking from
the outside
NOTE
If you unlock the driver
’s door with a
key (including a mechanical key) and
open the door while the alarm system
is armed, the alarm system is triggered
and the vehicle
’s horn sounds. In this
case, perform any of the following
operations:
. Press any button on the access key
(except when the access key battery is
discharged).
. Press the push-button ignition
switch to
“ACC”.
. Carry the access key and perform
either of the following procedures.
– Grip the front door handle
– Press the rear gate opener button
For details about the alarm system,
refer to
“Alarm system” F2-21.
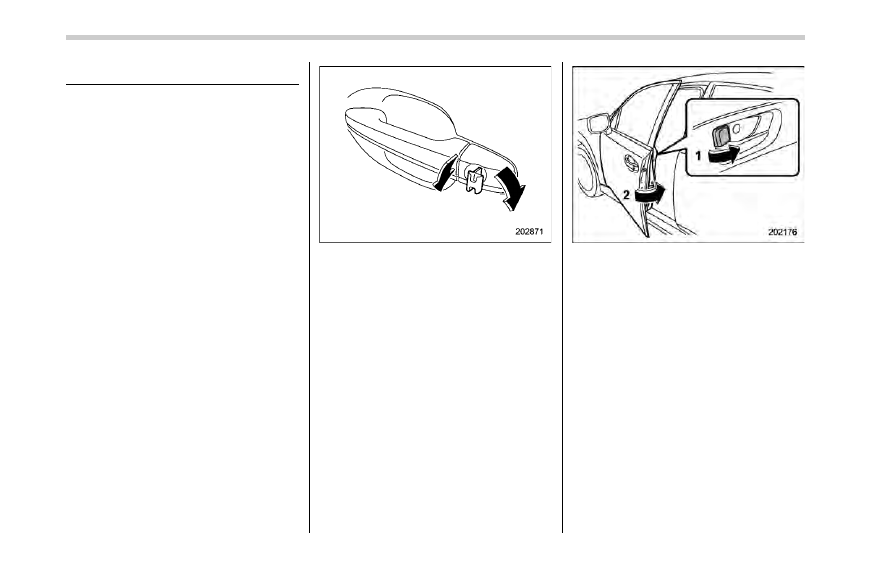
To lock the driver
’s door from the outside
with the mechanical key, turn the key
toward the front.
To unlock the door, turn the key toward the
rear. Pull the outside door handle to open
an unlocked door.
NOTE
The mechanical key is directional. If the
key cannot be inserted, change the
direction that the grooved side is
facing and insert it again.
To lock the door from outside without the
key, the following methods are available.
Locking using lock lever
1)
Rotate the lock lever forward.
2)
Close the door.
2-14