Subaru Legacy IV (2008 year). Manual - part 950
BR-12
Front Brake Pad
BRAKE
2. Front Brake Pad
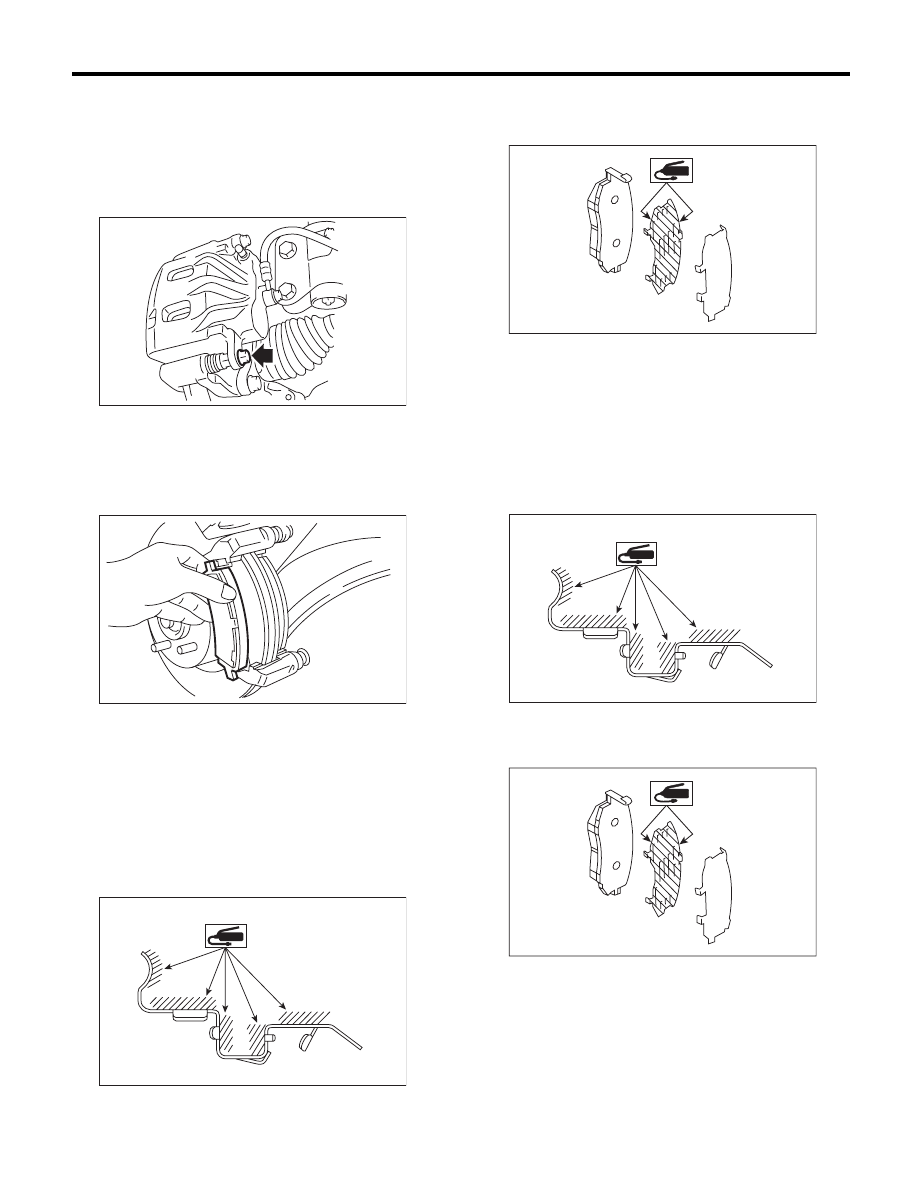
A: REMOVAL
1. 16-INCH TYPE
1) Lift up the vehicle, and remove the front wheels.
2) Remove the caliper bolt.
3) Raise the caliper body and support it.
NOTE:
Do not disconnect the brake hose from the caliper
body.
4) Remove the pad.
2. 17-INCH TYPE
Refer to 16-inch type. <Ref. to BR-12, 16-INCH
TYPE, REMOVAL, Front Brake Pad.>
B: INSTALLATION
1. 16-INCH TYPE
1) Apply a thin coat of Molykote M7439 (Part No.
K0777YA000) or grease contained in the pad kit to
the pad clip.
2) Apply a thin coat of Molykote AS880N (Part No.
K0779YA010) or grease contained in the pad kit to
both surfaces of the pad inner shim.
3) Install the pad to support.
4) Install the caliper body to the support.
Tightening torque:
27 N·m (2.8 kgf-m, 19.9 ft-lb)
2. 17-INCH TYPE
1) Apply a thin coat of Molykote M7439 (Part No.
K0777YA000) or grease contained in the pad kit to
the pad clip.
2) Apply a thin coat of Molykote AS880N (Part No.
K0779YA010) or grease contained in the pad kit to
both surfaces of the pad inner shim.
BR-00339
BR-00012
BR-00596
BR-00601
BR-00596
BR-00601