Content .. 1075 1076 1077 1078 ..
Subaru Legacy IV (2008 year). Manual - part 1077
GW-35
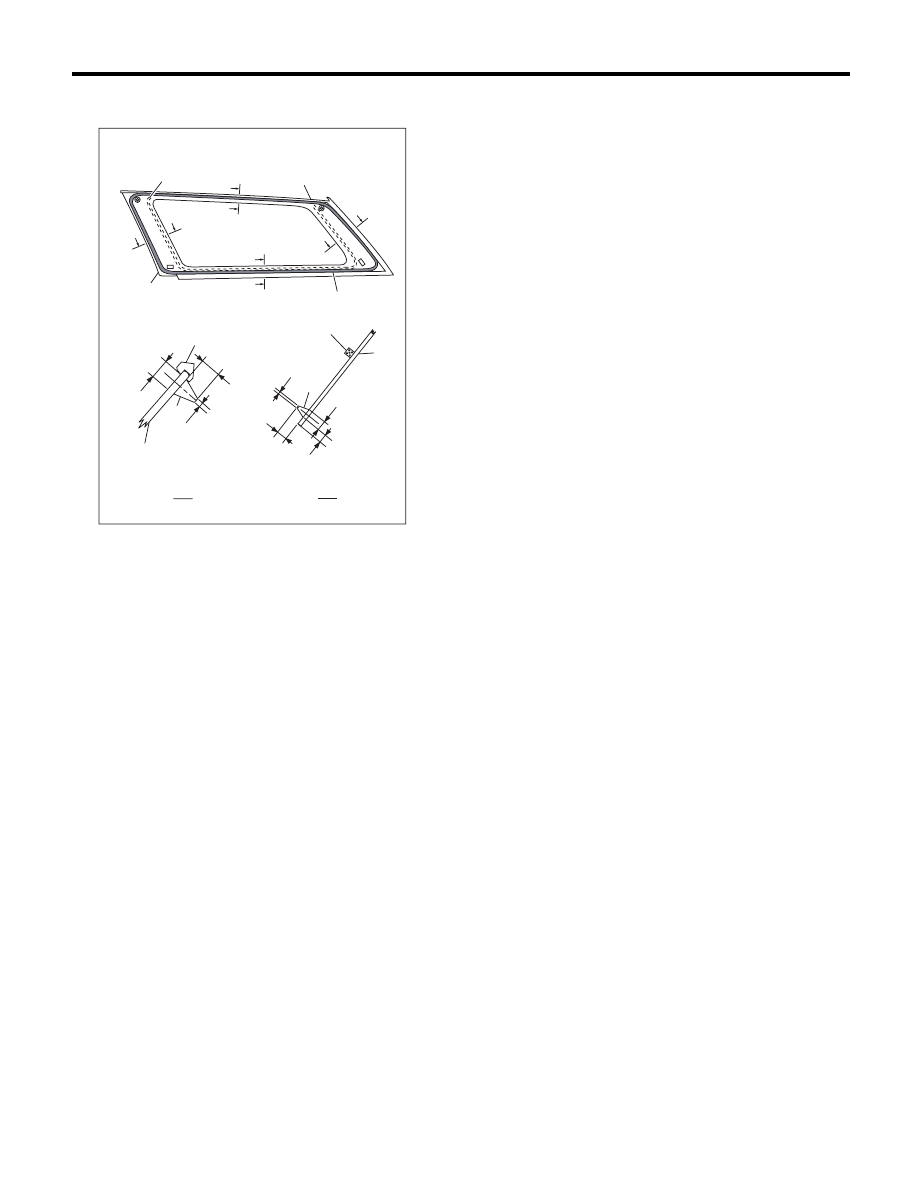
Rear Quarter Glass
GLASS/WINDOWS/MIRRORS
3) Apply adhesive to the glass end surface as
shown.
4) Install the glass in the same procedure as for
windshield glass. <Ref. to GW-27, INSTALLA-
TION, Windshield Glass.>
5) After completion of all work, allow the vehicle to
stand for about 24 hours.
NOTE:
• When door is opened/closed after glass is bond-
ed, always lower the door glass first, and then
open/close it carefully.
• Move the vehicle slowly.
• For minimum drying time and vehicle standing
time before driving after bonding, follow instruc-
tions or instruction manual from the adhesive man-
ufacturer.
6) After curing of adhesive, pour the water on exter-
nal surface of vehicle to check that there are no wa-
ter leaks.
NOTE:
When a vehicle is returned to the user, tell him or
her that the vehicle should not be subjected to
heavy impact for at least three days.
(1) Dam rubber
(2) Molding
(3) Adhesive
(4) Glass
(5) 2 mm (0.08 in)
(6) 8 — 10 mm (0.31 — 0.39 in)
(7) 7 mm (0.28 in)
(8) 8 mm (0.31 in)
GW-00763
(2)
(2)
(3)
(1)
(5)
(2)
(8)
(7)
(6)
(4)
(5)
(8)
(6)
(4)
(4)
(1)
B
B
A
A
B-B
A-A
A
A
A
A
(3)