Content .. 1043 1044 1045 1046 ..
Subaru Legacy IV (2008 year). Manual - part 1045
SB-18
Front Seat Belt
SEAT BELT SYSTEM
5. Front Seat Belt
A: REMOVAL
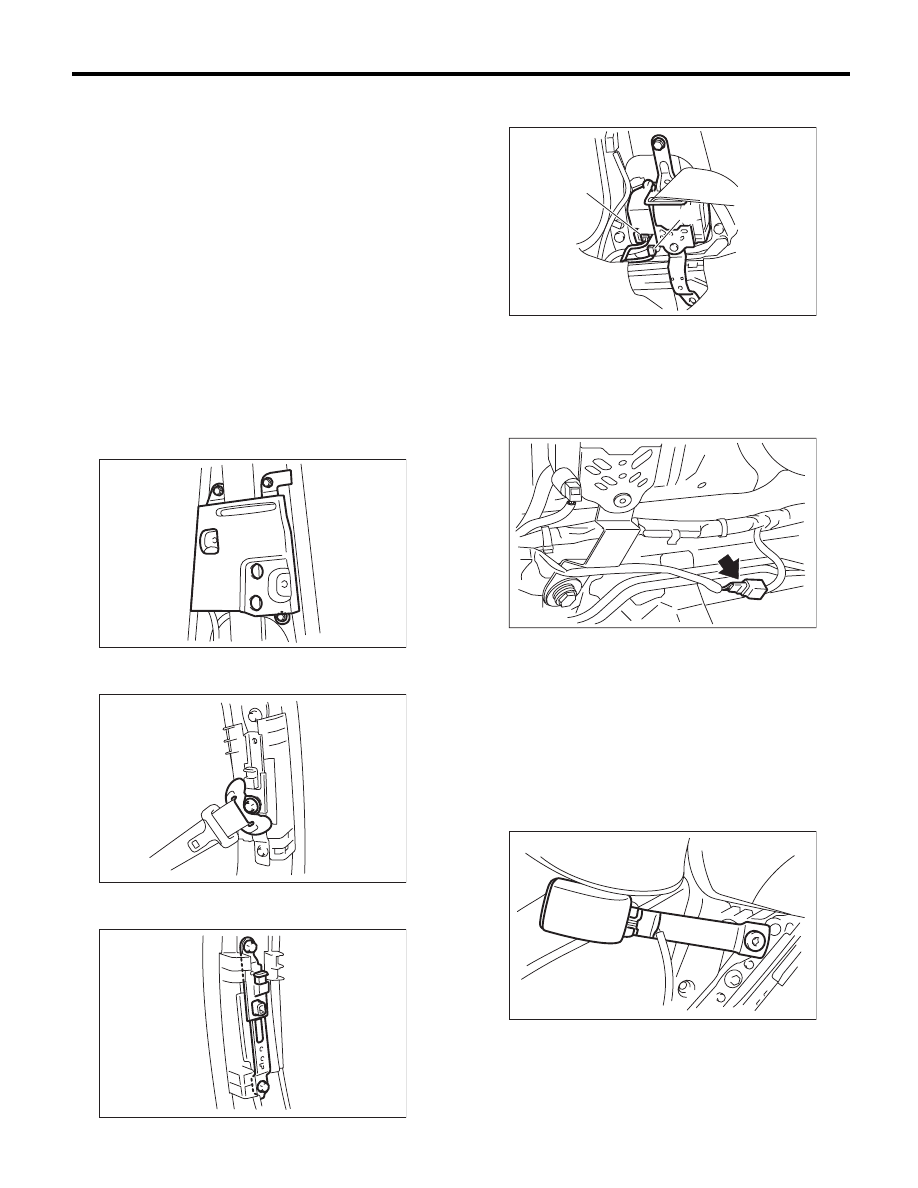
1. OUTER SEAT BELT ASSEMBLY
CAUTION:
• Do not drop or subject the pretensioner to
any impact.
• Since the pretensioner and bracket are inte-
grated as a unit, do not disassemble them.
1) Fold the backrest all the way forward, and then
move the front seat all the way forward.
2) Turn the ignition switch to OFF, disconnect the
battery ground cable, and wait 20 seconds or more.
3) Remove the center pillar lower trim. <Ref. to EI-
61, REMOVAL, Lower Inner Trim.>
4) Remove the center pillar upper trim. <Ref. to EI-
62, REMOVAL, Upper Inner Trim.>
5) Remove the bolt, then remove the center pillar
inner protector lower.
6) Remove the bolt, and then remove the shoulder
anchor.
7) Remove the bolt, and then remove the adjust-
able anchor assembly.
8) Disconnect the pretensioner connector (A), re-
move the bolt, and remove the seat belt retractor.
NOTE:
Disconnect the tension reducer connector (B) for
the seat belt retractor with a tension reducer func-
tion.
9) Disconnect the connector of belt tension sensor
on passenger’s side.
2. INNER SEAT BELT ASSEMBLY
1) Turn the ignition switch to OFF, disconnect the
battery ground cable, and wait 20 seconds or more.
2) Remove the front seats. <Ref. to SE-9, REMOV-
AL, Front Seat.>
3) Disconnect the seat belt warning light connector
under the seat.
4) Remove the harness clips.
5) Remove the TORX
®
bolt, and then remove the
inner seat belt assembly.
SB-00144
SB-00152
SB-00153
SB-00346
(A)
(B)
SB-00326
SE-00332