SsangYong Rexton. Manual - part 685
SSANGYONG Y200
9D-54 BODY ELECTRICAL
YAD9D0A0
YAD9D0B0
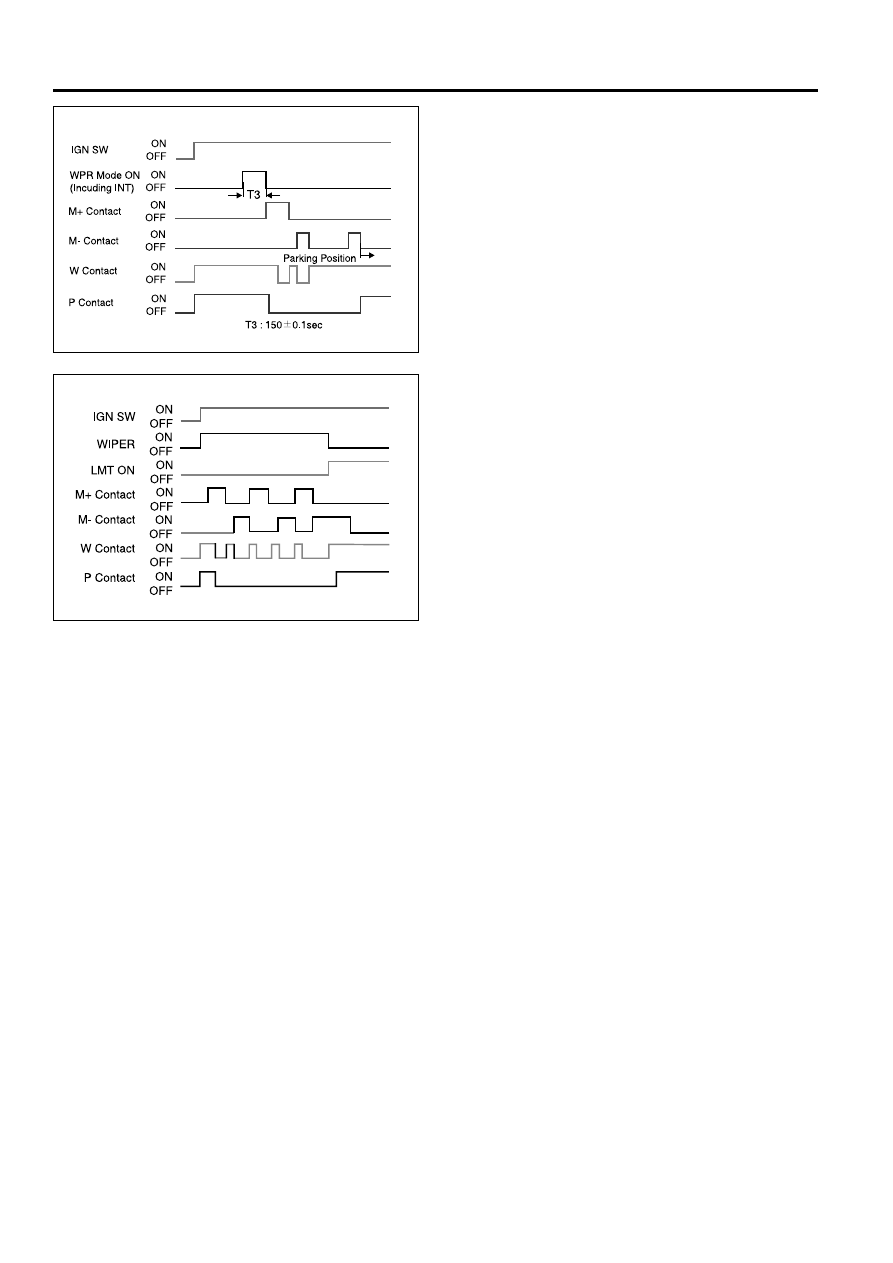
Washer linked mode
1. As turn ignition switch on, wiper switch is ON more
than 0.6 seconds, and then, power of washer linked
mode is “ON”
2. After turning washer switch off, operation of wiper
mode is operating twice, and then back to parking
position.
3. Power of wiper motor is operating with the same
mode of wiper operation.
Operation of limit switch: ON/ OFF mode
1. As turn ignition switch on, if wiper motor turn limit
on, without delay, back to parking position and
then stop motor.
2. Being state of turning on, stop control power of
wiper motor.
(Namely, opening up rear glass, for wiper not to
be interfered )