SsangYong Korando III (2010 year). Manual - part 129


  Index      SsangYong     SsangYong Korando III - service repair manual 2010 year


Search            


Content   ..  127  128  129  130   ..


SsangYong Korando III (2010 year). Manual - part 129


14-8

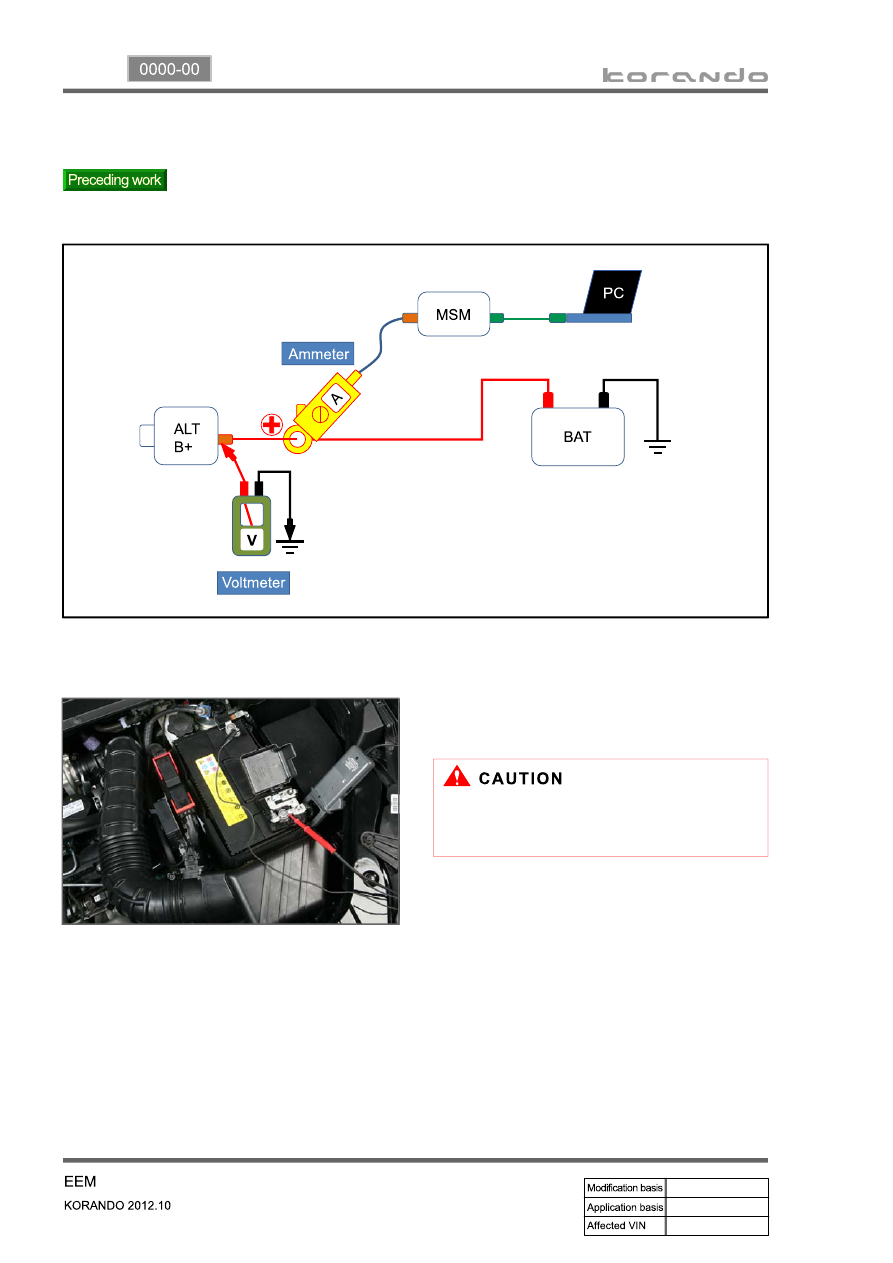
4. INSPECTION - CHARGING CURRENT

Perform the basic inspection.

-

Setting up the testers

Preparation

Set up the ammeter and voltmeter as 

shown in the figure.

1.

Make sure to set up the tester while keeping 

its polarity.

14-9

0000-00

Inspection

Start the engine and turns on the headlamp, blower and heated wire at their full load. Then, measure 

the maximum output current (MSM measurement value) when racing the engine to 2,700 rpm.

1.

Specified value

60% of rated current (limit)

Turn the ignition OFF after inspection.

Disconnect the negative cable from the battery and remove the testers (ammeter and 

voltmeter).

2.

3.

Characteristic curve (output from alternator)

The output current may not reach the limit value due to various parameters (high temperature or 

electric load etc.). Thus, do not perform the inspection with fully charged battery.

14-10

5. INSPECTION - REGULATING VOLTAGE

Perform the basic inspection.

-

Setting up the testers

Preparation

Set up the ammeter and voltmeter as shown 

in the figure.

1.

Inspection

Turn the ignition ON and measure the voltage on the voltmeter.

1.

Start the engine and turn all electric devices OFF.

Increase the engine speed to 2,700 rpm and maintain the speed. Measure the voltage when the 

output current from alternator decrease below 30A.

2.

3.

Specified value

over 12V 

Specified value

11.5 ~ 15.5V

Make sure to set up the tester while keeping 

its polarity.

14-11

0000-00

 Inspection

Measure the current while removing the fuses one by one. If the current drops sharply when a certain 

fuse is removed, inspect the affected circuit.

1.

Specified value

below 0.05A

6. INSPECTION - DARK CURRENT

Perform the basic inspection.

-

Setting up the tester

Preparation

Disconnect the negative cable from the battery.

Set up the ammeter as shown in the figure above.

1.

2.

1) When Using Multi-tester

Connect the “+” probe to ground wiring and “-“probe to “-“terminal of battery.


Content   ..  127  128  129  130   ..