SsangYong Korando II (1996-2006 year). Manual - part 38
1D1 -- 14 M162 ENGINE COOLING
DAEWOO MY_2000
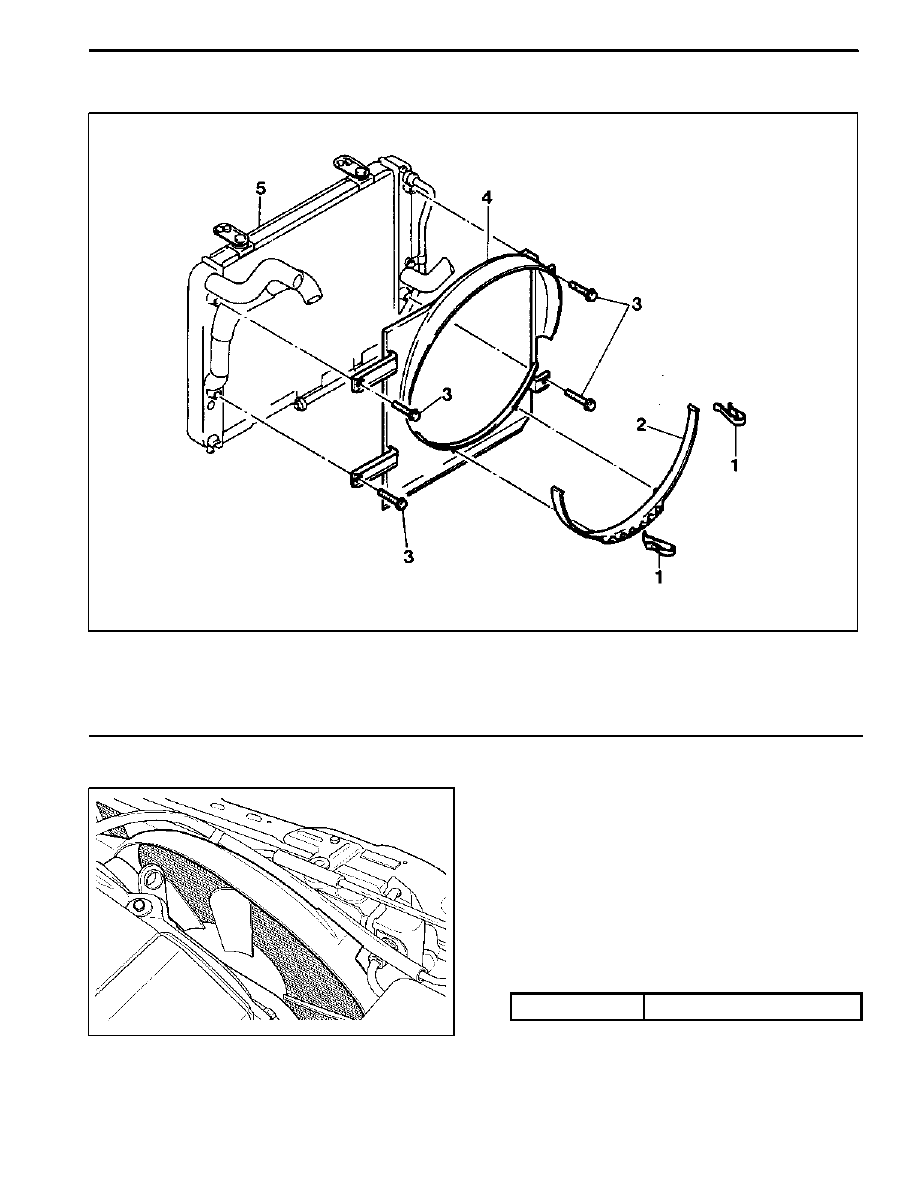
COOLING FAN SHROUD
1 Clip
2 Lower Fan Shroud
3 Bolt
4 Fan Shroud Assembly
5 Radiator
Removal & Installation Procedure
1. Pull out the 2 clips (1) from the fan shroud assembly.
2. Remove the lower fan shroud (2).
Notice: For installation, exactly align the lower fan
shroud pin into the hole of the fan shroud assembly (4)
and insert the clips.
3. Remove the bolts (3) and then remove the cooling fan
shroud assembly (4).
Installation Notice
Tightening Torque
3 -- 7 NSm (27 -- 62 lb-in)
4. Installation should follow the removal procedure in
the reverse order.