Dacia Pick-Up 1304/1305/1307. Manual - part 139


  Index      Dacia     Dacia Pick-Up 1304/1305/1307 (Engine F8Q) - service repair manual 2004 year


Search            


Content   ..  137  138  139  140   ..


Dacia Pick-Up 1304/1305/1307. Manual - part 139


85

WINDSCREEN WIPERS

85 - 5

R

EMOUNTING

Clean the parts.
Check the state of the parts ( pinions, bearings, collector ), replace the defective or worn parts.
Grease the parts with grease type LiCaPb type II.
Mount: the rotor, the bearing at  the back of the motor, the reduction gear casing, the pinion,

and the reduction gear cap.

Adjust the axial clearance of the rotor  (C); the screw should gently press the rotor shaft end.
Mount the windscreen wiper drive motor on the mechanism support.

WINDSCREEN WIPER DRIVE MOTOR COAL BRUSHES REPLACEMENT

The operation shall be  performed after dismounting the mechanism off the vehicle.

D

ISMO UNTING

Dismount the drive motor from the

windscreen wiper mechanism.

Dismount : the reduction gear and the rotor.
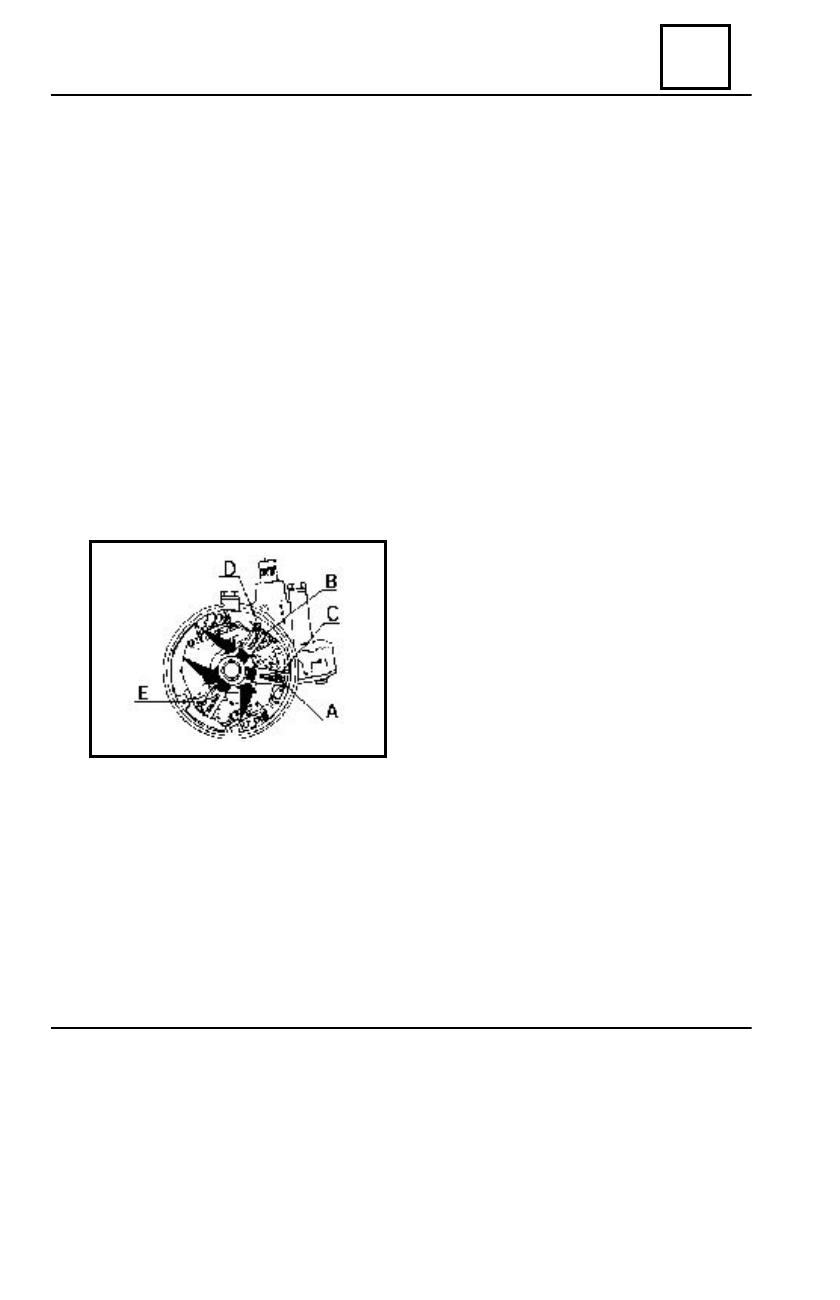
Disconnect the coal brushes terminals (A, B

, E).

Dismount the coal brushes.

R

EMOUNTING

Check the state of the collector and its chan-

nels.

Mount the new coal brushes; check  the free

displacement of the coal brushes in the supports.

Mount the rotor and the reduction gear.
Adjust the axial clearance of the rotor, by

means of  the adjustment screw.

Mount the drive motor on the mechanism.

- loosen the adjustment screw of the rotor axial clearance.

Dismount: the reduction gear cap, the pinion.

2. Rotor dismounting:

- unscrew the attachment screws (A) of the reduction gear casing, on the drive  engine.

Dismount: the reduction gear casing, the bearing at the back of the motor and the rotor.

WINDSCREEN WIPER DRIVE MOTOR

WINDSCREEN WIPERS

85

85 - 6

The windscreen washer assembly is placed in the engine compartment, being attached on the

left front wing  lining. According to the manufacture variant, this may have the electric pumps
attached on  the  front  wing lining (fig. a) or on the washer reservoir (fig. b).

( fig.a )

( fig.b )

D

ISMO UNTING

Disconnect the battery; then the connecting wires from washer pumps.
Disconnect the aspiration and exhaust tubes from the couplings and adjustable nozzles.
Dismount the attachment screws of washer reservoir support.
Dismount the washer pumps from the left wing lining or from the reservoir, according with the

manufacture variant.

R

EMOUNTING

Perform the dismounting operations in reverse order.
Check the operating and eventually adjust by means of  a “needle” the nozzles, in order to

correctly wash the windscreen.

WINDSCREEN WASHER ASSEMBLY

85

WINDSCREEN WIPERS

85 - 7

THE WINDSCREEN WIPER IS WORKING

THE WASHER PUMP IS NOT WORKING

Place the plug (-) of the pump at

 the mass.

The pump is working;

the mass wire broken or not connected.

The pump is not working; replace the

pump.

The pump is not working.

The pump is working.

Performm a direct supply of the pump.

      Check if when lever is acted
     the contact end is voltage supplied.

The contact end is voltage supplied;

   the pump supply wire is broken or not

connected.

The contact end is not voltage supplied.
Replace the contact.

DIAGNOSTIC

WINDSCREEN WIPERS

85

85 - 8

THE WINDSCREEN WIPER IS NOT WORKING

THE PUMP IS WORKING

Connect the pump motor casing at the mass.

The motor is working;

repair the mass.

   + 12 V voltage existing at the  contact
end;motor is not working. Check if the
motor is supplied.

The motor is not working.

       The wires are not supplied;

    replace the contact.

Check if the supply wires of the
motor are voltage supplied at the
contact exit.

          The motor is not supplied; motor
    supplying wires broken or not connected.
.

The motor is supplied.

Replace the motor.

DIAGNOSTIC


Content   ..  137  138  139  140   ..