Peugeot Partner VU (2007 year). Instruction - part 5
63
-
Visibility
Dipped/Main beam change
Pull the stalk towards you.
Note: with the ignition off, when the
driver’s door is opened, a buzzer
sounds if you have left your lights
on.
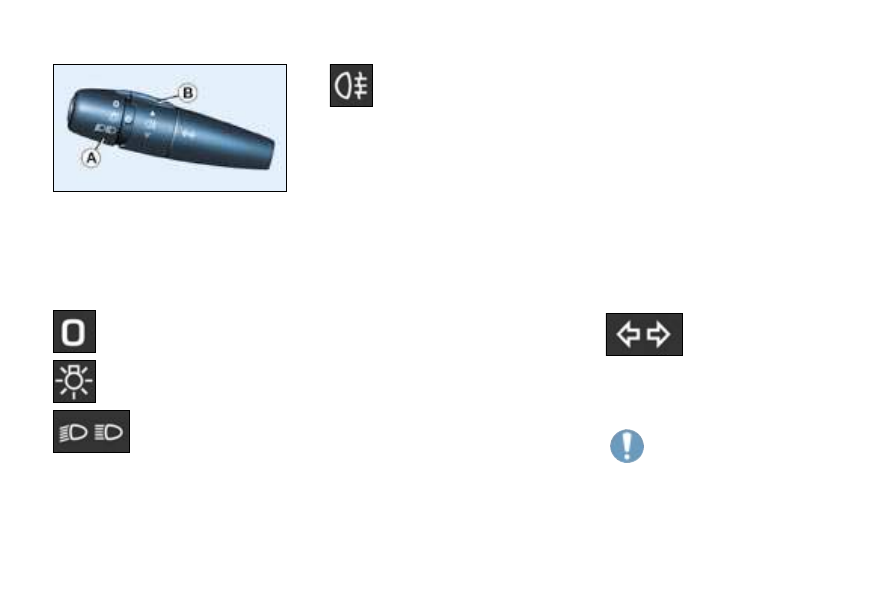
THE LIGHTS STALK
Front and rear lights
Selection is by turning ring
A.
Lights off
Side lights
Dipped/main beam head-
lamps
Front fog lamps and
rear fog lamp
Rotate the ring forwards to
switch on and backwards to
switch off. The status is confirmed by
the indicator light on the instrument
panel.
"Follow-me-home" lighting
In poor light, or at night, if you leave
your vehicle, the side lights and
dipped headlamps may remain on for
approximately one minute.
To activate this function:
- place the key in the
STOP posi-
tion,
- place the lights stalk in position
O,
- flash the headlamps,
- exit the vehicle and lock it.
In good or rainy weather,
both day and night, the front
fog lamps and the rear fog
lamp are dazzling and are
prohibited.
Do not forget to switch them
off when they are no longer needed.
Left: downwards.
Right: upwards.
Direction indicators (flashers)
Vehicles fitted with a rear fog
lamp only (ring B)
Rotate the ring forwards.
This only operates with the dipped/
main beam headlamps.
Vehicles fitted with front fog
lamps and a rear fog lamp (ring B)
Front fog lamps (first rotation of the
ring forwards).
Front and rear fog lamps (2nd rota-
tion of the ring forwards).
Note: to switch off the rear fog lamp
and the front fog lamps, turn the ring
backwards twice in succession.