Peugeot Expert VU (2016 year). Instruction - part 8
111
3
Ease of use and comfort
Expert_en_Chap03_ergonomie-et-confort_ed01-2016
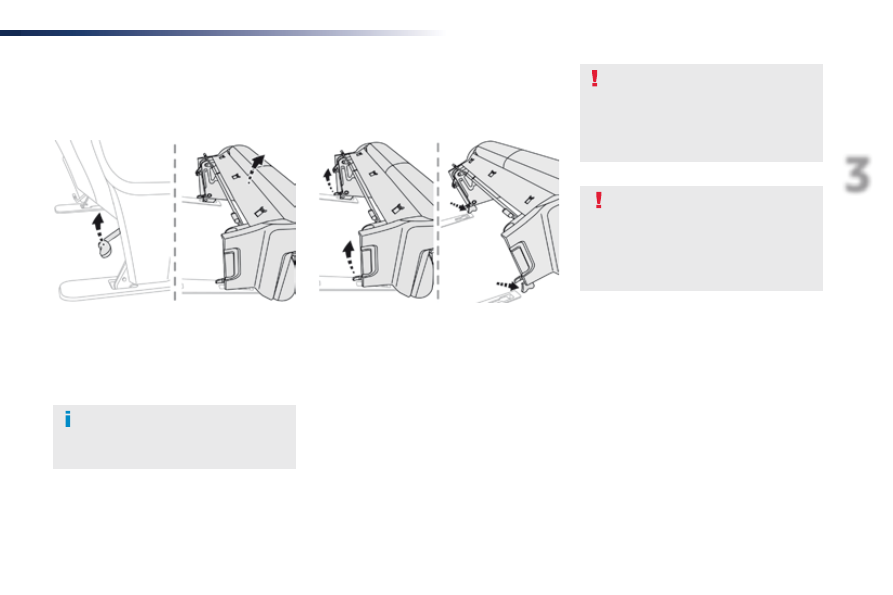
F If your vehicle has the facility, place the
seat backrest in the table position.
F Release the front feet using these handles.
F Disengage the seat from its anchorages.
F Remove the seat.
F If your vehicle has the facility, place the
backrest in the table position.
F tip the seat forward.
Tipping, access to row 3
Removing a seat
It is not necessary to fold the backrest
(table position) to tip the bench seat for
access to row 3.
F using the handle, release the rear feet then
tip the seat forward.
F to return the seat, tip the bench towards
the rear until the feet lock into place.
If removing and storing a bench seat
out of the vehicle, ensure that it is
placed in a clean area, so as to avoid
introducing any foreign bodies into the
mechanisms.
the bench seats are not designed for
any use other than in the vehicle. they
have mechanisms and functions that
could be damaged if used incorrectly or
are dropped.