Peugeot 308 (2017 year). Instruction - part 17
255
8
In the event of a breakdown
308_en_Chap08_en-cas-de-panne_ed01-2016
For reassembly, carry out these operations in
reverse order.
Direction indicators
(halogen model)
Faster flashing of a direction indicator
warning lamp (left or right) indicates a
failed bulb on that side.
Daytime running lamps /
sidelamps
("full LED" technology model)
For the replacement of this type of "full LeD"
light emitting diode lamps, contact a PeugeOt
dealer or a qualified workshop.
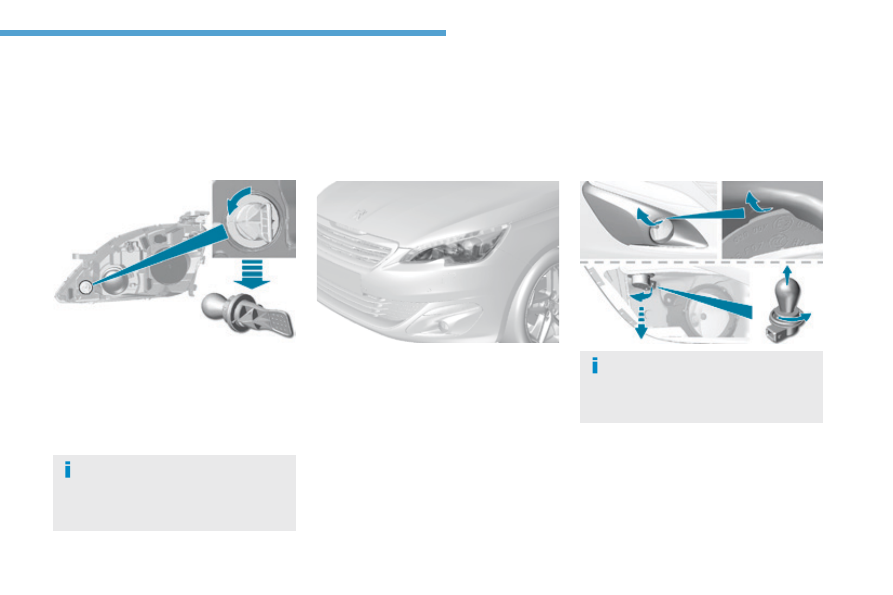
Direction indicators
("full LED" technology model)
the direction indicator bulb is located below
the front lamp.
F unclip the finisher by pulling at the top
(cut-out).
F unscrew the bulb holder (1/4 turn).
F Change the failed bulb.
For reassembly, carry out these operations in
reverse order.
Faster flashing of a direction indicator
warning lamp (left or right) indicates a
failed bulb on that side.
F unscrew the bulb holder (1/4 turn).
F Remove the bulb holder.
F Change the failed bulb.