Peugeot 405. Manual - part 2


  Главная      Peugeot     Peugeot 405 (1988-1997) - Service And Repair Manual Haynes


поиск по сайту            


содержание   ..  1  2  3   ..


Peugeot 405. Manual - part 2


The Peugeot 405 model range was introduced into the UK in

January 1988 in Saloon form only.

Available with 1.6, 1.8, 1.9 and 2.0 engines, all models have front-

wheel-drive with all round independent suspension.

Automatic transmission models were introduced in April 1988.
In July 1988 came the sporty Mi 16 version with its 1.9 litre double

overhead cam, 16-valve engine, uprated gearbox, suspension and an
ABS braking system to match its power.

Estate car versions were introduced in October 1988.
From 1991, engines equipped with catalytic converters were

progressively introduced, to meet the more stringent exhaust gas
emission regulations.

Since its introduction, the 405 range has continually been

developed. All models have a high trim level, which is very
comprehensive in the upper model range.

For the home mechanic, the Peugeot 405 is a straightforward

vehicle to maintain and repair since design features have been
incorporated to reduce the actual cost of ownership to a minimum, and
most of the items requiring frequent attention are easily accessible.

Your Peugeot 405 Manual

The aim of this manual is to help you get the best value from your

vehicle. It can do so in several ways. It can help you decide what work
must be done (even should you choose to get it done by a garage),
provide information on routine maintenance and servicing, and give a
logical course of action and diagnosis when random faults occur.
However, it is hoped that you will use the manual by tackling the work
yourself. On simpler jobs, it may even be quicker than booking the car
into a garage and going there twice, to leave and collect it. Perhaps
most important, a lot of money can be saved by avoiding the costs a
garage must charge to cover its labour and overheads.

The manual has drawings and descriptions to show the function of

the various components, so that their layout can be understood. Then
the tasks are described and photographed in a clear step-by-step
sequence.

0•4

Introduction

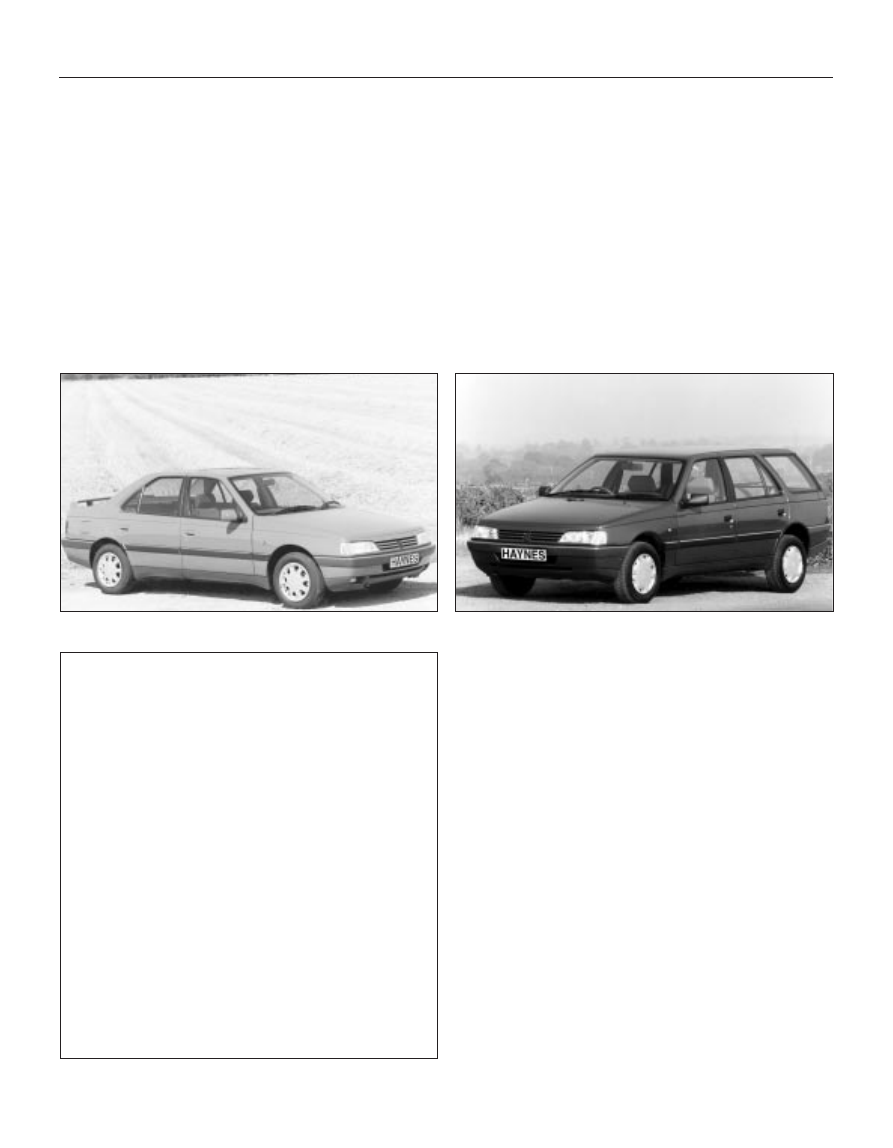
Peugeot 405 SRi Saloon

Peugeot 405 GL Estate

Acknowledgements

Thanks are due to Champion Spark Plug who supplied the

illustrations showing spark plug conditions. Certain other illustrations
are the copyright of the Peugeot Talbot Motor Company Limited, and
are used with their permission. Special thanks to Gliddons of Taunton
who provided several of the project vehicles used in the origination of
this manual. Thanks are also due to Sykes-Pickavant Limited, who
provided some of the workshop tools, and to all those people at
Sparkford who helped in the production of this manual.

We take great pride in the accuracy of information given in this

manual, but vehicle manufacturers make alterations and design
changes during the production run of a particular vehicle of which
they do not inform us. No liability can be accepted by the authors
or publishers for loss, damage or injury caused by any errors in, or
omissions from, the information given.

Project vehicles

The vehicles used in the preparation of this manual, and which

appear in many of the photographic sequences, were a Peugeot 405
GL Saloon, a Peugeot 405 GTX Estate, a Peugeot 405 GR Saloon, and
a Peugeot GTX Saloon. 

The Peugeot 405 Team

Haynes manuals are produced by dedicated and
enthusiastic people working in close co-operation. The
team responsible for the creation of this book included: 

Authors

Steve Rendle
Andy Legg

Sub-editor

Carole Turk

Editor & Page Make-up

Bob Jex

Workshop manager

Paul Buckland

Photo Scans

John Martin
Paul Tanswell

Cover illustration & Line Art

Roger Healing

Wiring diagrams

Matthew Marke

We hope the book will help you to get the maximum
enjoyment from your car. By carrying out routine
maintenance as described you will ensure your car’s
reliability and preserve its resale value.

Safety First!  

0•5

Working on your car can be dangerous.

This page shows just some of the potential
risks and hazards, with the aim of creating a
safety-conscious attitude.

General hazards

Scalding

• Don’t remove the radiator or expansion
tank cap while the engine is hot.
• Engine oil, automatic transmission fluid or
power steering fluid may also be dangerously
hot if the engine has recently been running.

Burning

• Beware of burns from the exhaust system
and from any part of the engine. Brake discs
and drums can also be extremely hot
immediately after use.

Crushing

• When working under or near
a raised vehicle,
always
supplement the
jack with axle
stands, or use
drive-on
ramps.
Never
venture
under a car which
is only supported by a jack.
• Take care if loosening or tightening high-
torque nuts when the vehicle is on stands.
Initial loosening and final tightening should
be done with the wheels on the ground.

Fire

• Fuel is highly flammable; fuel vapour is
explosive. 
• Don’t let fuel spill onto a hot engine. 
• Do not smoke or allow naked lights
(including pilot lights) anywhere near a
vehicle being worked on. Also beware of
creating sparks 
(electrically or by use of tools).
• Fuel vapour is heavier than air, so don’t
work on the fuel system with the vehicle over
an inspection pit.
• Another cause of fire is an electrical
overload or short-circuit. Take care when
repairing or modifying the vehicle wiring.
• Keep a fire extinguisher handy, of a type
suitable for use on fuel and electrical fires.

Electric shock 

• Ignition HT
voltage can be
dangerous,
especially to
people with heart
problems or a
pacemaker. Don’t
work on or near the
ignition system with
the engine running or
the ignition switched on.

• Mains voltage is also dangerous. Make
sure that any mains-operated equipment is
correctly earthed. Mains power points should
be protected by a residual current device
(RCD) circuit breaker.

Fume or gas intoxication 

• Exhaust fumes are
poisonous; they often
contain carbon
monoxide, which is
rapidly fatal if inhaled.
Never run the
engine in a
confined space
such as a garage
with the doors shut.
• Fuel vapour is also
poisonous, as are the vapours from some
cleaning solvents and paint thinners.

Poisonous or irritant substances

• Avoid skin contact with battery acid and
with any fuel, fluid or lubricant, especially
antifreeze, brake hydraulic fluid and Diesel
fuel. Don’t syphon them by mouth. If such a
substance is swallowed or gets into the eyes,
seek medical advice.
• Prolonged contact with used engine oil can
cause skin cancer. Wear gloves or use a
barrier cream if necessary. Change out of oil-
soaked clothes and do not keep oily rags in
your pocket.
• Air conditioning refrigerant forms a
poisonous gas if exposed to a naked flame
(including a cigarette). It can also cause skin
burns on contact.

Asbestos

• Asbestos dust can cause cancer if inhaled
or swallowed. Asbestos may be found in
gaskets and in brake and clutch linings.
When dealing with such components it is
safest to assume that they contain asbestos.

Special hazards

Hydrofluoric acid

• This extremely corrosive acid is formed
when certain types of synthetic rubber, found
in some O-rings, oil seals, fuel hoses etc, are
exposed to temperatures above 400

0

C. The

rubber changes into a charred or sticky
substance containing the acid. Once formed,
the acid remains dangerous for years. If it
gets onto the skin, it may be necessary to
amputate the limb concerned.
• When dealing with a vehicle which has
suffered a fire, or with components salvaged
from such a vehicle, wear protective gloves
and discard them after use.

The battery

• Batteries contain sulphuric acid, which
attacks clothing, eyes and skin. Take care
when topping-up or carrying the battery.
• The hydrogen gas given off by the battery
is highly explosive. Never cause a spark or
allow a naked light nearby. Be careful when
connecting and disconnecting battery
chargers or jump leads.

Air bags

• Air bags can cause injury if they go off
accidentally. Take care when removing the
steering wheel and/or facia. Special storage
instructions may apply.

Diesel injection equipment

• Diesel injection pumps supply fuel at very
high pressure. Take care when working on
the fuel injectors and fuel pipes.

Warning: Never expose the hands,
face or any other part of the body
to injector spray; the fuel can

penetrate the skin with potentially fatal
results.

Remember...

DO

• Do use eye protection when using power
tools, and when working under the vehicle.

• Do wear gloves or use barrier cream to
protect your hands when necessary.

• Do get someone to check periodically
that all is well when working alone on the
vehicle.

• Do keep loose clothing and long hair well
out of the way of moving mechanical parts.

• Do remove rings, wristwatch etc, before
working on the vehicle – especially the
electrical system.

• Do ensure that any lifting or jacking
equipment has a safe working load rating
adequate for the job.

A few tips

DON’T

• Don’t attempt to lift a heavy component
which may be beyond your capability – get
assistance.

• Don’t rush to finish a job, or take
unverified short cuts.

• Don’t use ill-fitting tools which may slip
and cause injury.

• Don’t leave tools or parts lying around
where someone can trip over them. Mop
up oil and fuel spills at once.

• Don’t allow children or pets to play in or
near a vehicle being worked on.

0•6

Roadside Repairs

The following pages are intended to help in dealing with

common roadside emergencies and breakdowns. You will find
more detailed fault finding information at the back of the
manual, and repair information in the main chapters.

If your car won’t start 
and the starter motor
doesn’t turn

M If it’s a model with automatic transmission, make sure the

selector is in ‘P’ or ‘N’.

M Open the bonnet and make sure that the battery terminals

are clean and tight.

M Switch on the headlights and try to start the engine. If the

headlights go very dim when you’re trying to start, the
battery is probably flat. Get out of trouble by jump starting
(see next page) using a friend’s car.

If your car won’t start 
even though the starter
motor turns as normal

M Is there fuel in the tank?

M Is there moisture on electrical components under the

bonnet? Switch off the ignition, then wipe off any obvious
dampness with a dry cloth. Spray a water-repellent aerosol
product (WD-40 or equivalent) on ignition and fuel system
electrical connectors like those shown in the photos. 
Pay special attention to the ignition coil wiring connector
and HT leads. (Note that Diesel engines don’t normally
suffer from damp.)

Check that the spark plug HT leads
(where applicable) are securely
connected by pushing them home.

A

The throttle potentiometer wiring plug
may cause problems if not connected
securely.

B

Check the idle speed stepper motor
wiring plug for security.

C

Check the security and condition of the
battery connections.

D

Check that the ignition coil wiring plug is
secure, and spray with water-dispersant
if necessary.

E

Check that electrical connections are secure (with the ignition switched off) and spray them
with a water dispersant spray like WD40 if you suspect a problem due to damp

Roadside Repairs  

0•7

When jump-starting a car using a
booster battery, observe the following
precautions:

4

Before connecting the booster
battery, make sure that the ignition is
switched off.

4

Ensure that all electrical equipment
(lights, heater, wipers, etc) is
switched off.

4

Make sure that the booster battery is
the same voltage as the discharged
one in the vehicle.

4

If the battery is being jump-started
from the battery in another vehicle,
the two vehcles MUST NOT TOUCH
each other.

4

Make sure that the transmission is in
neutral (or PARK, in the case of
automatic transmission).

Jump starting will get you out
of trouble, but you must correct
whatever made the battery go
flat in the first place. There are 

three possibilities:

1

The battery has been drained by
repeated attempts to start, or by

leaving the lights on.

2

The charging system is not working
properly (alternator drivebelt slack

or broken, alternator wiring fault or
alternator itself faulty).

3

The battery itself is at fault
(electrolyte low, or battery worn out).

Connect one end of the red jump lead to
the positive (+) terminal of the flat
battery

Connect the other end of the red lead to
the positive (+) terminal of the booster
battery.

Connect one end of the black jump lead
to the negative (-) terminal of the
booster battery

Connect the other end of the black
jump lead to a bolt or bracket on the
engine block, well away from the
battery, on the vehicle to be started.

1

2

3

4

Make sure that the jump leads will not
come into contact with the fan, drive-
belts or other moving parts of the
engine.

5

Start the engine using the booster
battery, then with the engine running at
idle speed, disconnect the jump leads in
the reverse order of connection.

6

Jump starting


содержание   ..  1  2  3   ..