Opel Mokka X (2019 year). Manual - part 13
198
Vehicle care
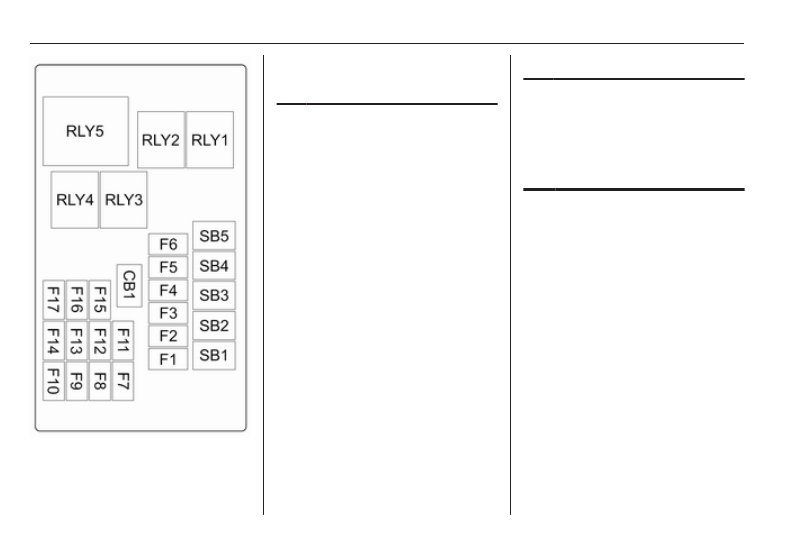
Mini Fuses
No. Circuit
1
Amplifier
2
All-wheel drive
3
–
4
Selective catalytic reduction
5
Selective catalytic reduction
6
Selective catalytic reduction
7
Selective catalytic reduction
8
Spare
9
Spare
10 Spare
11 –
12 Spare
13 –
14 –
15 Spare
16 –
No. Circuit
17 –
18 –
S/B Fuses
No. Circuit
1
DC/DC 400W transformer
2
DC/DC 400W transformer
3
–
4
–
5
–
6
–
7
–
8
–
9
–