Opel Frontera UBS. Manual - part 193


  Index      Opel     Opel Frontera UBS - service repair manual 1998-2002 year


Search            


Content   ..  191  192  193  194   ..


Opel Frontera UBS. Manual - part 193


4D2–28 TRANSFER CASE (TOD)

Tension of Lock-up Fork Spring

D

If the measurement exceeds the limit, replace the
spring. (When compressed to 41.4 mm)

Standard : 27.1-33.8 N {2.76-3.45 kg/6.08-7.61 Ib}

Allowable limit : 24.5 N {2.5 kg/5.5 Ib}

014RW048

Tension of Detent Spring Assembly

D

If the measurement exceeds the limit, replace the
spring. N {kg} (When compressed by 3 mm from the
free length)

Standard : 139 N -203 {14.2-20.7 kg/31.3-45.6 Ib}

Allowable limit : 130 N {13.3 kg/29.3 Ib}

261RW041

Oil Pump

D

Remove foreign materials from the strainer.  If the
strainer is damaged, replace it.

D

If the area into which the shaft is inserted is
excessively worn or damaged, replace the pump.

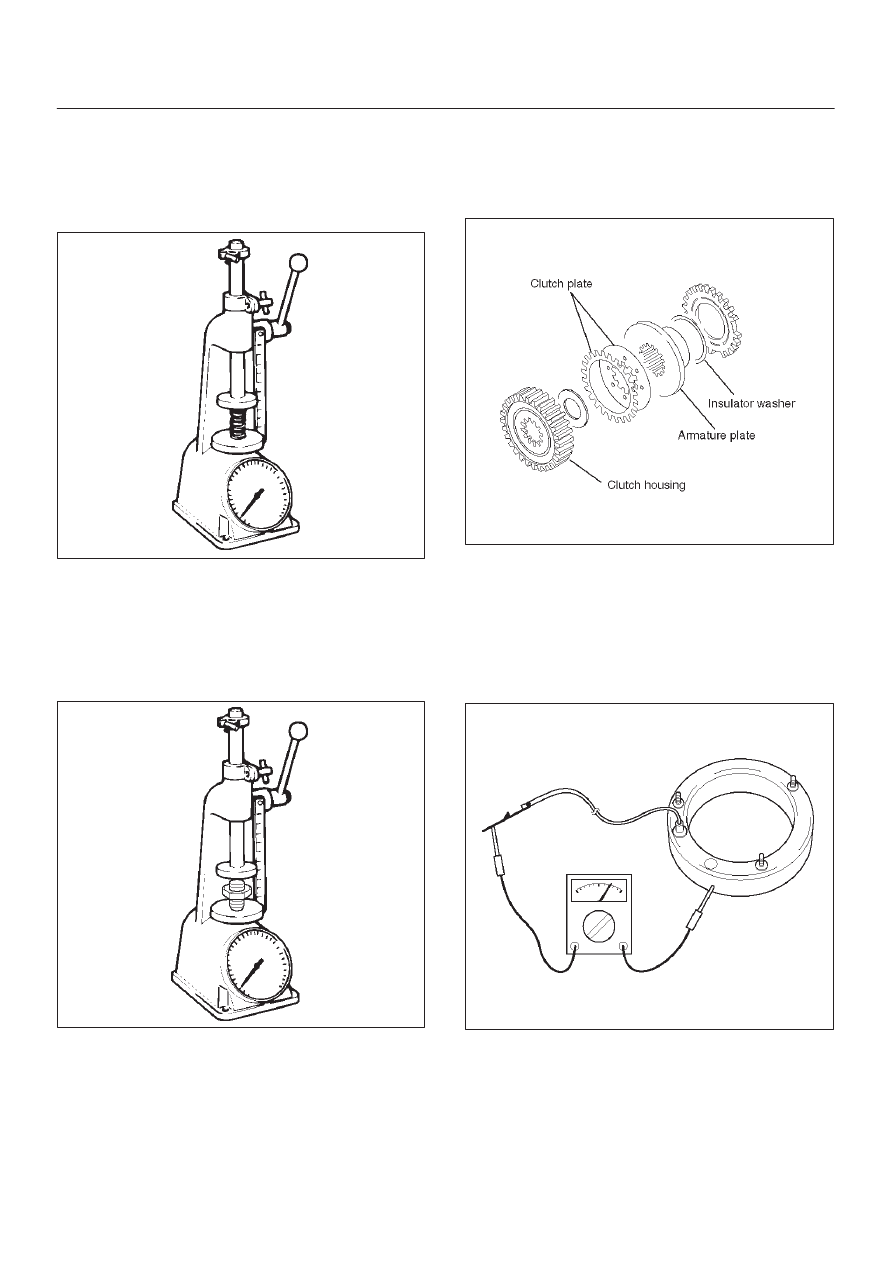
Multi Plate Disk Clutch

D

If the burned, mirror-surfaced clutch facing, or
scraping is observed on the clutch plates, clutch
housing, armature plate, and insulator washer,
replace the part or parts.

266RW003

Coil Assembly

D

Check the resistance of the coil with a tester.  If
defects are observed, replace the assembly.
* (ordinary temperature)

Standard : 1.4

2.0 

W

Allowable limit : 1.0

5.0 

W

261RW031

4D2–29

TRANSFER CASE (TOD)

Cam Pulley, Cam Ball, and Cam&Coil
Housing

D

Check the cam balls and cam for excessive wear or
damage.  If defective, replace the parts.  4H and 4L
switches.

266RW016

The Parts 4H and 4L Switch

D

Check the continuity of 4H and 4L switch.

261RW003

261RW049

Switch
Stroke

4H Switch

Signal

4L Switch 

Signal

The

correspo

nding

position

B to Switch

Body

A to C

osition

of

transfer

lever

1

Open

Open

High

2

Open

Close

4L

3

Close

Close

Neutral

4D2–30 TRANSFER CASE (TOD)

Transfer Case

Disassembled View

265RW015

Legend

(1) Transfer Case
(2) Ball Bearing
(3) Ring Gear
(4) Snap Ring
(5) Input Shaft and Carrier Assembly
(6) Snap Ring

(7) Ball Bearing
(8) Snap Ring
(9) Thrust Plate

(10) Carrier Assembly

(11) Snap Ring

(12) Circular Hub
(13) Input Shaft

Reassembly

1. Remove the oil seal from the transfer case.
2. Apply engine oil to the circumference of the new oil

seal and fill the lip with grease (Besco L2 or
equivalent).

4D2–31

TRANSFER CASE (TOD)

3. Using the front output shaft oil seal installer

5-8840-2410-0 (J-42807), install the oil seal to the
transfer case.

261RW053

Front Output Shaft Oil Seal

Distance between the transfer case end and oil seal.

NOTE: When installing the oil seal to the specified
dimension, be careful not to damage it.

Distance : 0.93 — 1.43mm (0.037 — 0.056 in)

A04RW003

4. Using the input shaft (main) oil seal installer

5-8840-2411-0 (J-42808), install the oil seal to the
transfer case.

261RW055

Input Shaft Oil Seal

Distance between the transfer case end and oil seal.

NOTE: When installing the oil seal to the specified
dimension, be careful not to damage it.

Distance : 3.25 — 3.75mm (0.13 — 0.15 in)

A04RW002


Content   ..  191  192  193  194   ..