Content .. 1777 1778 1779 1780 ..
Opel Frontera UBS. Manual - part 1779
8J–4
EXTERIOR/INTERIOR TRIM
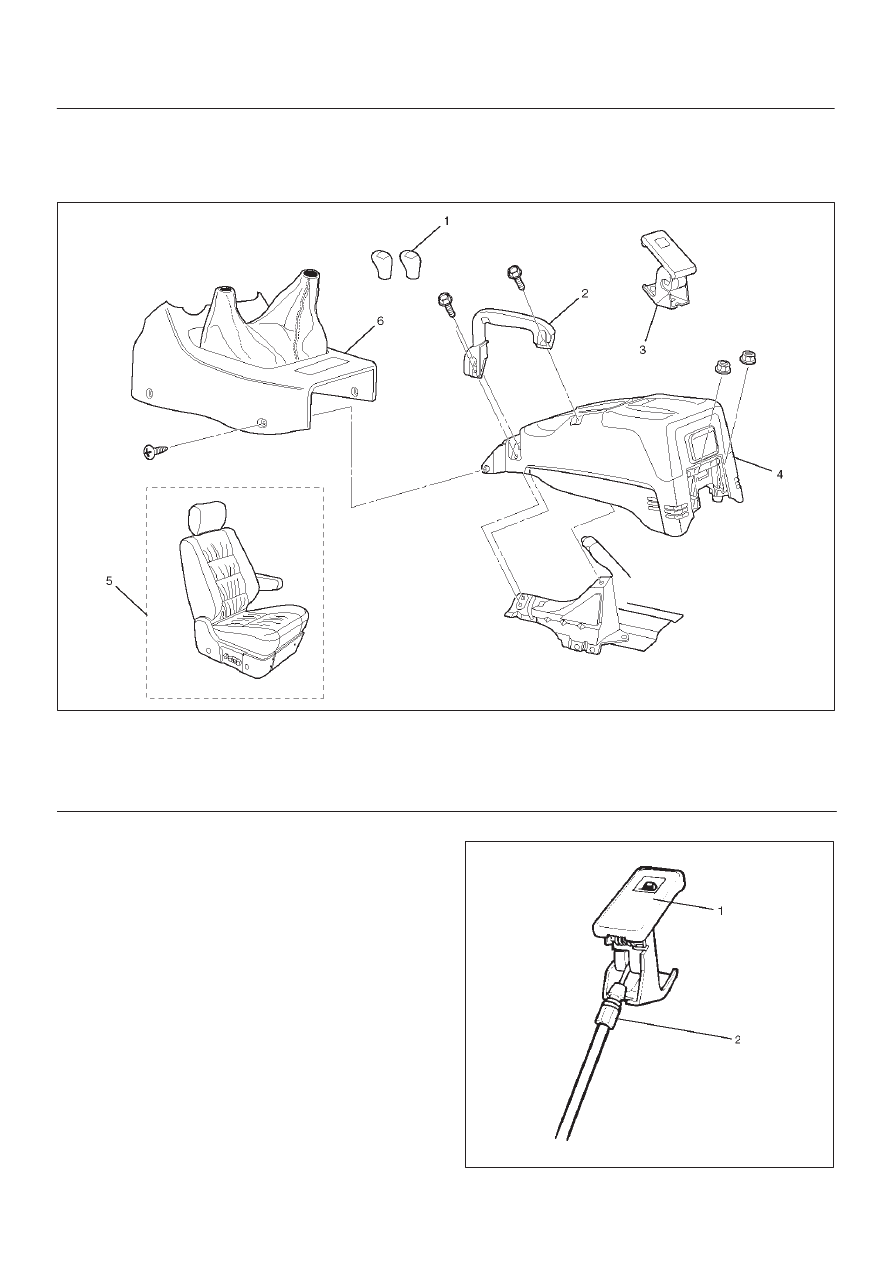
Consoles
Consoles and Associated Parts
This illustration is based on RHD
745RW009
Legend
(1) Shift Knob (M/T) / Transfer Knob (A/T)
(2) Assist Grip
(3) Fuel Filler Lid Opener
(4) Center Console Assembly
(5) Front Seat Assembly (RH)
(6) Front Console Assembly
Removal
1. Disconnect the battery ground cable.
2. Remove the shift knob (M/T) / transfer knob (A/T).
3. Remove the front console assembly.
D
Remove four fixing screws and disconnect the
switch connectors.
4. Remove the front seat assembly(RH).
D
Refer to the Front Seat Assembly in Seats section.
5. Remove the assist grip.
D
Remove three bolts.
6. Remove the fuel filler lid opener.
D
Remove the fuel filter lid opener(1) and disconnect
the cable(2).
686RW007