Opel Frontera UBS. Manual - part 1515


  Index      Opel     Opel Frontera UBS - service repair manual 1998-2002 year


Search            


Content   ..  1513  1514  1515  1516   ..


Opel Frontera UBS. Manual - part 1515


7B–14 MANUAL TRANSMISSION

7. Install the engine rear mount to the transmission case

and tighten the fixing bolts specified torque (6VE1).

Torque: 41 N·m (4.2kg·m/30 Ib ft)

8. Install the third crossmember to the frame and tighten

the fixing bolts specified torque.

Torque: 50 N·m (5.1kg·m/37 Ib ft)

9. Tighten the engine rear mount nuts specified torque.

Torque: 50 N·m (5.1kg·m/37 Ib ft)

10. Remove the transmission jack.

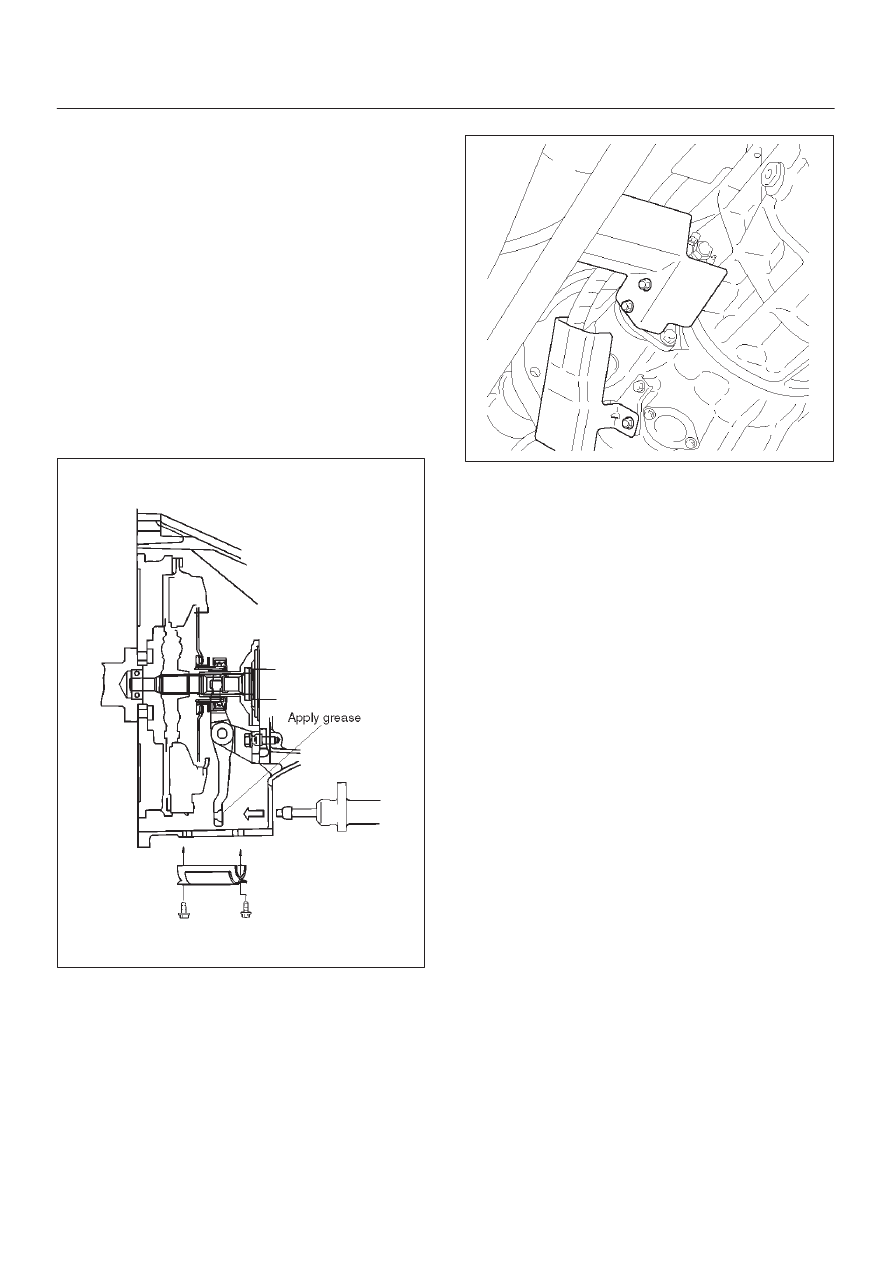
11. Apply the grease to top hole portion of the shift fork.

12. Install the slave cylinder and tighten the fixing bolts

specified torque.

Torque: 43 N·m (4.4kg·m/32 Ib ft)

13. Install the clutch dust cover to the clutch housing and

tighten the fixing bolts specified torque.

Torque: 8 N·m (0.8kg·m/69 Ib in)

220RS007

14. Install the slave cylinder heat protector to the slave

cylinder.

15. Install bracket and two transmission harness clamps

to the transmission case (6VE1).

16. Install harness heat protector (6VE1).

(6VE1)

225RW006

17. Install four fuel pipe bracket (6VE1).

MANUAL TRANSMISSION

7B–15

141RW024

18. Connect the speedometer sensor and 2WD–4WD

actuator harness connector.

826RW024

7B–16 MANUAL TRANSMISSION

19. Connect the backup lamp switch, 4WD indicator

switch, and 1-2 indicator switch harness connectors.

826RW023

20. Install the front and 3 way exhaust pipe (6VE1).

Install the exhaust pipe with catalytic converter
(4JX1).

Torque: 
Exhaust pipe to exhaust manifold:

67 N·m (6.8 kg·m/49 Ib ft)

Exhaust pipe flange bolt:

43 N·m (4.4 kg·m/32 Ib ft)

(4JX1)

150RW041

21. Connect two oxygen sensor connectors to the

transmission harness (6VE1).

22. Install the front propeller shaft and tighten the fixing

bolts and nuts specified torque.

Torque: 63 N·m (6.4 kg·m/46 Ib ft)

23. Install the rear propeller shaft and tighten the fixing

bolts and nuts specified torque.

Torque: 63 N·m (6.4 kg·m/46 Ib ft)

24. Install transfer protector and tighten the fixing bolts

specified torque.

Torque: 37 N·m (3.8 kg·m/27 Ib ft)

25. Install the transmission control lever and transfer

control lever.

235RW014

26. Install the grommet assembly.
27. Install the front console assembly.
28. Install the gear control lever knob.
29. Connect battery ground cable.
30. Install engine hood.

MANUAL TRANSMISSION

7B–17

Rear Oil Seal (Transfer Adapter)

Removal

1. Remove the transfer case assembly from the vehicle.

Refer to Transfer Case in Drive Line/Axle section.

2. Remove the rear oil seal from the transfer adapter.

220RW090

Installation

1. Use 5–8840–2558–0 (J–42802) transfer adapter oil

seal installer, and install the rear oil seal to the transfer
adapter.

2. Apply grease to the oil seal lip.
3. Install the transfer case assembly to the vehicle.

Refer to Transfer Case in Drive Line/Axle section.

220RW115


Content   ..  1513  1514  1515  1516   ..