Opel Frontera UE. Manual - part 383
6F–4
ENGINE EXHAUST
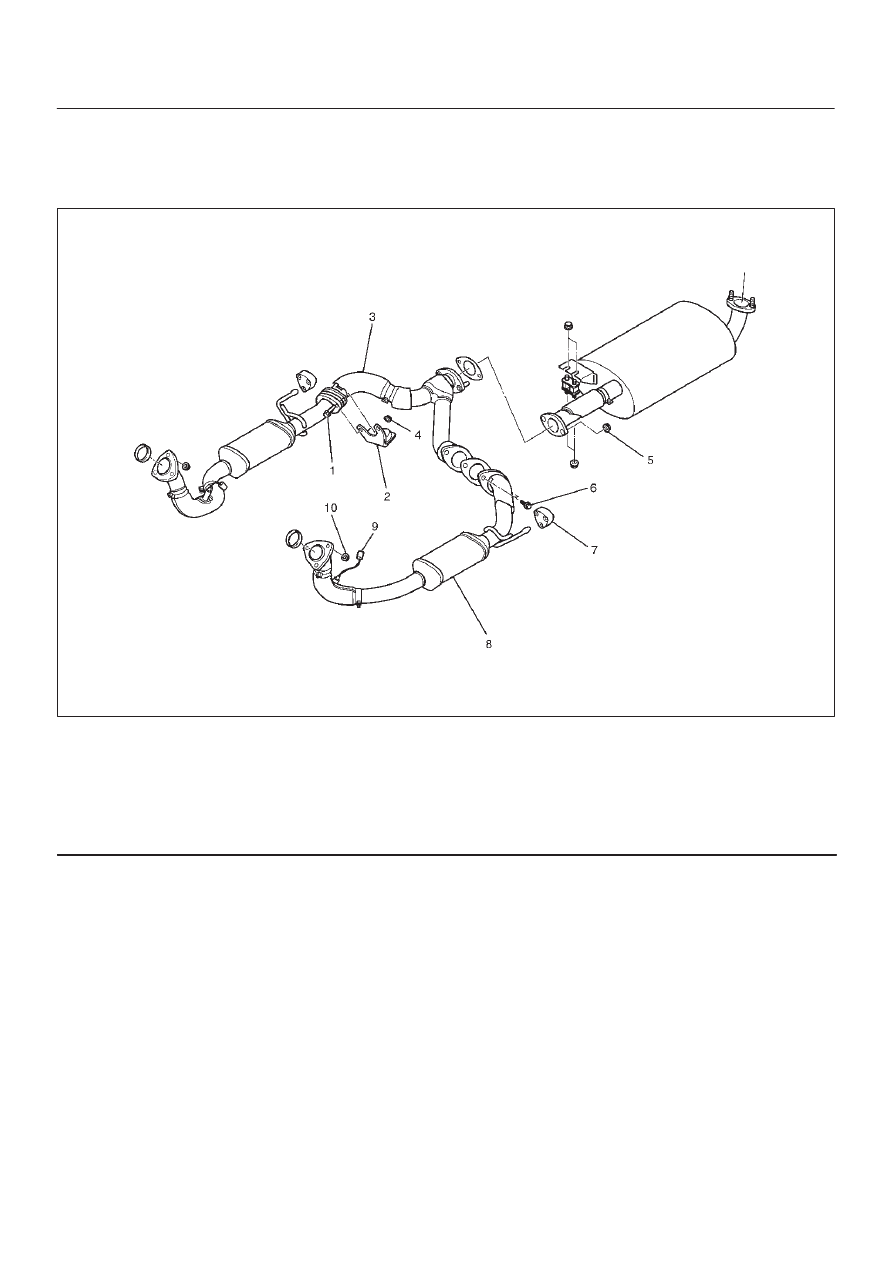
Three Way Catalytic Converter LH and Forked Exhaust Pipe
Three Way Catalytic Converter LH and Forked Exhaust Pipe and Associated
Parts
150RX018
Legend
(1) Forked Exhaust Pipe Fixing Bolts
(2) Mass Damper
(3) Forked Exhaust Pipe
(4) Forked Exhaust Pipe Fixing Nuts
(5) Exhaust Silencer Fixing Nuts
(6) Forked Exhaust Pipe Fixing Bolts
(7) Mounting Rubber
(8) Three Way Catalytic Converter LH
(9) O
2
Sensor Terminal Connector
(10) Three Way Catalytic Converter Fixing Nuts
Removal
1. Disconnect battery ground cable.
2. Lift up the vehicle and support with suitable safety
stands.
3. Disconnect O
2
sensor harness connectors (9).
4. Remove the forked exhaust pipe fixing bolts and nuts
(1) (4) (6) and the exhaust silencer fixing nuts (5), then
remove the forked exhaust pipe (3) and the mass
damper (2).
5. Remove the three way catalytic converter fixing nuts
(11) and the mounting rubber (7), then remove the
three way catalytic converter (8).
Installation
1. Install the three way catalytic converter (8) and the
mounting rubber (7), and tighten the fixing nuts (11) to
the specific torque.
Torque
Nuts: 67 N·m (6.8kg·m/49 lb ft)
2. Install the forked exhaust pipe (3) and the mass
damper (2), and tighten the fixing bolts (1) (6) and
nuts (4) (5) to the specified torque.
Torque
Bolts&Nuts: 43 N·m (4.4kg·m/32 lb ft)
Nuts: 43 N·m (4.4kg·m/32 lb ft)
3. Connect the O
2
sensor connectors (9).