Opel Frontera UE. Manual - part 208
6E1–130
X22SE 2.2L ENGINE DRIVEABILITY AND EMISSION
DIAGNOSTIC TROUBLE CODE (DTC) P0171 SYSTEM TOO LEAN (BANK 1)
D06RX119
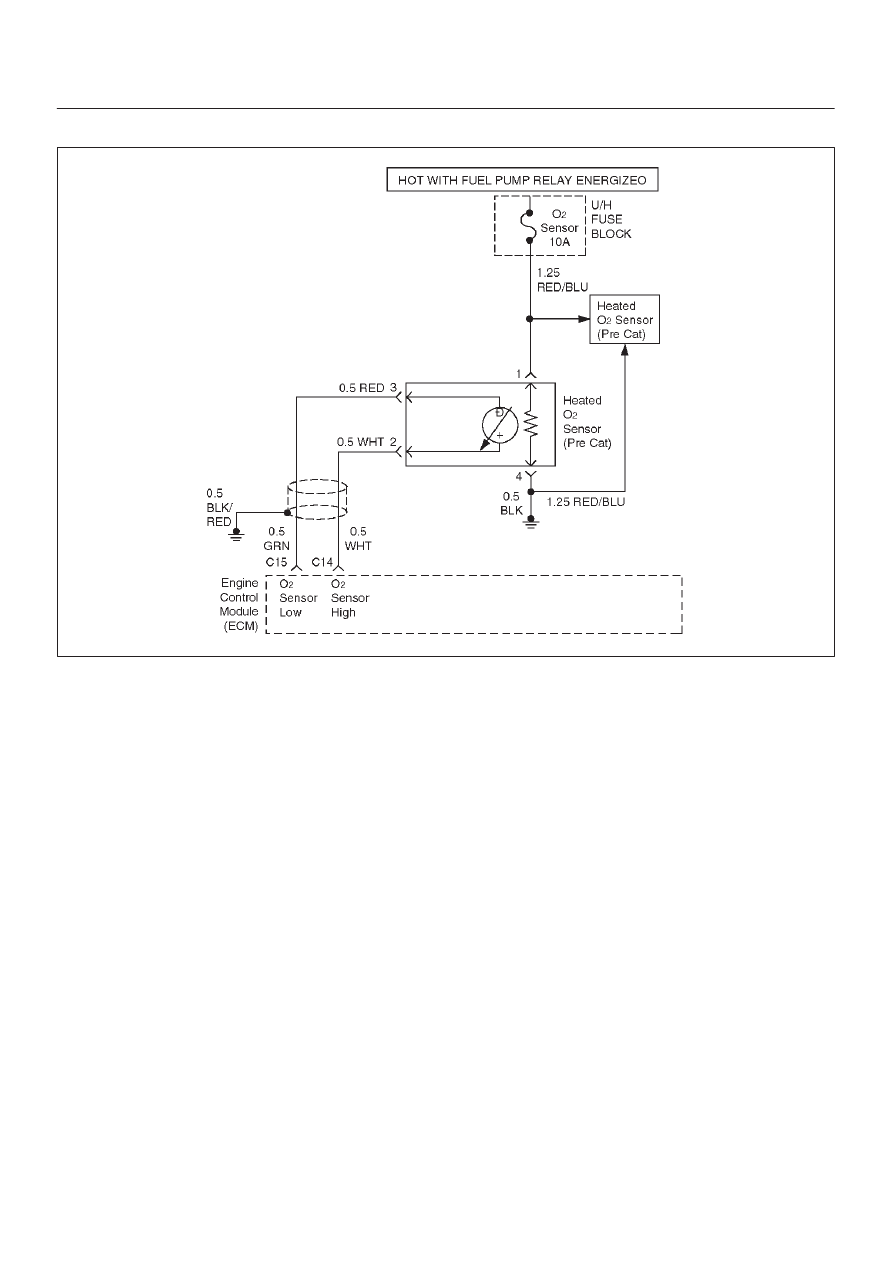
Circuit Description
To provide the best possible combination of driveability,
fuel economy, and emission control, a ”Closed Loop”
air/fuel metering system is used. While in ”Closed Loop”,
the engine control module (ECM) monitors the Bank 1
HO2S 1 signal and adjusts fuel delivery based upon the
HO2S signal voltage. A change made to fuel delivery will
be indicated by the long and short term fuel trim values
which can be monitored with a Tech 2. Ideal fuel trim
values are around 0%; if the HO2S signal indicates a lean
condition the ECM will add fuel, resulting in fuel trim
values above 0%. If a rich condition is detected, the fuel
trim values will be below 0%, indicating that the ECM is
reducing the amount of fuel delivered. If an excessively
lean condition is detected on Bank 1, the ECM will set
Diagnostic Trouble Code P0171. DTC P0171 is a type B
code.
The ECM’s maximum authority to control long term fuel
trim allows a range between –14% and +20%. The ECM
monitors fuel trim under various engine speed/load fuel
trim cells before determining the status of the fuel trim
diagnostic.
Conditions for Setting the DTC
D
No Tech 2 test is being run.
D
None of the following: EGR Diagnostic Trouble Codes,
HO2S Diagnostic Trouble Codes, (response,
transition, open, low volts, no activity), TP sensor
Diagnostic Trouble Codes, MAP Diagnostic Trouble
Codes, IAT Diagnostic Trouble Codes, canister purge
Diagnostic Trouble Codes, EVAP Diagnostic Trouble
Codes, injector circuit Diagnostic Trouble Codes, or
misfire Diagnostic Trouble Codes.
D
Engine coolant temperature is between 65
°
C (149
°
F)
and 104
°
C (219
°
F).
D
Intake air temperature is between –40
°
C (–40
°
F) and
120
°
C (248
°
F).
D
Manifold absolute pressure is between 23.75 kPa and
99 kPa.
D
Engine speed is between 400 and 6000 RPM.
D
Barometric pressure is greater than 72.3 kPa.
D
System voltage is greater than 9.5v.
D
Engine is operating in ”Closed Loop”.
D
The average of the short term fuel trim samples is
greater than 0.97 and the average of adaptive index
multiplier samples is greater than 1.21.
Action Taken When the DTC Sets
D
The ECM will illuminate the malfunction indicator lamp
(MIL) after the second consecutive trip in which the
fault is detected.
D
The ECM will store conditions which were present
when the Diagnostic Trouble Code was set as Freeze
Frame and in the Failure Records data.